


Overview
Drip AI Suggestion turns a plain-language description of your business into a complete, ready-to-use Drip Campaign — no manual message writing required. Describe your business, audience, and goals, choose a channel (SMS, WhatsApp, or Email), and the AI generates a campaign name, keywords, and a full sequence of scheduled messages. Refine it conversationally, then save — it becomes a normal, fully editable Drip Campaign.
Before You Begin
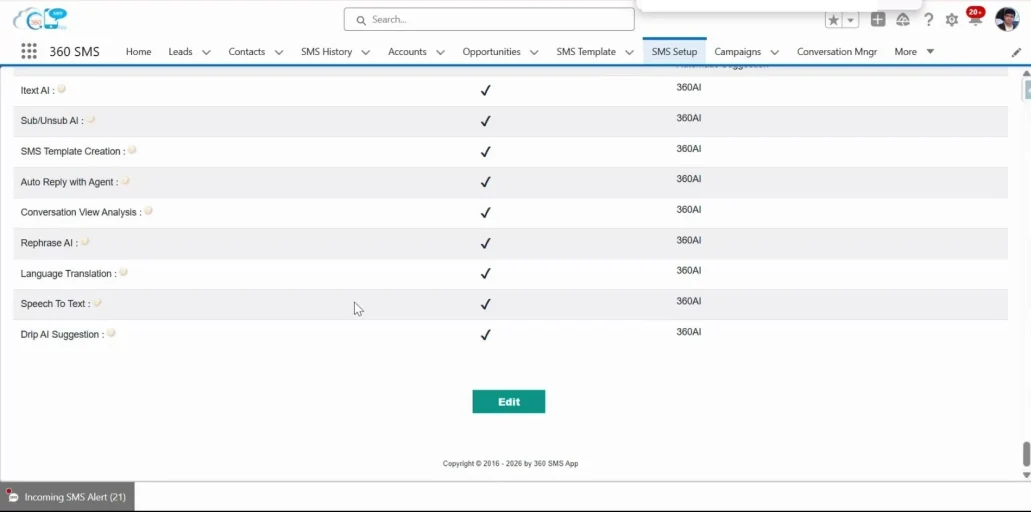
Drip AI Suggestion must be enabled by an Administrator before the Suggest Drip button appears on the Drip Campaign page.
-
- Go to 360 SMS → SMS Setup.
- Find Drip AI Suggestion in the list of AI features (alongside Itext AI, Rephrase AI, Speech To Text, and others).
- Confirm it is checked with 360AI selected. If not, click Edit, enable it, and Save.
Step-by-Step Walkthrough
STEP 1 Open the AI Drip Assistant
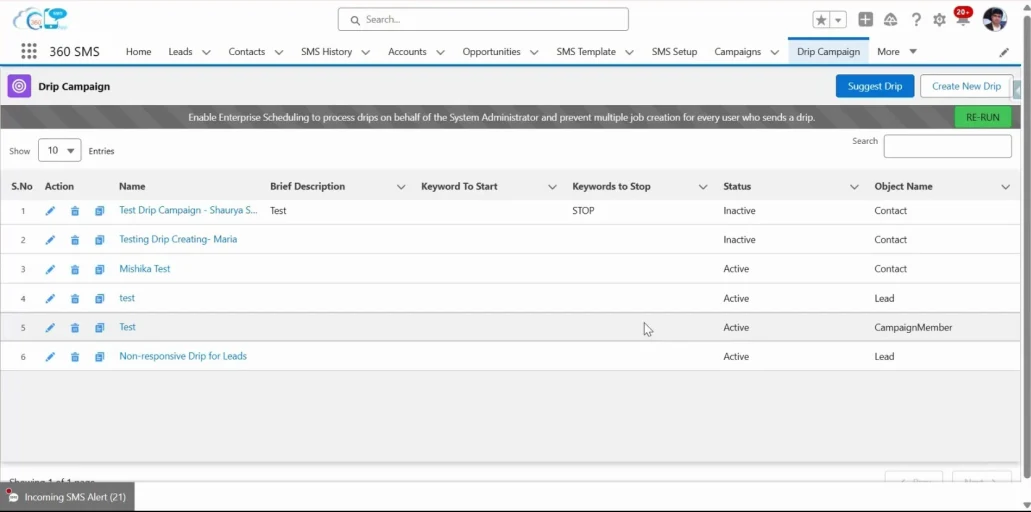
Go to 360 SMS → Drip Campaign, then click Suggest Drip in the top-right corner of the list page.
STEP 2 Describe Your Campaign
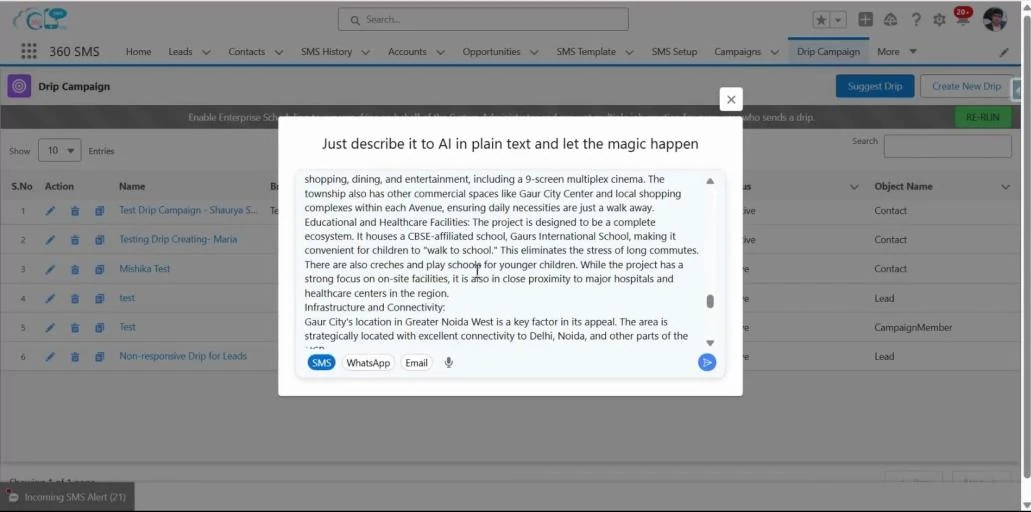
A panel opens: “Just describe it to AI in plain text and let the magic happen.” Type a description of your business, target audience, goals, and brand tone — the more detail you give, the better the suggestion. Choose a channel using the chips at the bottom (SMS, WhatsApp, or Email), or tap the mic icon to dictate instead of typing. Click the send arrow when you’re ready.
TIP
Selecting Email instead of SMS adds a Subject line to every generated message, in addition to the Message body.
STEP 3 Let AI Generate Your Campaign
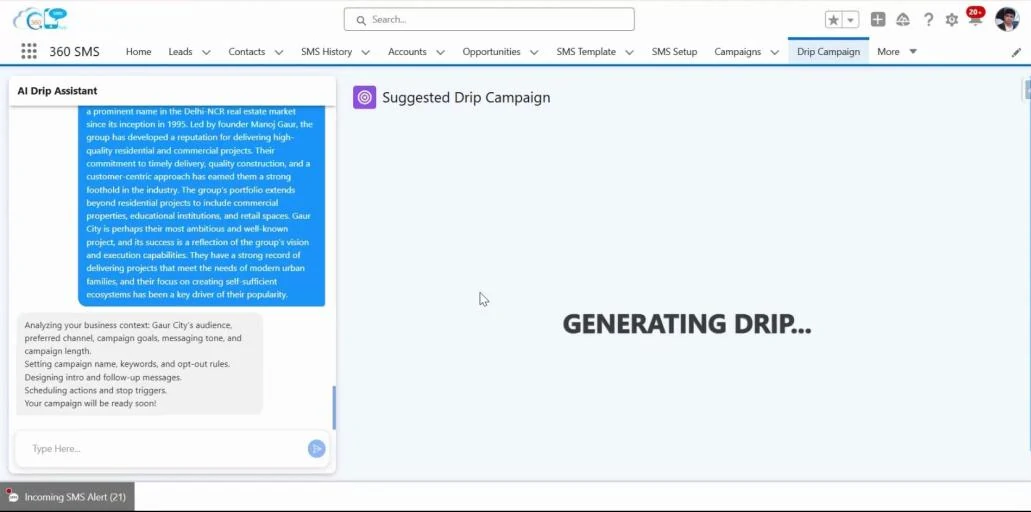
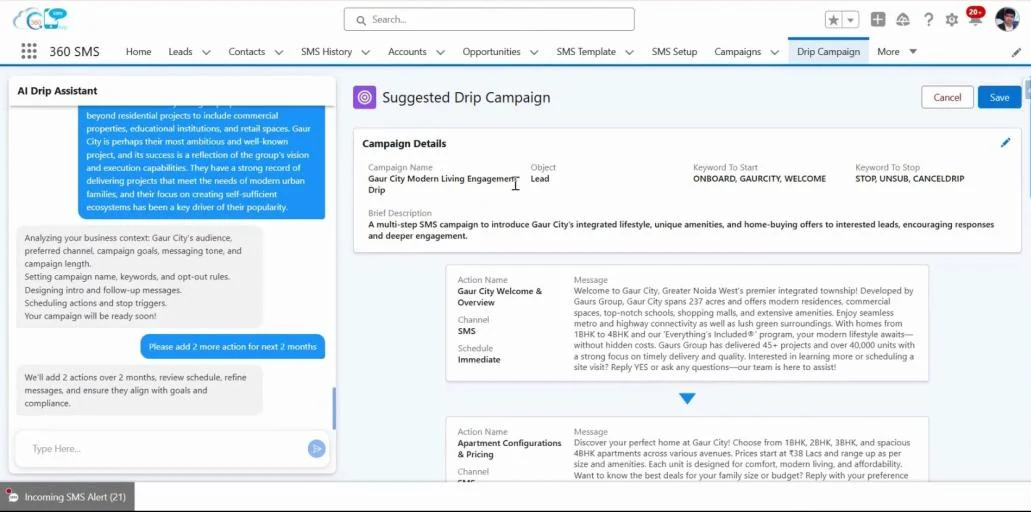
The AI Drip Assistant chat opens on the left and narrates its progress — analyzing your business context, setting the campaign name and keywords, designing the messages, and scheduling actions — while the Suggested Drip Campaign panel on the right shows “Generating Drip…” This usually takes well under a minute.
STEP 4 Review the Suggested Campaign
Once generation finishes, the right panel shows:
-
-
- Campaign Details — Campaign Name, Object, Keyword to Start, Keyword to Stop, and a Brief Description. Click the pencil icon on this card to edit any of these.
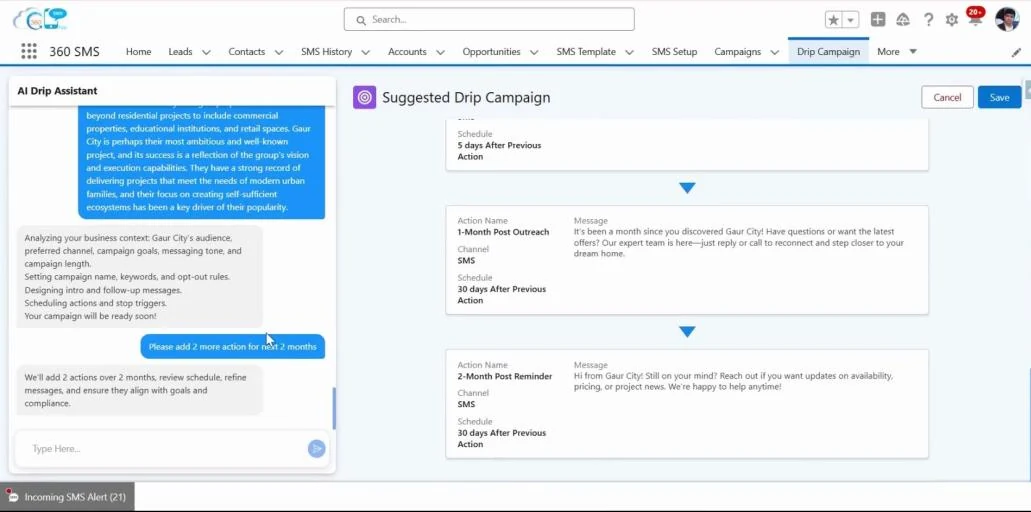
- Action cards — one per message in the sequence, each showing the Action Name, Message (or Subject + Message for Email), Channel, and Schedule (e.g. “3 days After Previous Action”). Use the pencil icon on a card to edit it, or the trash icon to remove it.
-
STEP 5 Refine It Through Chat (Optional)
Rather than editing actions one by one, you can type a follow-up instruction into the chat and the AI updates the whole suggestion to match — for example, “Please add 2 more action for next 2 months.” You can go back and forth as many times as needed before saving.
STEP 6 Save Your Campaign
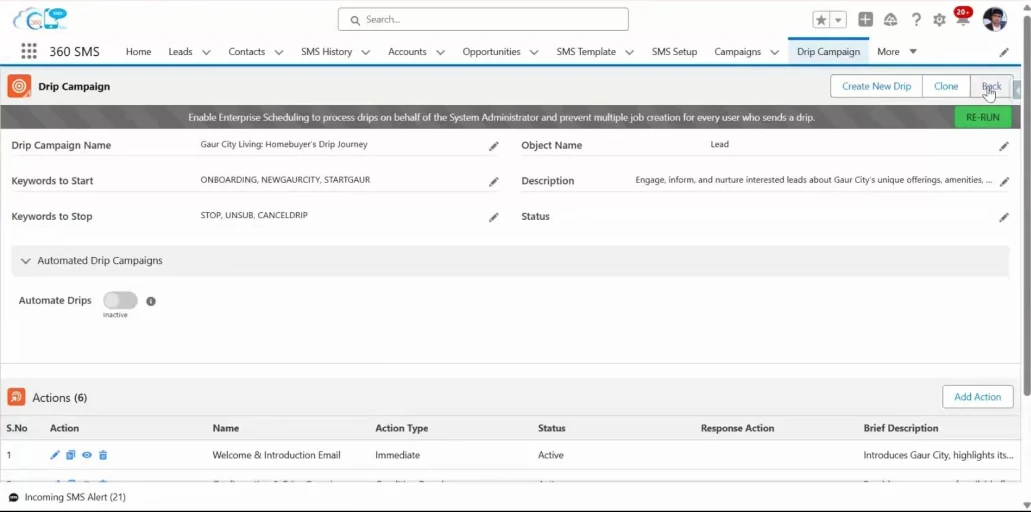
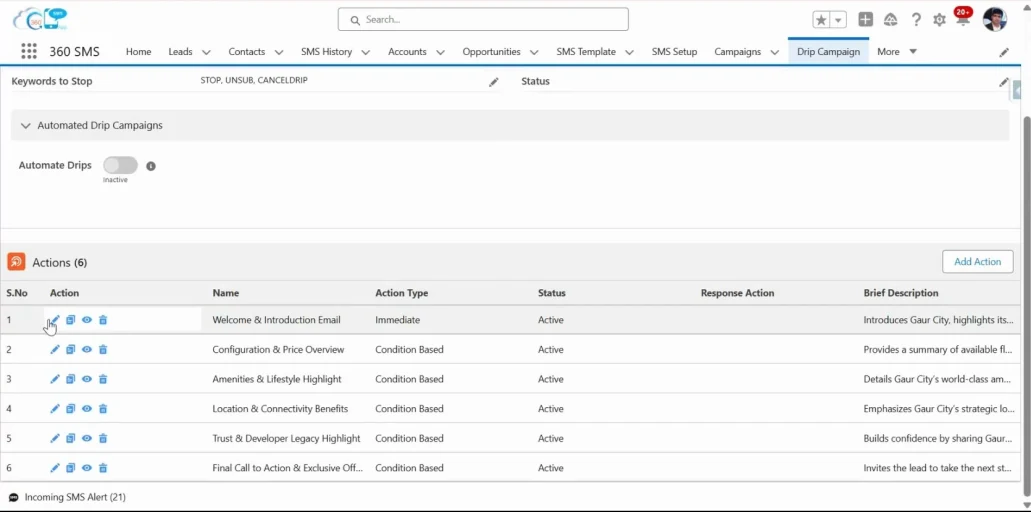
When you’re happy with the suggestion, click Save (or Cancel to discard it). The campaign is created as a standard Drip Campaign record, with every suggested message added as its own editable Action — exactly as if you had built it by hand.
IMPORTANT
Automate Drips is Inactive by default on a newly saved campaign. Turn it on from the record page once you’ve reviewed the actions and are ready for the campaign to run.