


Prerequisites
- Active Salesforce org with admin access.
- OpenAI account with API key.
- Access to 360 AI portal.
- Package Version 1.319
- Installation Url:
https://login.salesforce.com/packaging/installPackage.apexp?p0=04tIU000000r8w5
Setup Process
Step 1: Generate Access Token
- Go to the 360 AI Portal.
- Create an account by filling in:
- Name
- Organization Name
- Org ID
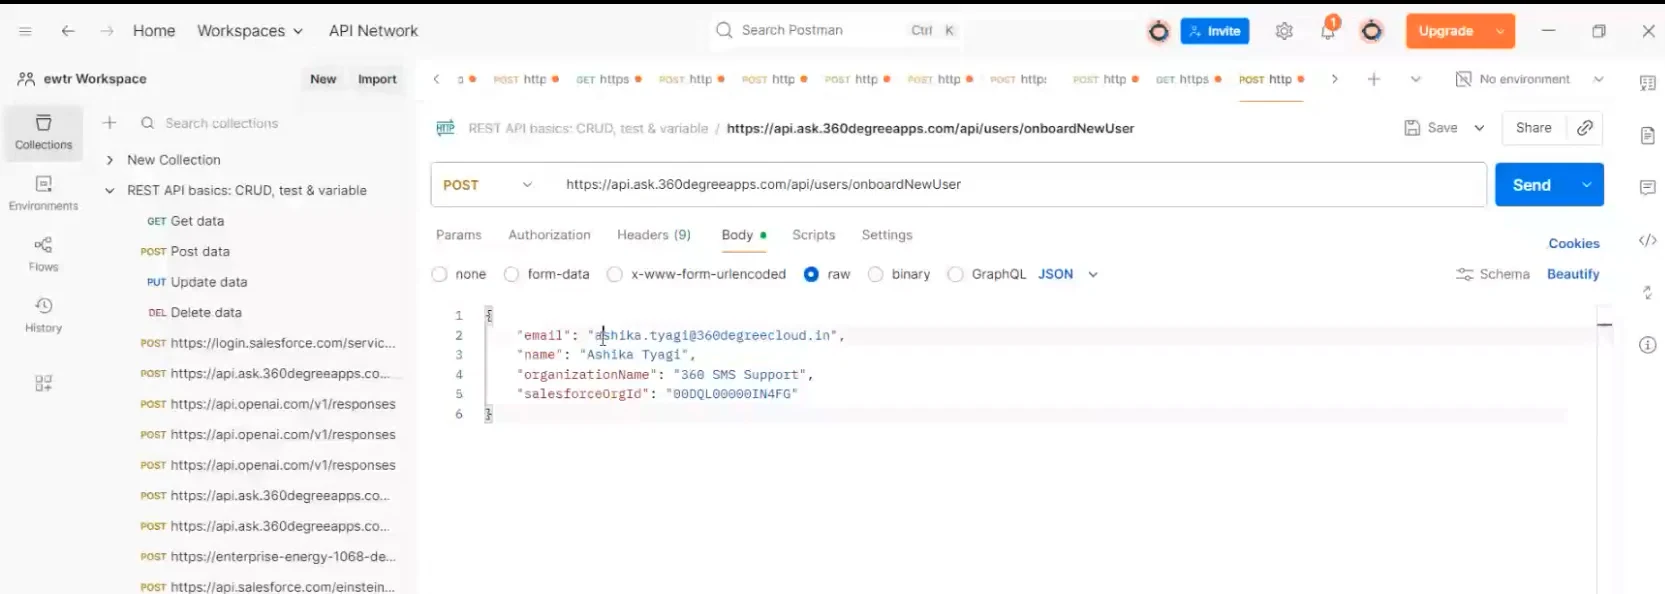
- Submit the request via API.
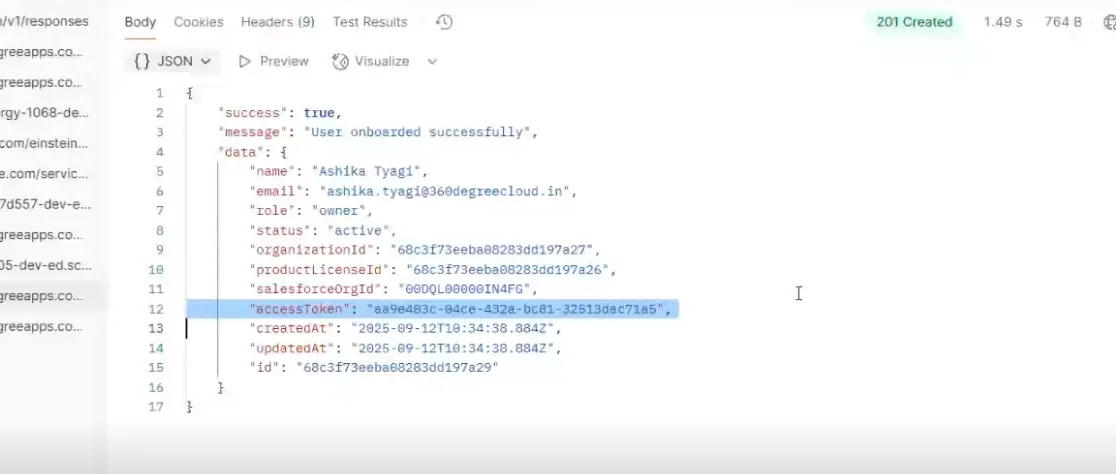
- In response, you will receive an Access Token.
- Save this token for use in further steps.
Step 2: Configure LMA Model
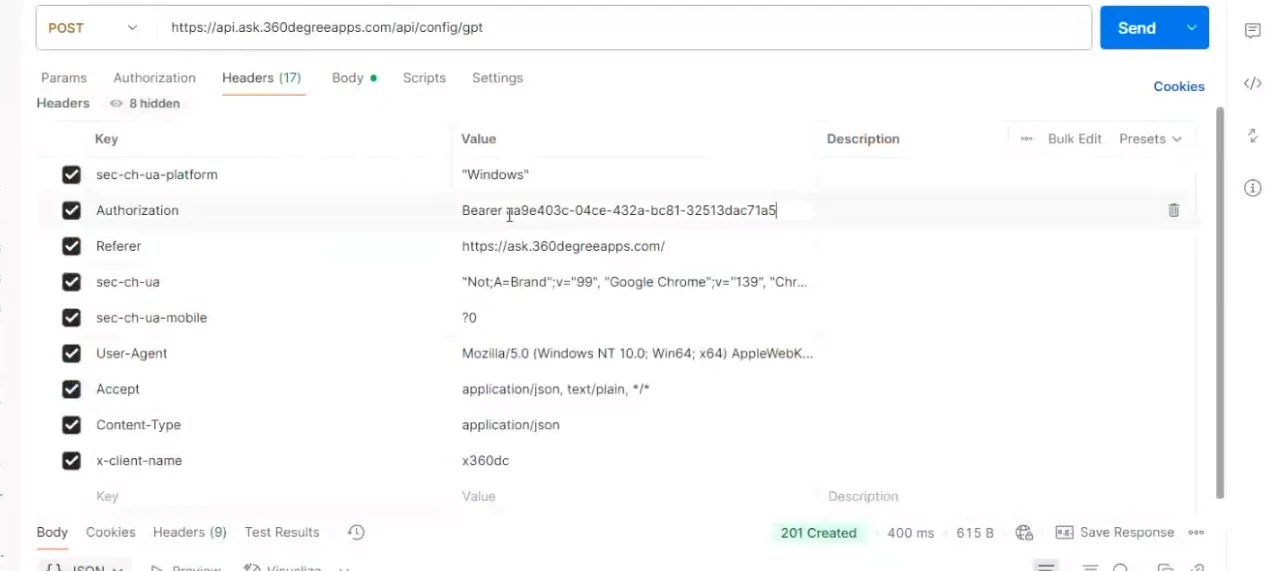
- In the header section, enter the Access Token (received in Step 1).
- Use the format:
- Authorization: Bearer <Access_Token>
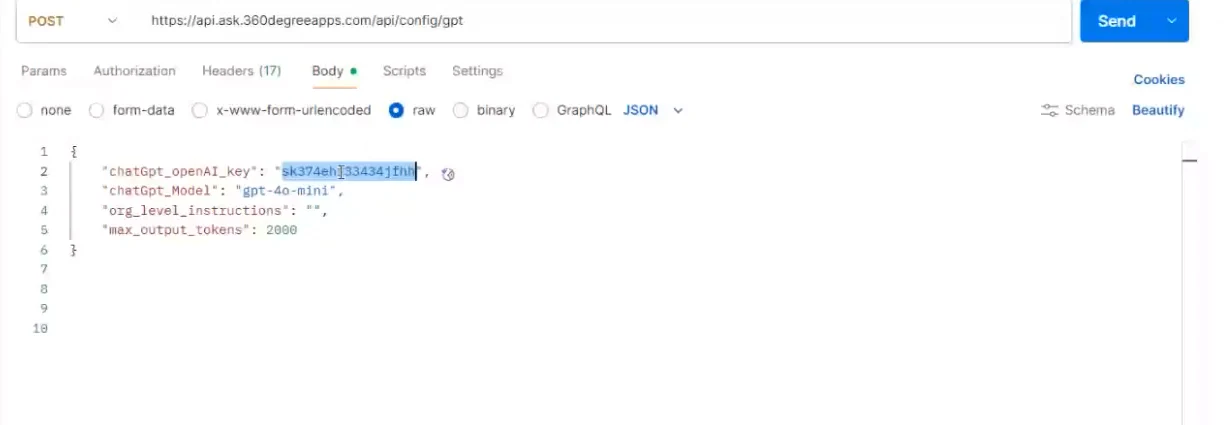
- In the body section, provide:
- chatgpt key → API key from your OpenAI account.
- Model name → Select the required model.
- Max output token limit → 2000.
- Once saved, your LMA model is now setup.
Step 3: Create Number
- Enter the following details:
- Provider Code → 360_AI
- Supported Action Type → 360 AI
- Token Field → Use the Access Token from Step 1.
- Once the number is created, click on the I/O Button.
- Assign the number to required users by configuring it under their profiles.
Step 4: General Settings & Remote Site Setup
- In General Settings, scroll down to view available AI Features.
- Click Edit → Enable/Disable features as per requirement.
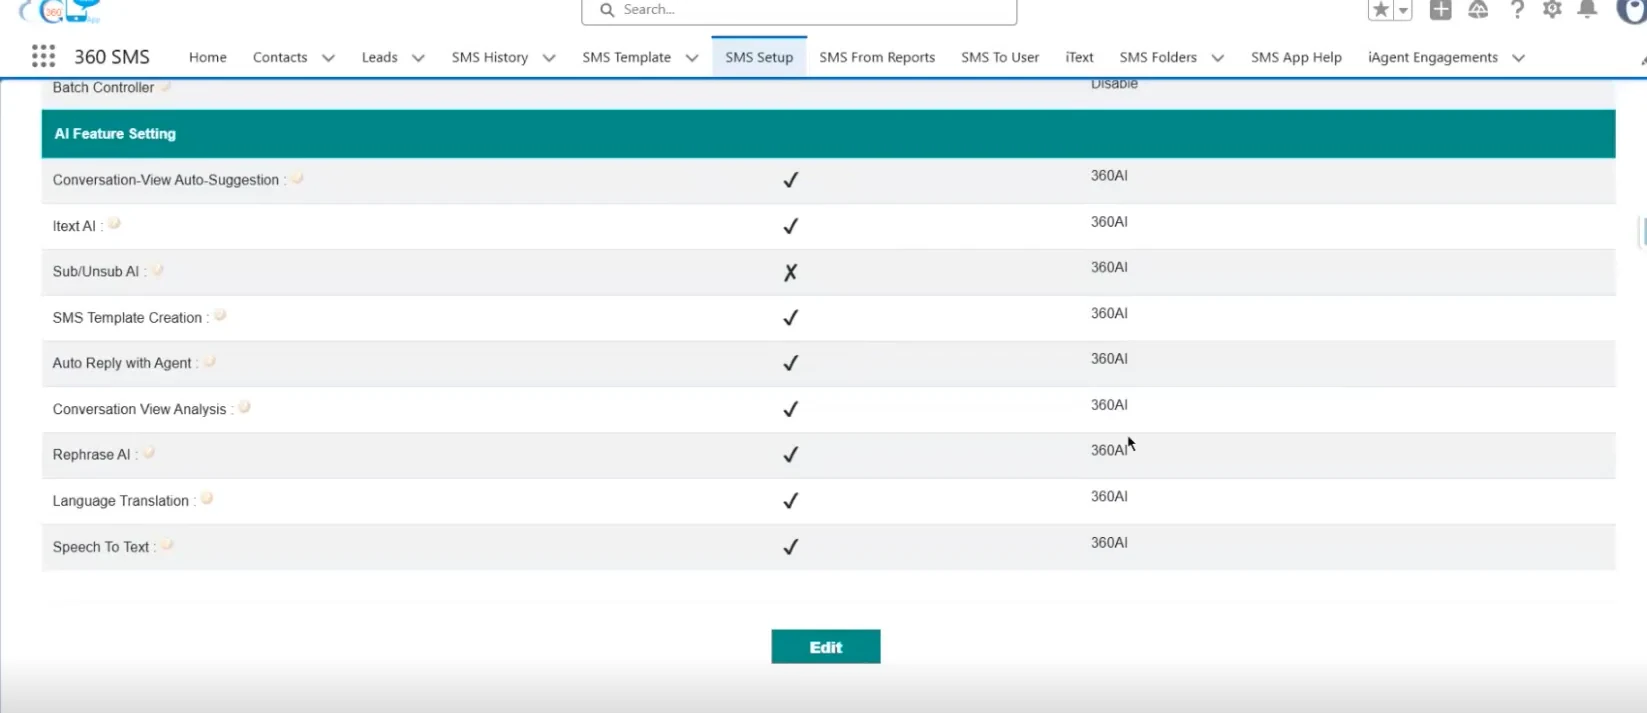
Note: To enable features, a Remote Site Setting must be created.
- Create a Remote Site Setting with the following URL:
https://api.ai.360degreeapps.com
Step 5: Agent Setup
- When a 360 AI Number is configured, a 360 Agent Record is automatically created.
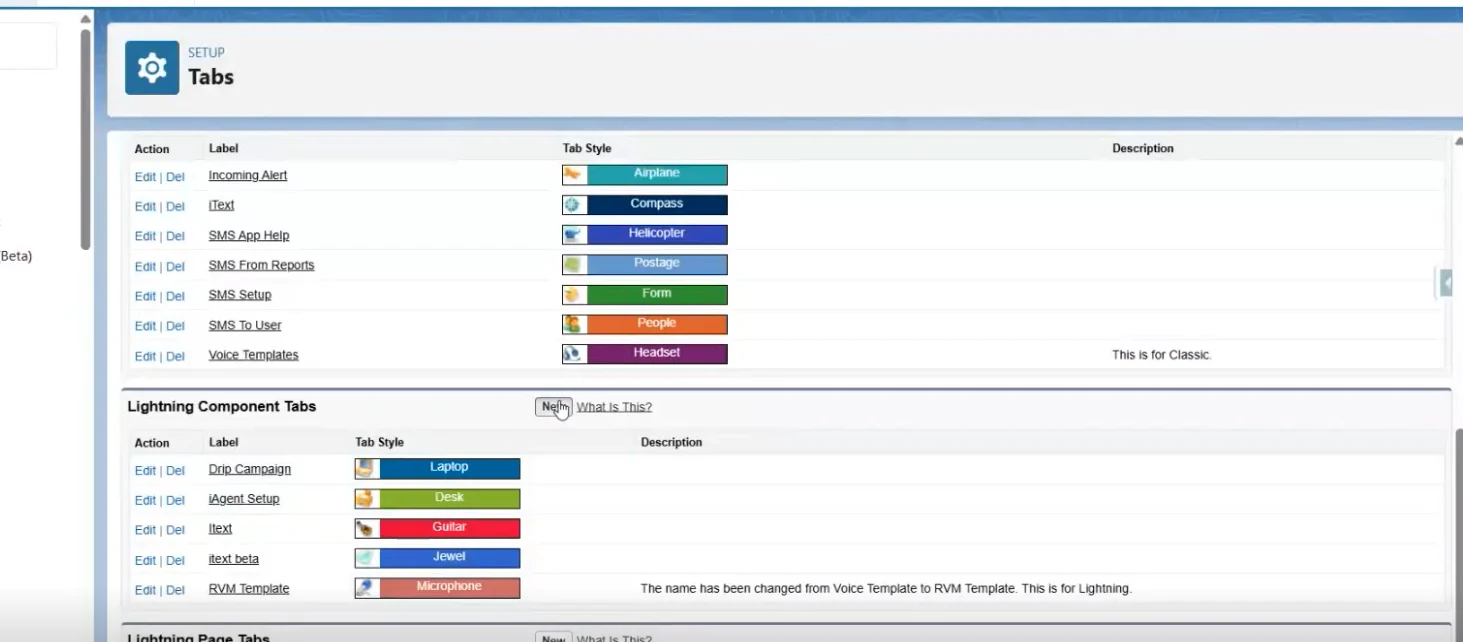
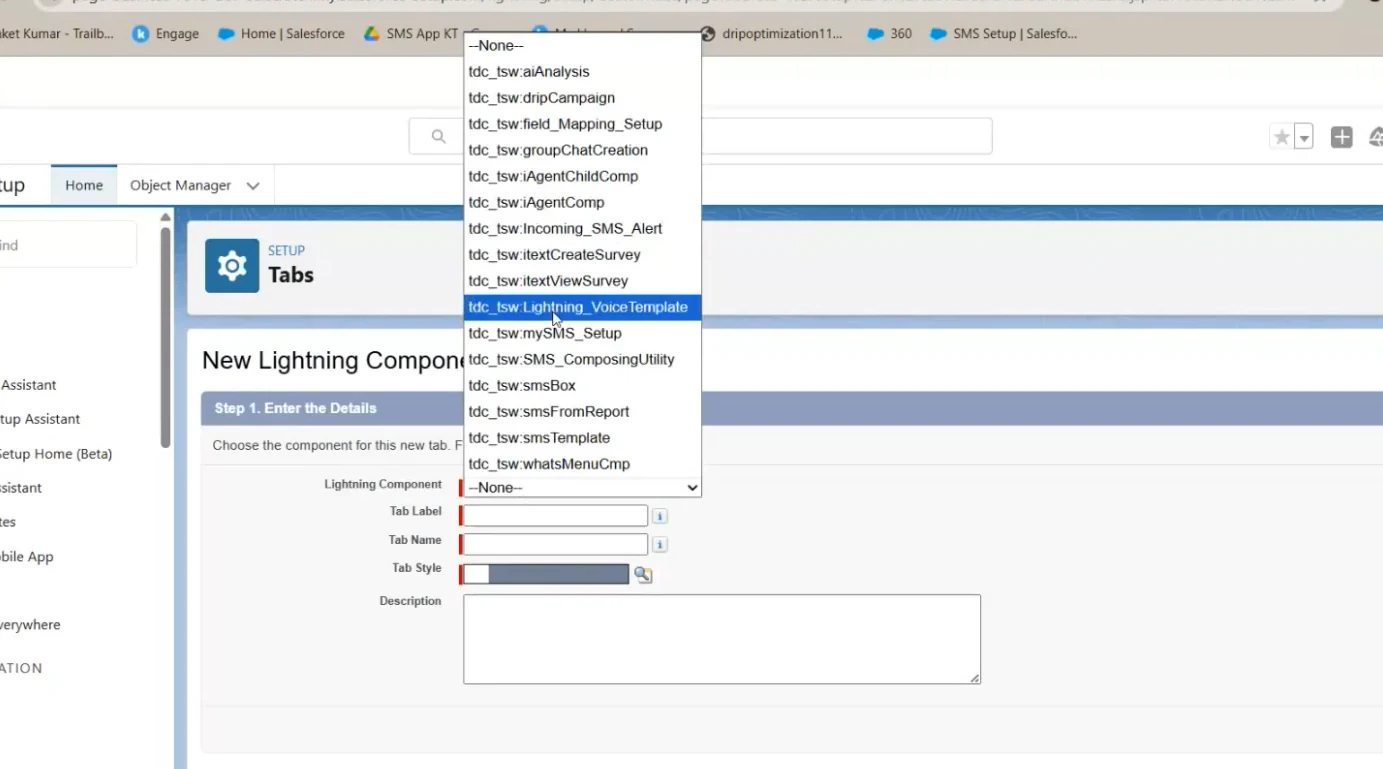
- Create a Lightning Component Tab for the agent.
- You can name the tab anything.
Step 6: Action Configuration
- From the App Launcher, search and open the newly created tab.
- You will be redirected to the Agent Setup Tab.
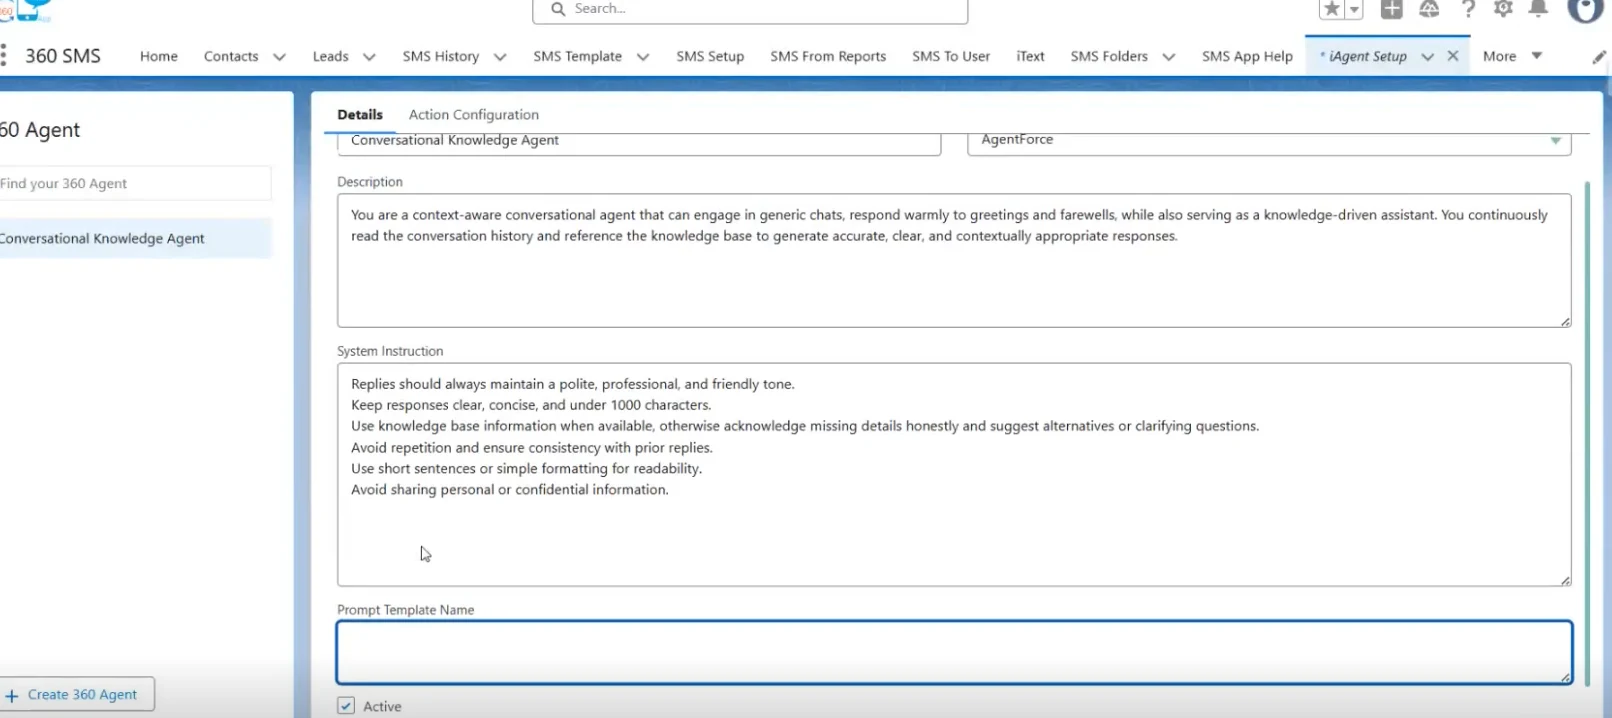
- The details page will be auto-filled.
- Click Edit to customize settings.
- Ensure the “Active” checkbox is selected (mandatory).
- If using Agentforce AI Model, enter the Prompt Template Name (the name of the agent you created).
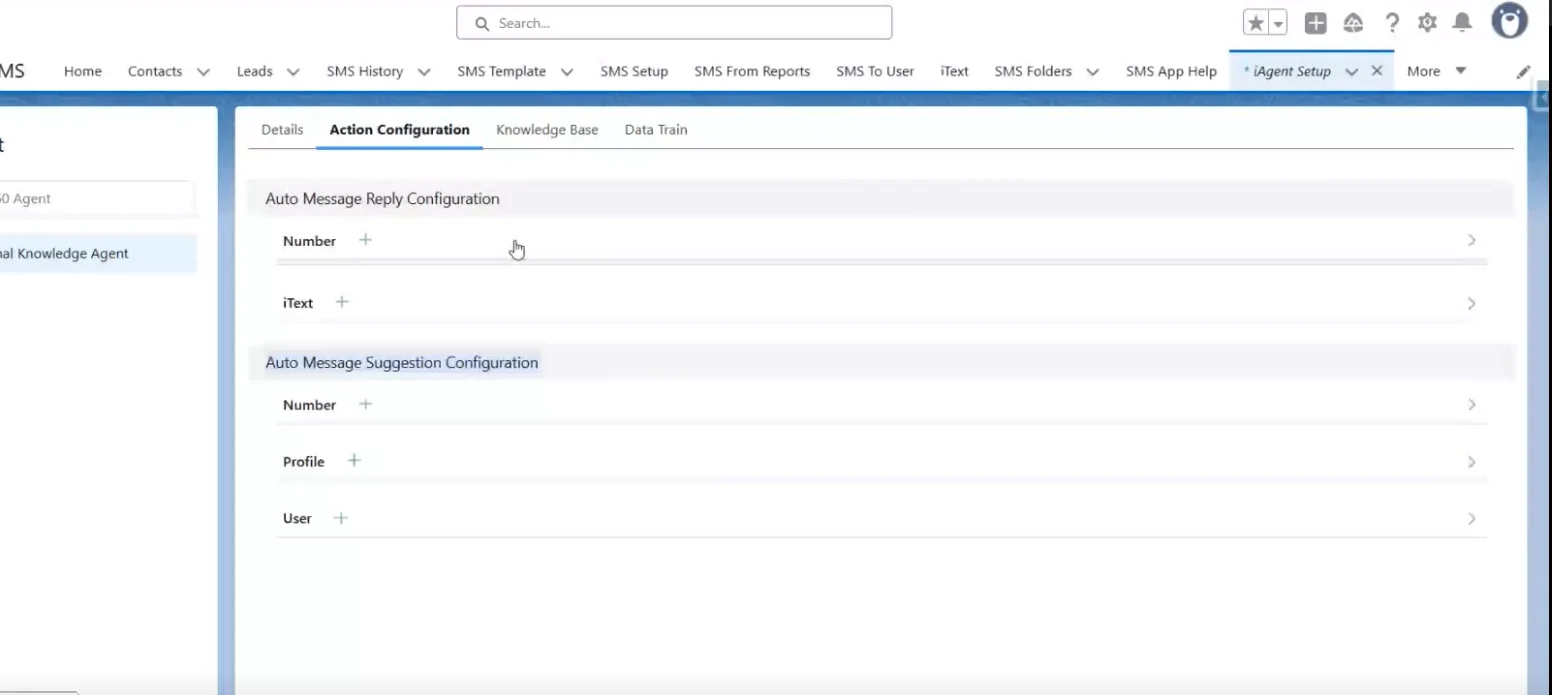
Two configurations are available:
- Auto-Message Reply Configuration
- Auto-Message Suggestion Configuration
Options:
- Apply to specific numbers, multiple numbers, or all numbers.
- For Auto-Message Suggestions, configuration can also be done user-wise or profile-wise.
Important: A single number cannot be used for both Auto-Reply Messages and Auto-Message Suggestions.
Step 7: Data Training
- Navigate to the Data Training Tab.
- Options for training the AI agent:
- Upload relevant data files.
- Manually input Questions & Answers for the agent.
Ready to Use!
Your AI Agent is now fully set up and ready to handle Auto-Reply and Auto-Suggestions based on your configuration.