Use Case:
360 Mass Mailer is an application built extensively on the Salesforce platform hence the app is native to the Salesforce architecture. The application is used to customize the body, the sender, and receptor details and to schedule the emails for multiple records simultaneously. The app is extensively useful for the marketing email campaigns of any organization.
Application Details:
360 Mass Mailer application contains the following functionalities:
- Email Connect Setup.
- Sending Emails to Standard Object Records.
- Sending Emails to Records Associated with a Particular Campaign.
- Sending Emails via Reports.
- Sending Scheduled Emails.
- Email History.
- Sending Emails Using Automation.
Email Connect Setup
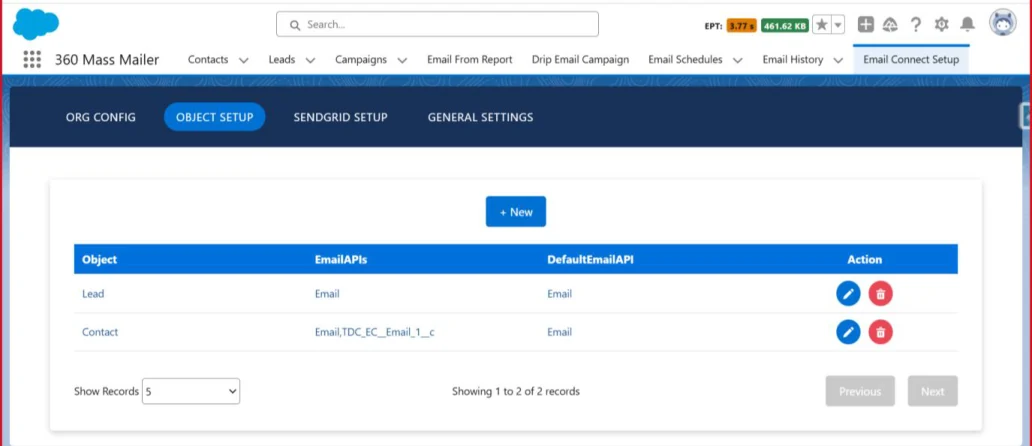
After landing on the 360 Mass Mailer application from the app launcher, you will see a tab for Email Connect Setup. The screen will show you options- “ORG CONFIG”, “OBJECT SETUP”, “SENDGRID SETUP” and “GENERAL SETTINGS”. To configure the 360 Mass Mailer app please contact the 360 Support Team.
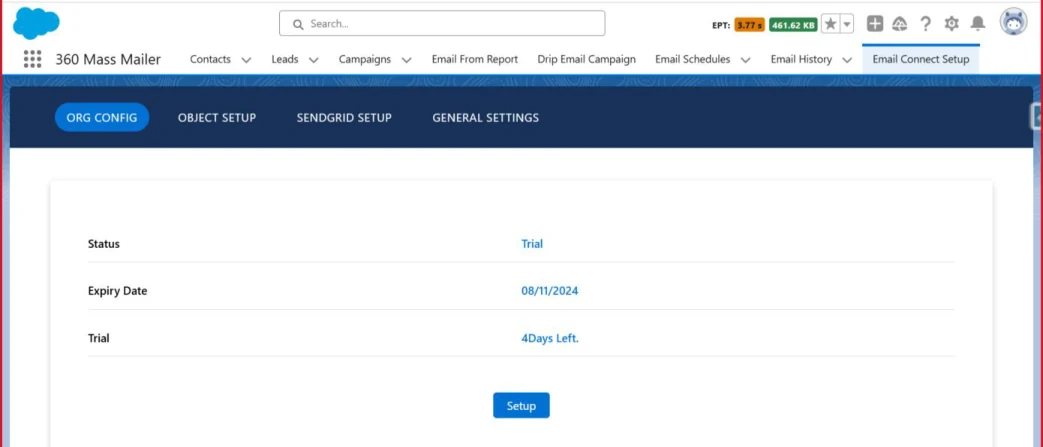
ORG CONFIG
It will display the status, expiry date, and trial information for your SendGrid account subscription (if your account is in trial mode). If your account is active, it will only show the status and license expiry date.
Note- Clicking the ‘Setup’ button will sync data from your organization to the setup organization.
PROVIDER SETUP
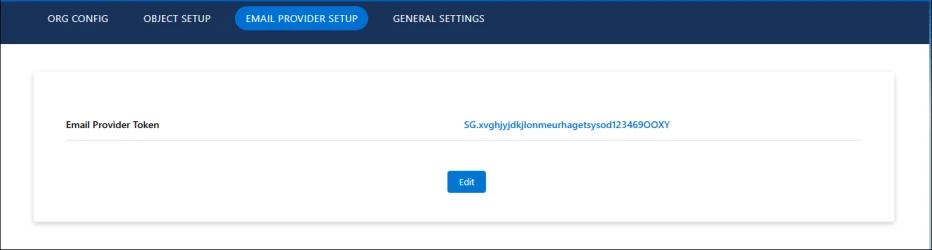
This will show the setup done on the SendGrid end. The access token that is generated from the SendGrid dashboard will be entered here which will link your org to the SendGrid account.
GENERAL SETTINGS
Under this subtab there are two options:
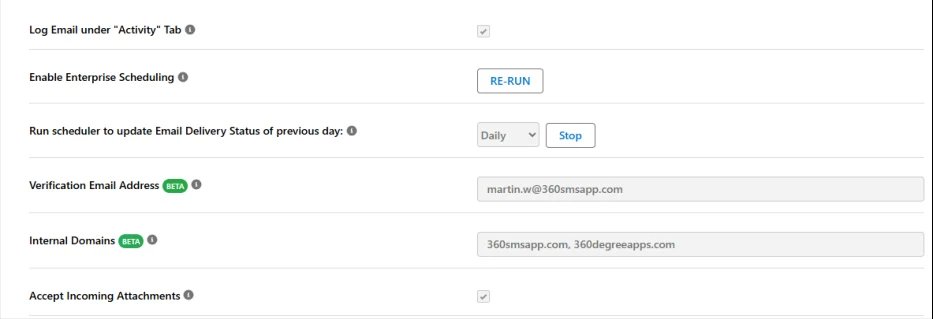
Log Email under “Activity” Tab: When this option is selected, emails from the app will be logged under the ‘Activity’ tab of the respective record (such as a Contact record).
Enable Enterprise Scheduling: Use this feature when multiple users are scheduling Emails.
Run Scheduler to update Email Delivery Status of Previous Day: Use this feature to recheck the statuses of email delivered in the last 24 hrs.
Verification Email Address: The address used for email verification.
Internal Domains: Use this feature to avoid syncing the communication between two employees of the same organization into Salesforce.
Accept Incoming Attachments: Use this feature to enable showing the attachments in the incoming emails.
Sending Emails to Standard and Custom Object Records
In this feature, we support standard and custom objects
For example- We take the example of the common objects- Go to either of the Contact or Lead tabs >> From the list view, select any random record >> Click on the “Send Bulk Email” button.
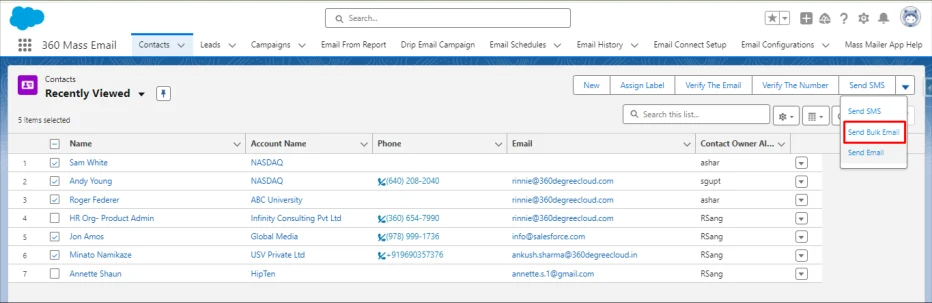
You’ll be redirected to a component to compose your email with details.
ListView ALL:
You can now send an email by selecting the radio button located at the top-right corner of the Email Compose page, labeled ‘Send Email to all Contacts.’ This option allows you to email all records in the chosen list view, regardless of whether they are individually selected
Note: This functionality is not enabled by default, to enable this please contact to 360 Support team
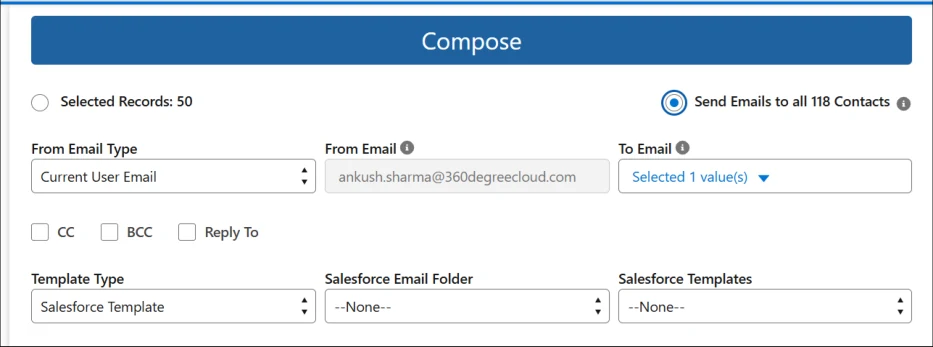
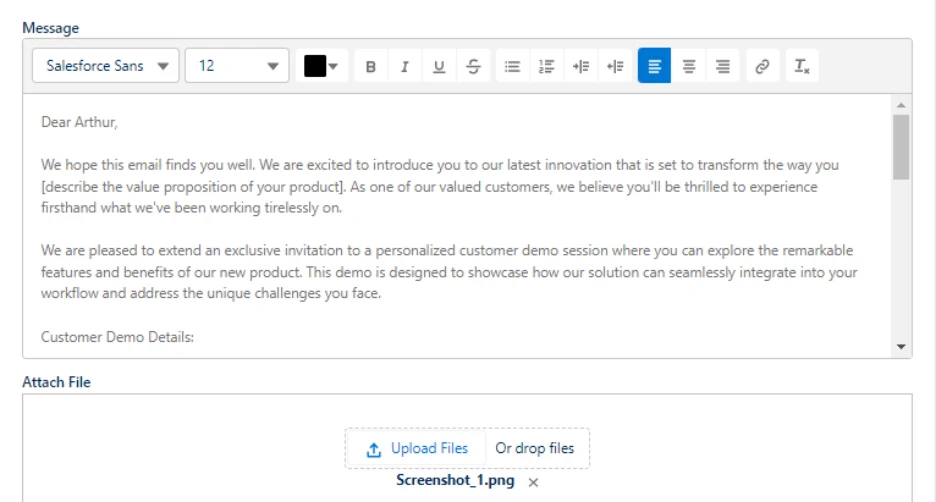
On the Compose Email component, you will see the following details:
- From Email Type: The sender’s email address. It has three options viz. The Current User Email is the email ID of the logged-in user, the Record Owner Email is the email ID of the record owner to which the mail is to be sent and the third option is to enter a custom email ID. Note that, for successful delivery, the email domain needs to support emails from outside the organization and the domain should be verified on SendGrid. The field From Email will be auto- populated based on your selection of this field.
- To Email: This is the receptor email address. This is a dropdown field whose values are taken from the email fields created on the corresponding object. You can select multiple values here.
- CC, BCC, and Reply-To checkboxes: You can enable the CC, BCC, and Reply- To checkboxes as needed. When you initiate a bulk email, it will also be shared with the email addresses specified in the CC, BCC, and Reply-To fields on the compose mail page. You can add up to 5 emails in the ‘CC’ and ‘BCC’ fields, and 1 email in the ‘Reply-To’ field.
- Drip Email Campaign: You can select and execute a drip campaign using this option.
- Selected records will show the number of records selected. The limit here is 200 records simultaneously which is the standard Salesforce limit.
- Here you can either send custom emails using the pre-created Salesforce templates, templates from SendGrid or you can also customise your email.
- You can also upload/drag-drop the files. You can select only one file at a time and the max size of the file is 5 megabytes.
- Then you can click on the Send button to send the message.
- A success screen will appear.
Sending Emails to Records Associated with a Particular Campaign
For sending mass emails using campaigns:
Go to Campaigns tab >> Click on desired Campaign record >> Go to record detail page >> Click on the Send Email button.

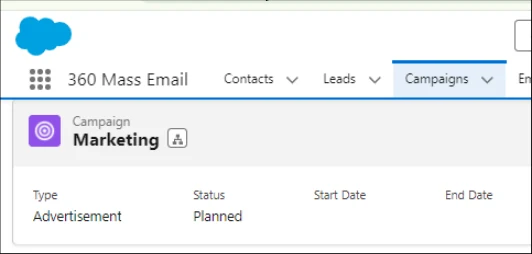
It will redirect you to the same Compose Email component.
Email From Report
This functionality allows us to send emails to multiple records simultaneously depending on the reports created.
Go to the Email From Reports tab >> Select a random report >> Select a record id column >> Click on the send button.
There is the hyperlink for the Mass Mailer App user guide through the note section under Email from Report
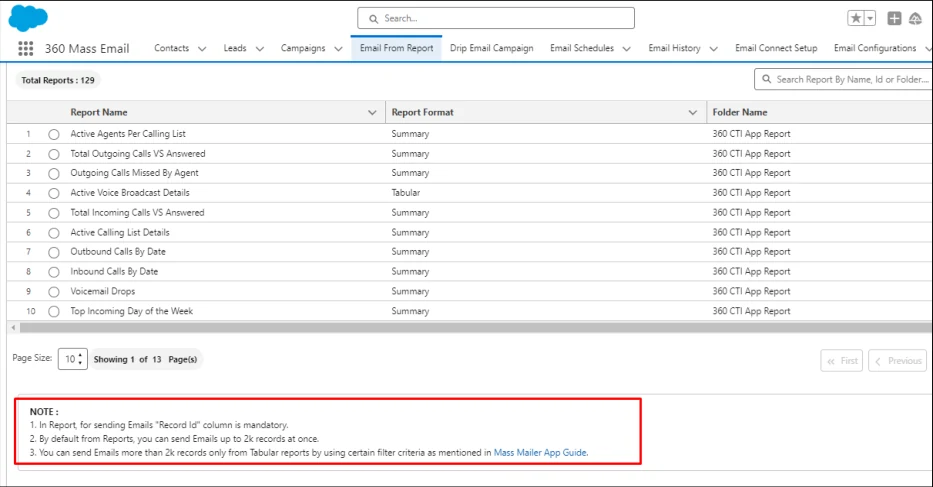
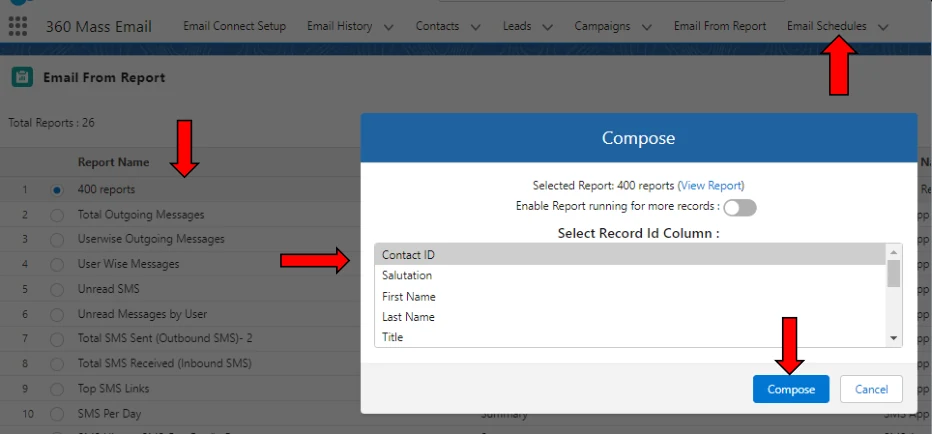
Note: It is mandatory that the report has a column for the record id in order to have the feature enabled.
Sending Scheduled Emails
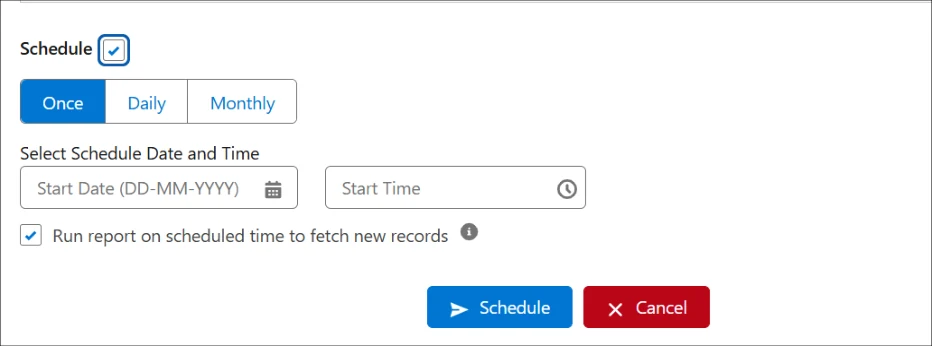
On the Compose Email component which is used to send the emails, there is an option to schedule the email. You can choose to schedule the email daily, weekly or monthly. You can also set up the time you want to send the emails.
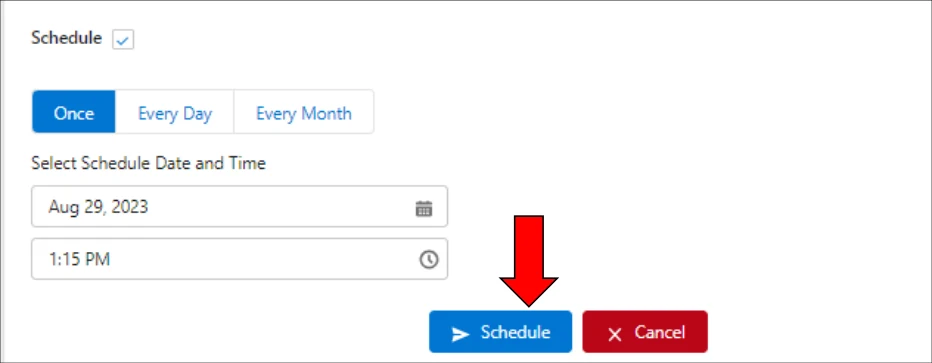
In order to access the scheduled email records,
Click on the Email Schedules tab >> Click on the record.
This will open up the record detail page.
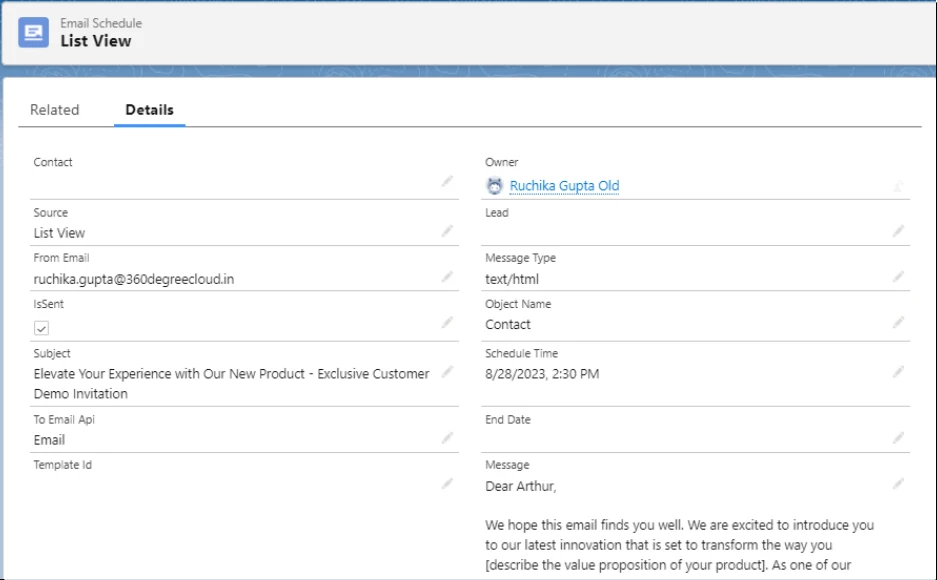
The record detail page has the following information:
- Source: It gives information on whether the email was sent from the list view or or from the record detail page.
- From Email: The sender’s email id.
- Subject: Subject of the sent email.
- Object Name: The object on which the email was scheduled.
- To Email API: Email field from the object that contains the receptor email ID.
- Message: Message body.
There is a checkbox named ‘Run report at scheduled time to fetch new records.’ Enabling this checkbox will ensure that new records are fetched at the scheduled time
Note- this checkbox is enabled by default, though you can enable/disable this checkbox as per your need
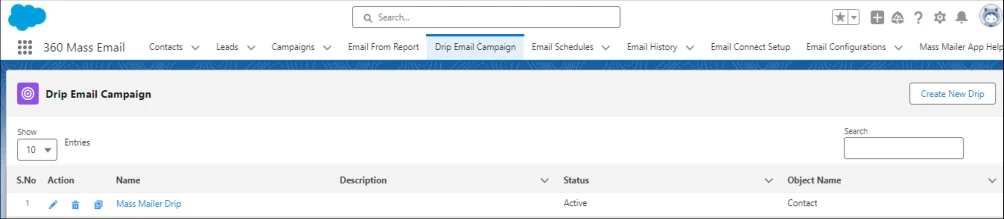
Drip Email Campaign
From this tab, you can create a Drip Email Campaign and customize actions as needed. Once the drip is created, it can be used to execute bulk emails for follow-ups, promotions, and other purposes.
Email History
In order to access the details of the sent emails,
Go to the Email History tab >> Open the email history record
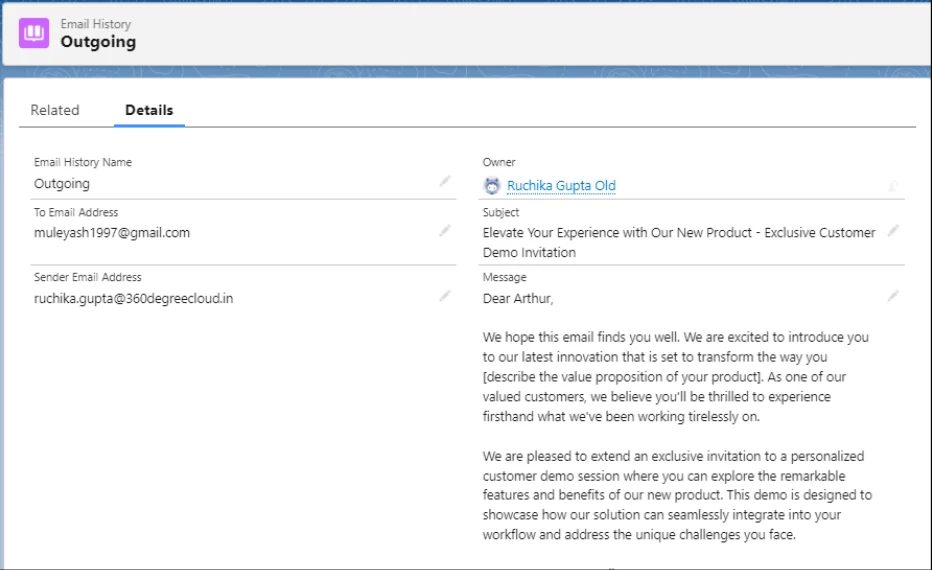
It will open up the record detail page. On the record detail page, you can see the following information:
- Email History Name: Shows whether the email was outgoing or incoming.
- In the Attachments section, the attachment details will be visible.
- The Statistics section will show the details of email performance.
- The delivery checkbox will show whether the email was delivered or not, the Status field will show the delivery status.
- If there is any link present in the email, the Email Click Count field will show the number of times the link was clicked.
- The spam checkbox will show whether the sent email is getting into the spam box of the user or not.
- Every sent email will provide the end user with the option to unsubscribe or resubscribe. Whenever the user clicks on these options, it will reflect on the corresponding checkboxes on this page.
Sending Emails Using Automation
In this feature, we can set up the mass mailer feature using custom automation depending on the particular criteria. Follow the following steps to have this feature enabled:
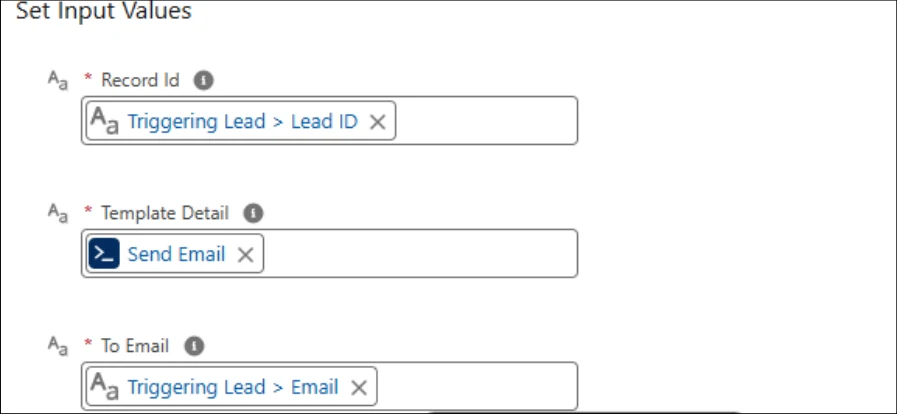
From the setup page, enter Flows in the quick find box >> Go to the Flows >> Click on new >> Select the type of Flow you want to create >> Select the object on which you want to create the Flow >> Select the criteria which you want to pre-define to send the emails >> Click on decision element >> Select Action element >> Select Send Email From Process Builder as the apex method >> Set up the variables as shown in the following figure >> Activate the Flow.
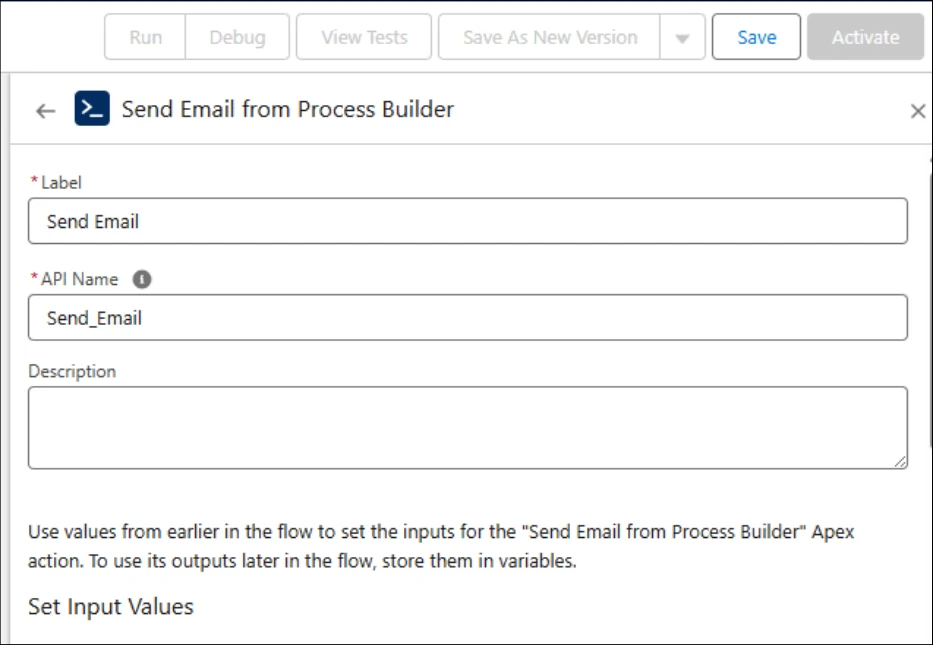
In order to set up scheduled emails using automation, follow the same procedure and set up the object variables as shown in the following figures.