


.svg")


iText, also known as decision trees, is one of the advanced features of the 360 SMS app. It allows users to create Surveys, Chatbots, Polls, Questionnaires, etc., by adding questions and answers on their own using point-and-click automation capabilities. But sometimes, users get stuck in between while configuring questions and answers due to a lack of knowledge. If you’re one of the 360 SMS app users trying to configure questions and answers in iText, but don’t know how to do this, then this article is for you. It will help you add questions and answers much conveniently.
Table of Contents
Step 1:
Click the iText tab (as shown below).

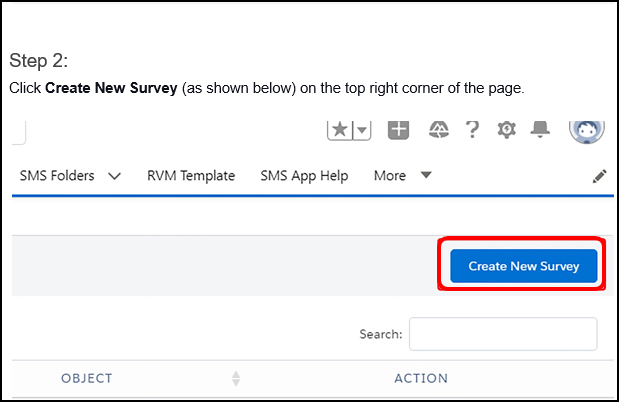
Step 2:
Click Create New Survey (as shown below) on the top right corner of the page.
Step 3:
As you click on Create New Survey, a Create Survey dialog box will appear (as shown below) where you need to enter values for the requested fields.
The fields requested are described below.
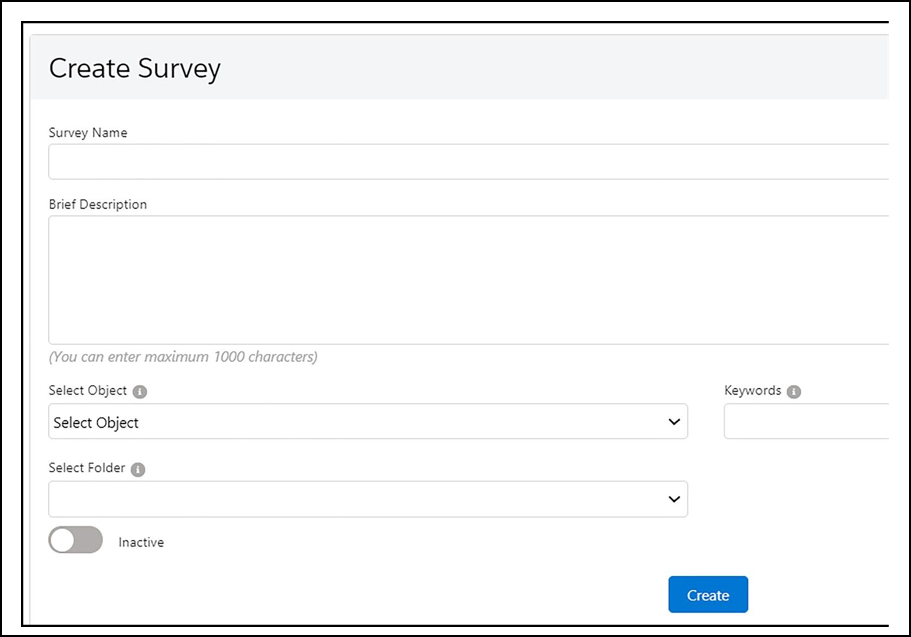
- Survey Name- Add Survey name.
- Brief Description- Add a brief description of a Survey to specify the purpose of creating a Survey, or when a Survey should be triggered.
- Select Object- Select the Salesforce object for which you want to create a Survey.
- Keywords- Add keywords and synonyms (comma separated). These keywords will help to trigger a Survey automatically in the event of an incoming text with any of the specified keywords.
- Select Folder- Select the folder from which you want to pick a Survey (if Surveys are arranged in a folder)
- Status- Toggles the status between Active or Inactive for a Survey.
After filling in all the details, click Create.
Step 4:
When you click Create, a Survey will be created. Now, you can add questions by clicking +Question, as shown below.

Step 5:
When you click on the +Question button, a dialog box should appear (as shown below) where you can add a new question with other details to a questionnaire.
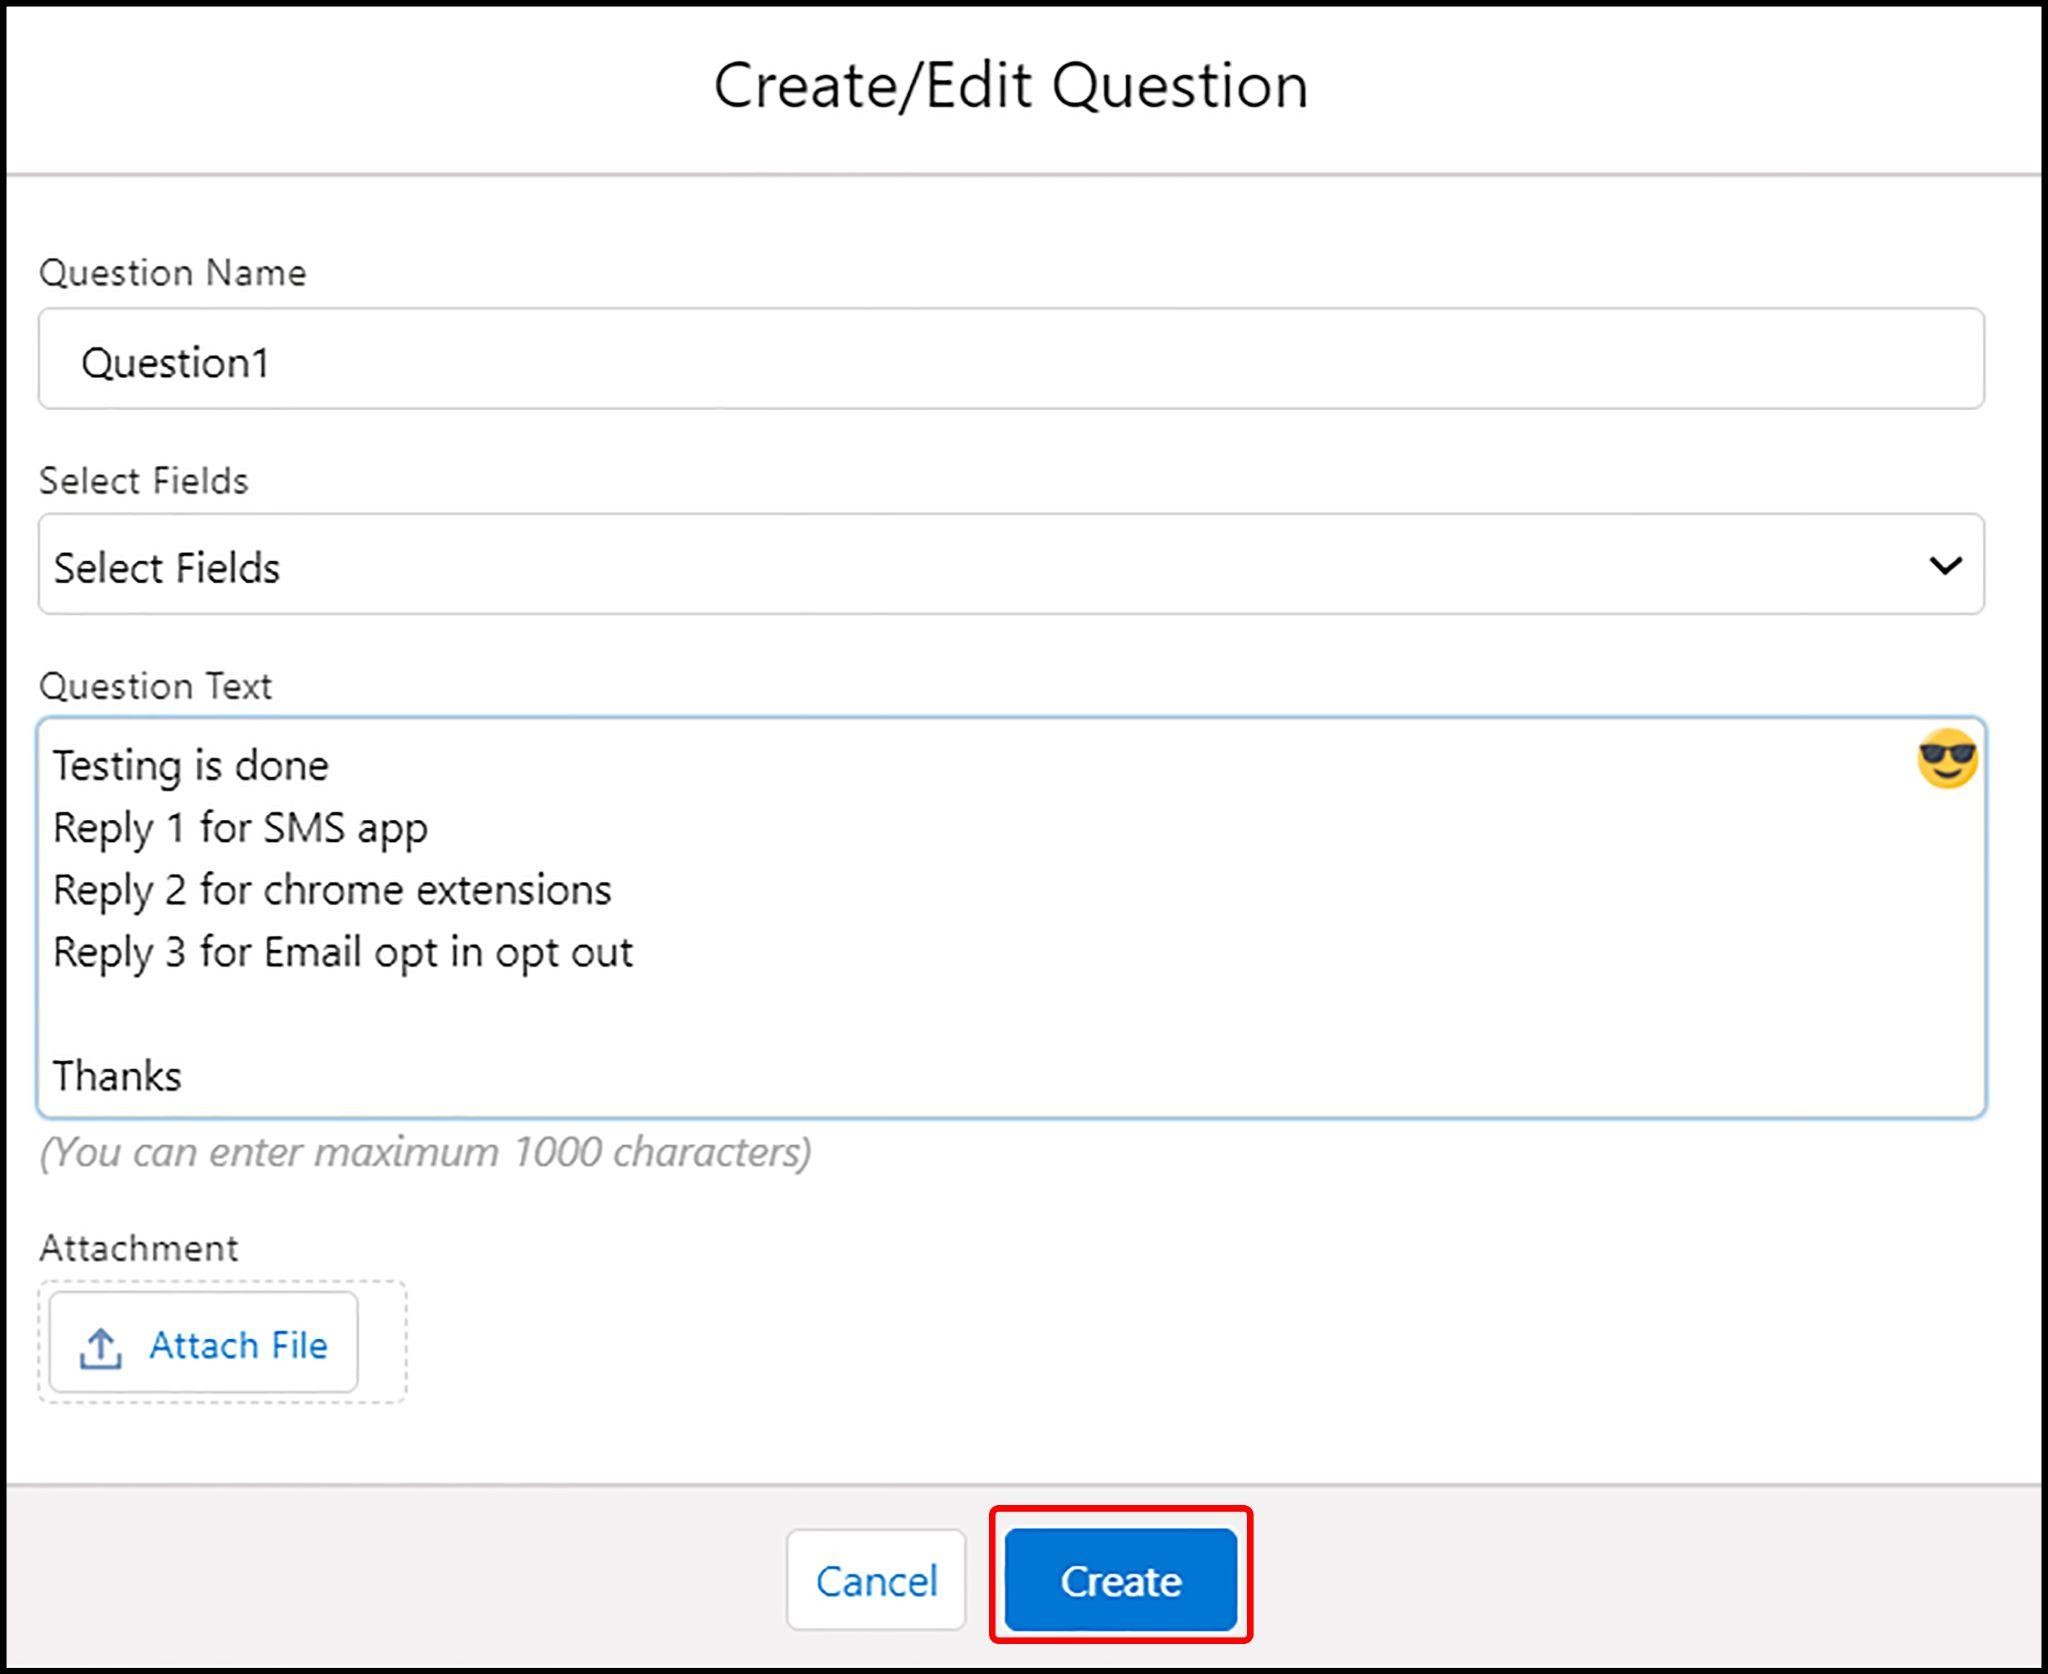
In this dialog box, you need to enter values for the requested fields.
The fields requested are described below.
- Question Name – Add the name or label of the question. For example – “Question 1.”
- Select Fields – Select ‘Merge Fields’ if you want to add any.
- Question Text – Add the first question that you want in a Questionnaire
- Attachment – Add attachments to a message if you want to.
After filling in all the details, click Create, and the question will be added to the Survey or a Questionnaire.
Step 6:
After clicking the Create button, you can see the added question in the Survey. An example is shown below.
 Now, you can add expected answers or answer choices for the added question by clicking the +Answer button placed against each question, as shown below.
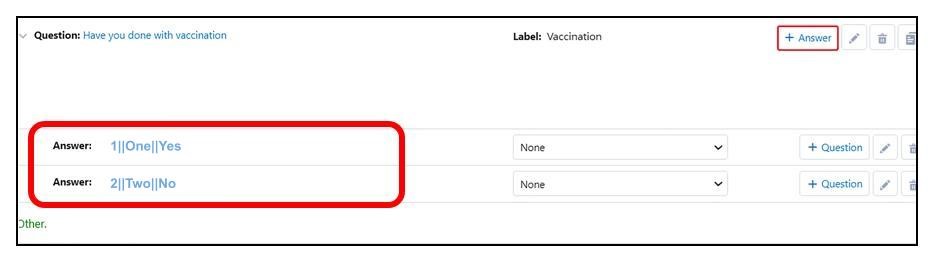
 For adding every new answer choice to a question, you need to click the +Answer button placed against each question.
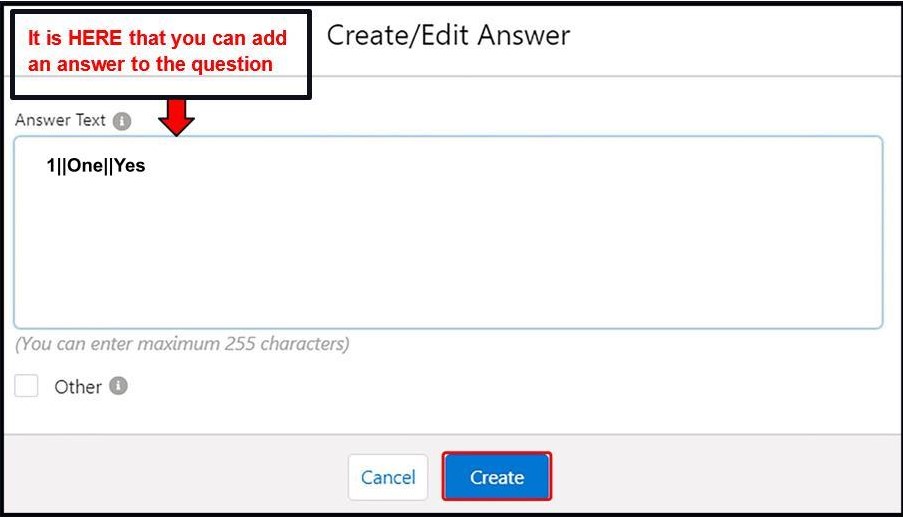
When you click on the +Answer button, a box should appear (as shown below).
It is HERE that you can add an answer to the question.
You can also add acceptable synonyms separated by a double pipe (‘||’) to each answer.
At last, click Create after entering each answer choice.
After adding answer choices, you can see all of them right below the question (as shown below).

Step 7:
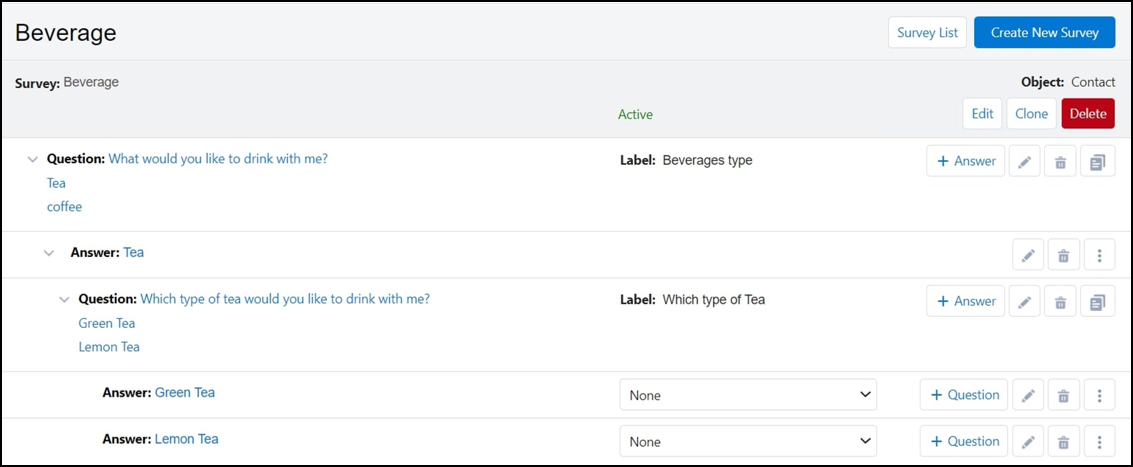
You can trigger a sequence of further nested questions and answers for each answer choice. So, for each type of answer received, a different sequence of questions may be triggered next.
You can sequence these questions and answers one after the other.
To do so, you need to click on the +Question button placed against each response, as shown below.
Also, you can edit or delete an answer using the ‘pen’ or ‘bin’ icons.
 Also, if you do not want to add a new question or want to skip a few questions and want to jump to a specific existing question in the event of a particular incoming response, you can use the None tab (as shown below) and choose a question from the dropdown.
 The question that will be triggered in the case of a particular response can be viewed right under the specific answer choice, as shown below.
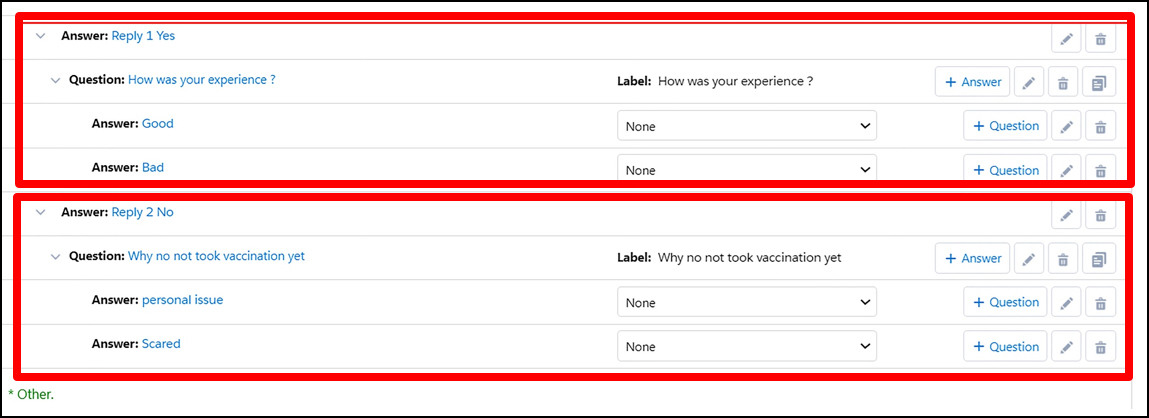 This way, you can keep adding a series of questions and answers in a Survey.
The best part of using iText is, you can take or assign actions side by side that you want to perform based on the answers received without navigating to the record page separately.
Taking Actions Depending on the Answers Received
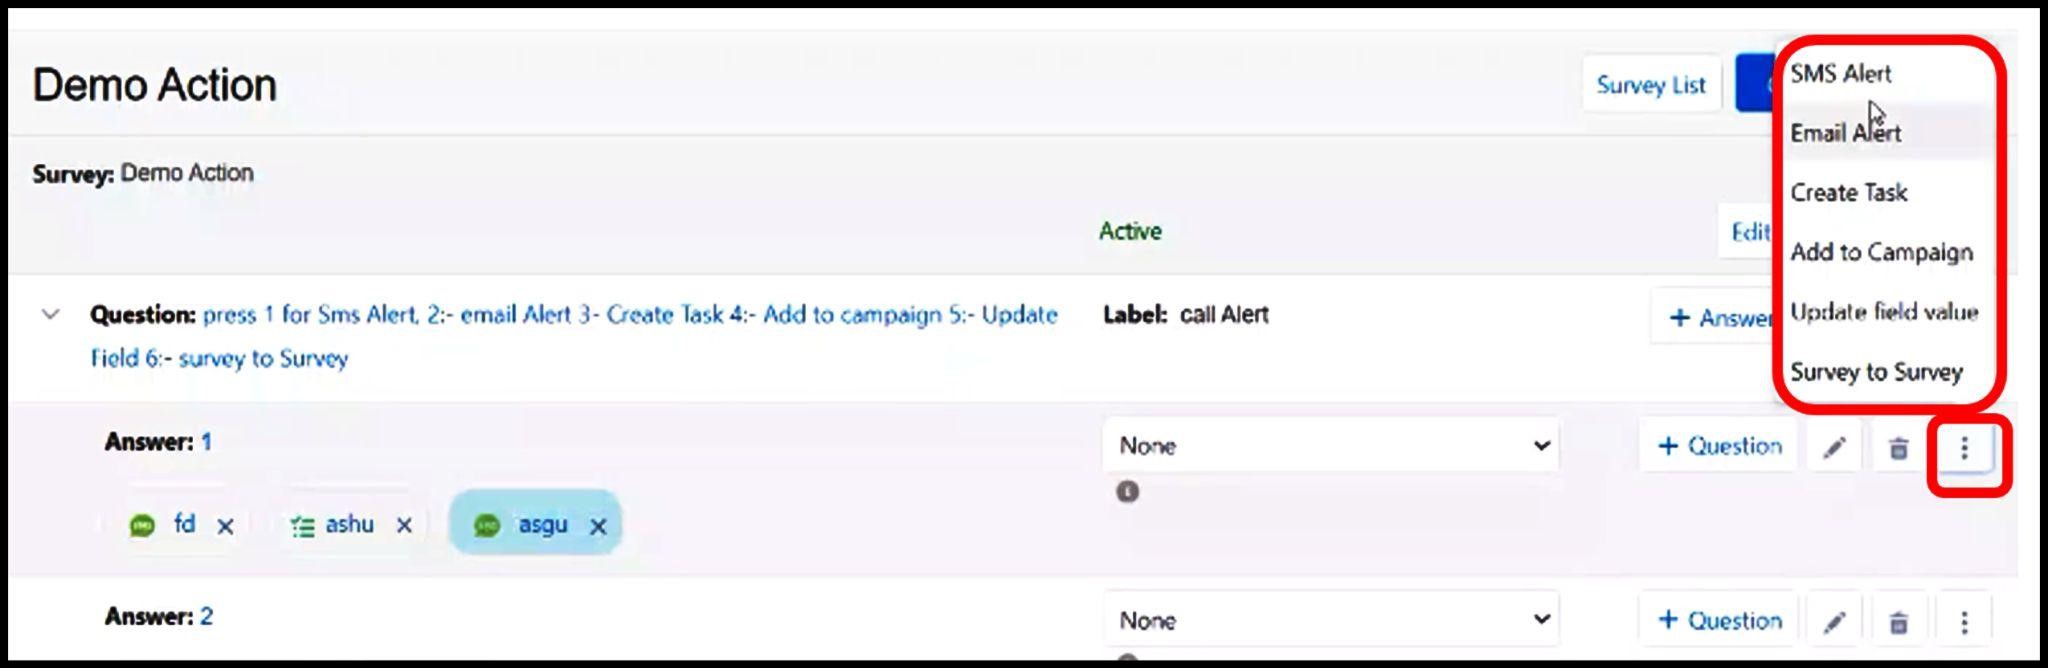
Answer Path is a part of iText that allows you to take action based on incoming answers to Surveys.
You can perform or assign actions like creating a task, updating fields, triggering emails, alerting a Salesforce user with a notification, jumping to another Survey, or adding recipients to ongoing campaigns.
You can click on the three dots icon (as shown below) placed against each answer to perform any action when an answer is received.
 To know more in detail about how to perform or assign actions based on iText response, click here.
Recent Blogs

Salesforce’s $3.6 Billion Fin Acquisition Signals a New Era of AI-Powered Customer Engagement
Listen to this article $3.6 billion. That’s what Salesforce paid for Fin, formerly Intercom. And while most people are treating…


Zoho CRM SMS for Hotels: How to Automate Guest Communication From Your CRM
Listen to this article There are certain queries from customers that front desk staff at a busy hotel have to…

Agentforce Two-Way SMS for Real Estate: Turn Marketing Blasts Into AI Conversations
Listen to this article Introduction A 40,000-contact drip with one property alert is sent. And then what? Most agents already…