13.1. Surveys and Decision Trees
(DIY Chatbots)
For the smooth running of any business and to maximize conversions, it is important to know customers individually, their experiences, and their requirements. But it isn’t possible to reach out to every individual through traditional methods and capture relevant data that organizations are looking for.
So, Surveys, Questionnaires, Polls, and Live Polls are created to help organizations reach millions of prospects and customers in one go and capture relevant data at scale as per the use-case. Also, with all important data by their side, users can make more accurate decisions and redefine their market strategies for better outcomes.
The point-and-click configuration of questions, answers, actions, and conditions in iText
lets users configure these to any level of complexity without developer assistance.
360 SMS enables users to configure surveys, questionnaires, polls, Chatbots, and data capture for the following uses
- qualifying inquiries,
- chatbots for customer support and sales inquiries,
- triggering relevant and user-defined actions,
- automating interactions after responses to a campaign,
- adding candidates/campaign respondents to a pre-scheduled campaign,
- much more
This is done through point-and-click decision trees called iText in 360 SMS.
13.1.1. Automated Questionnaires and Surveys
The Decision Tree or iText in 360 SMS is a no-code solution for multiple automated interactions. Interactions are qualified and progress through the decision trees based on the responses received.
13.1.1.1. Configure Questions and Answers
Configuring questions and answers in iText is fairly straightforward.
- Click the iText tab (as shown below).
Here users can view the list of all previously created Surveys and delete them by clicking Delete Survey (also shown below).
- To create a new survey,
Click Create New Survey (as shown below) on the top right corner of the page.

iText tab, Delete Survey button, Create New Survey button
This should bring up a page where users need to fill in details about the survey like the name, description, and object type of the survey.
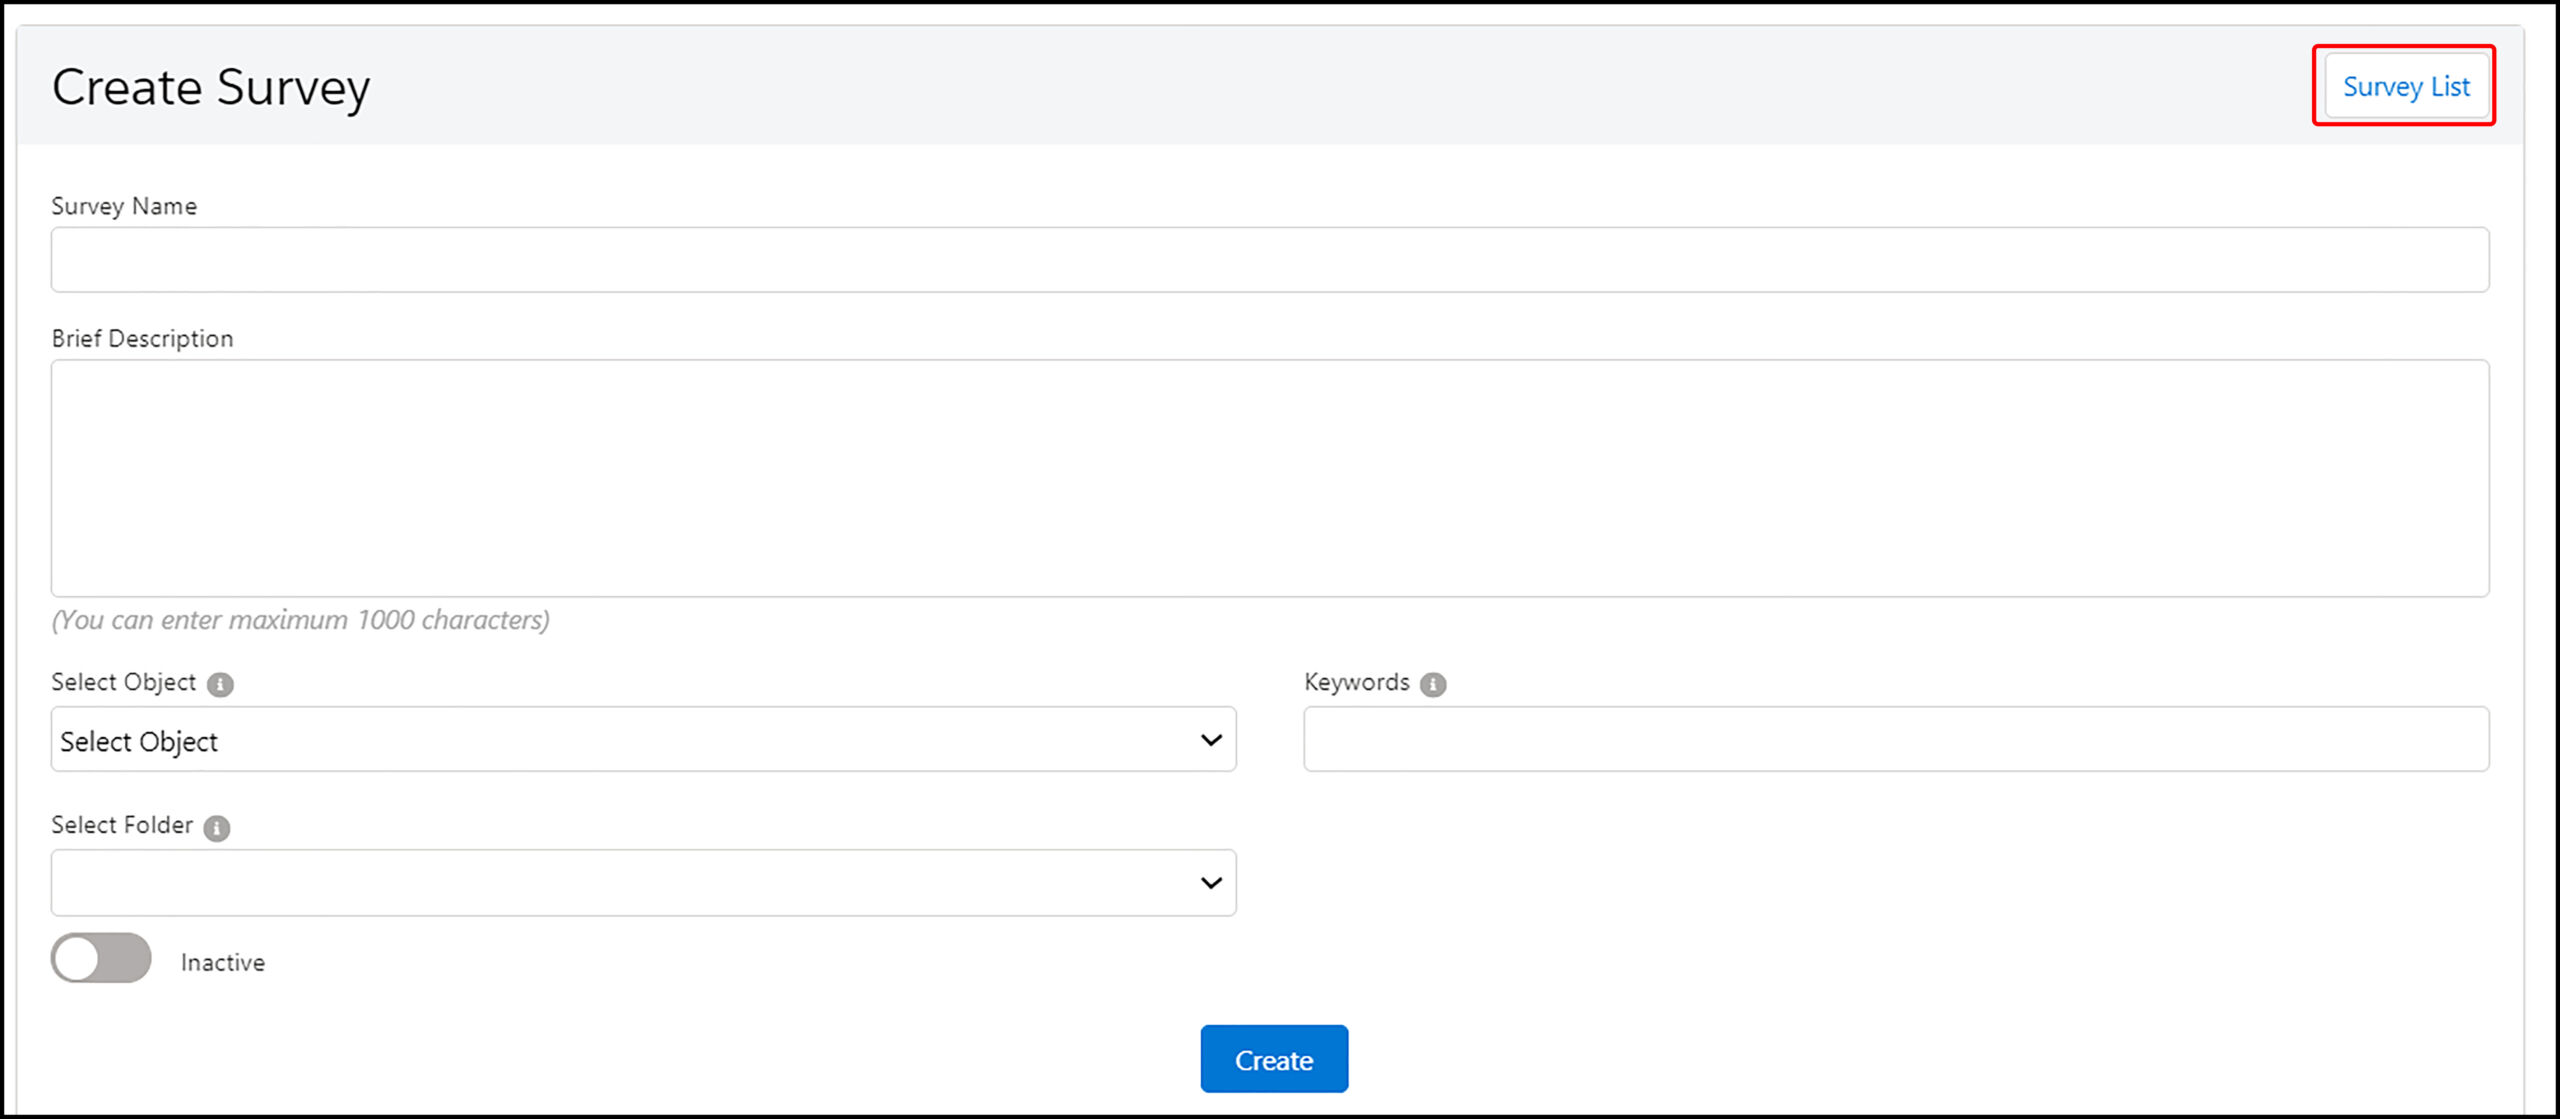
A page for creating a new Survey
Survey Name- This is for defining a Survey name.
Brief Description- In this section, users can add a brief description of a Survey to specify the purpose of creating a Survey, or when a Survey will be triggered.
Select Object- This is to select the Salesforce object type over which a user wants to create a Survey.
Keywords- Here, users can add reserved Keywords and synonyms (comma separated). These keywords are for initiating a Survey in the event of an incoming text with any of the given keywords.
Status- Toggles the status between Active or Inactive for a Survey.
Survey List- This button (as shown above) is used to go back to the list of previously created surveys.
After filling in all the details, click Create.
When users click Create, a Survey will be created, and users can add questions by clicking Question, as shown below.

A page for adding the First Question
As a user clicks on the +Question button to add new questions to a new questionnaire, a box will appear for creating a question as shown below.
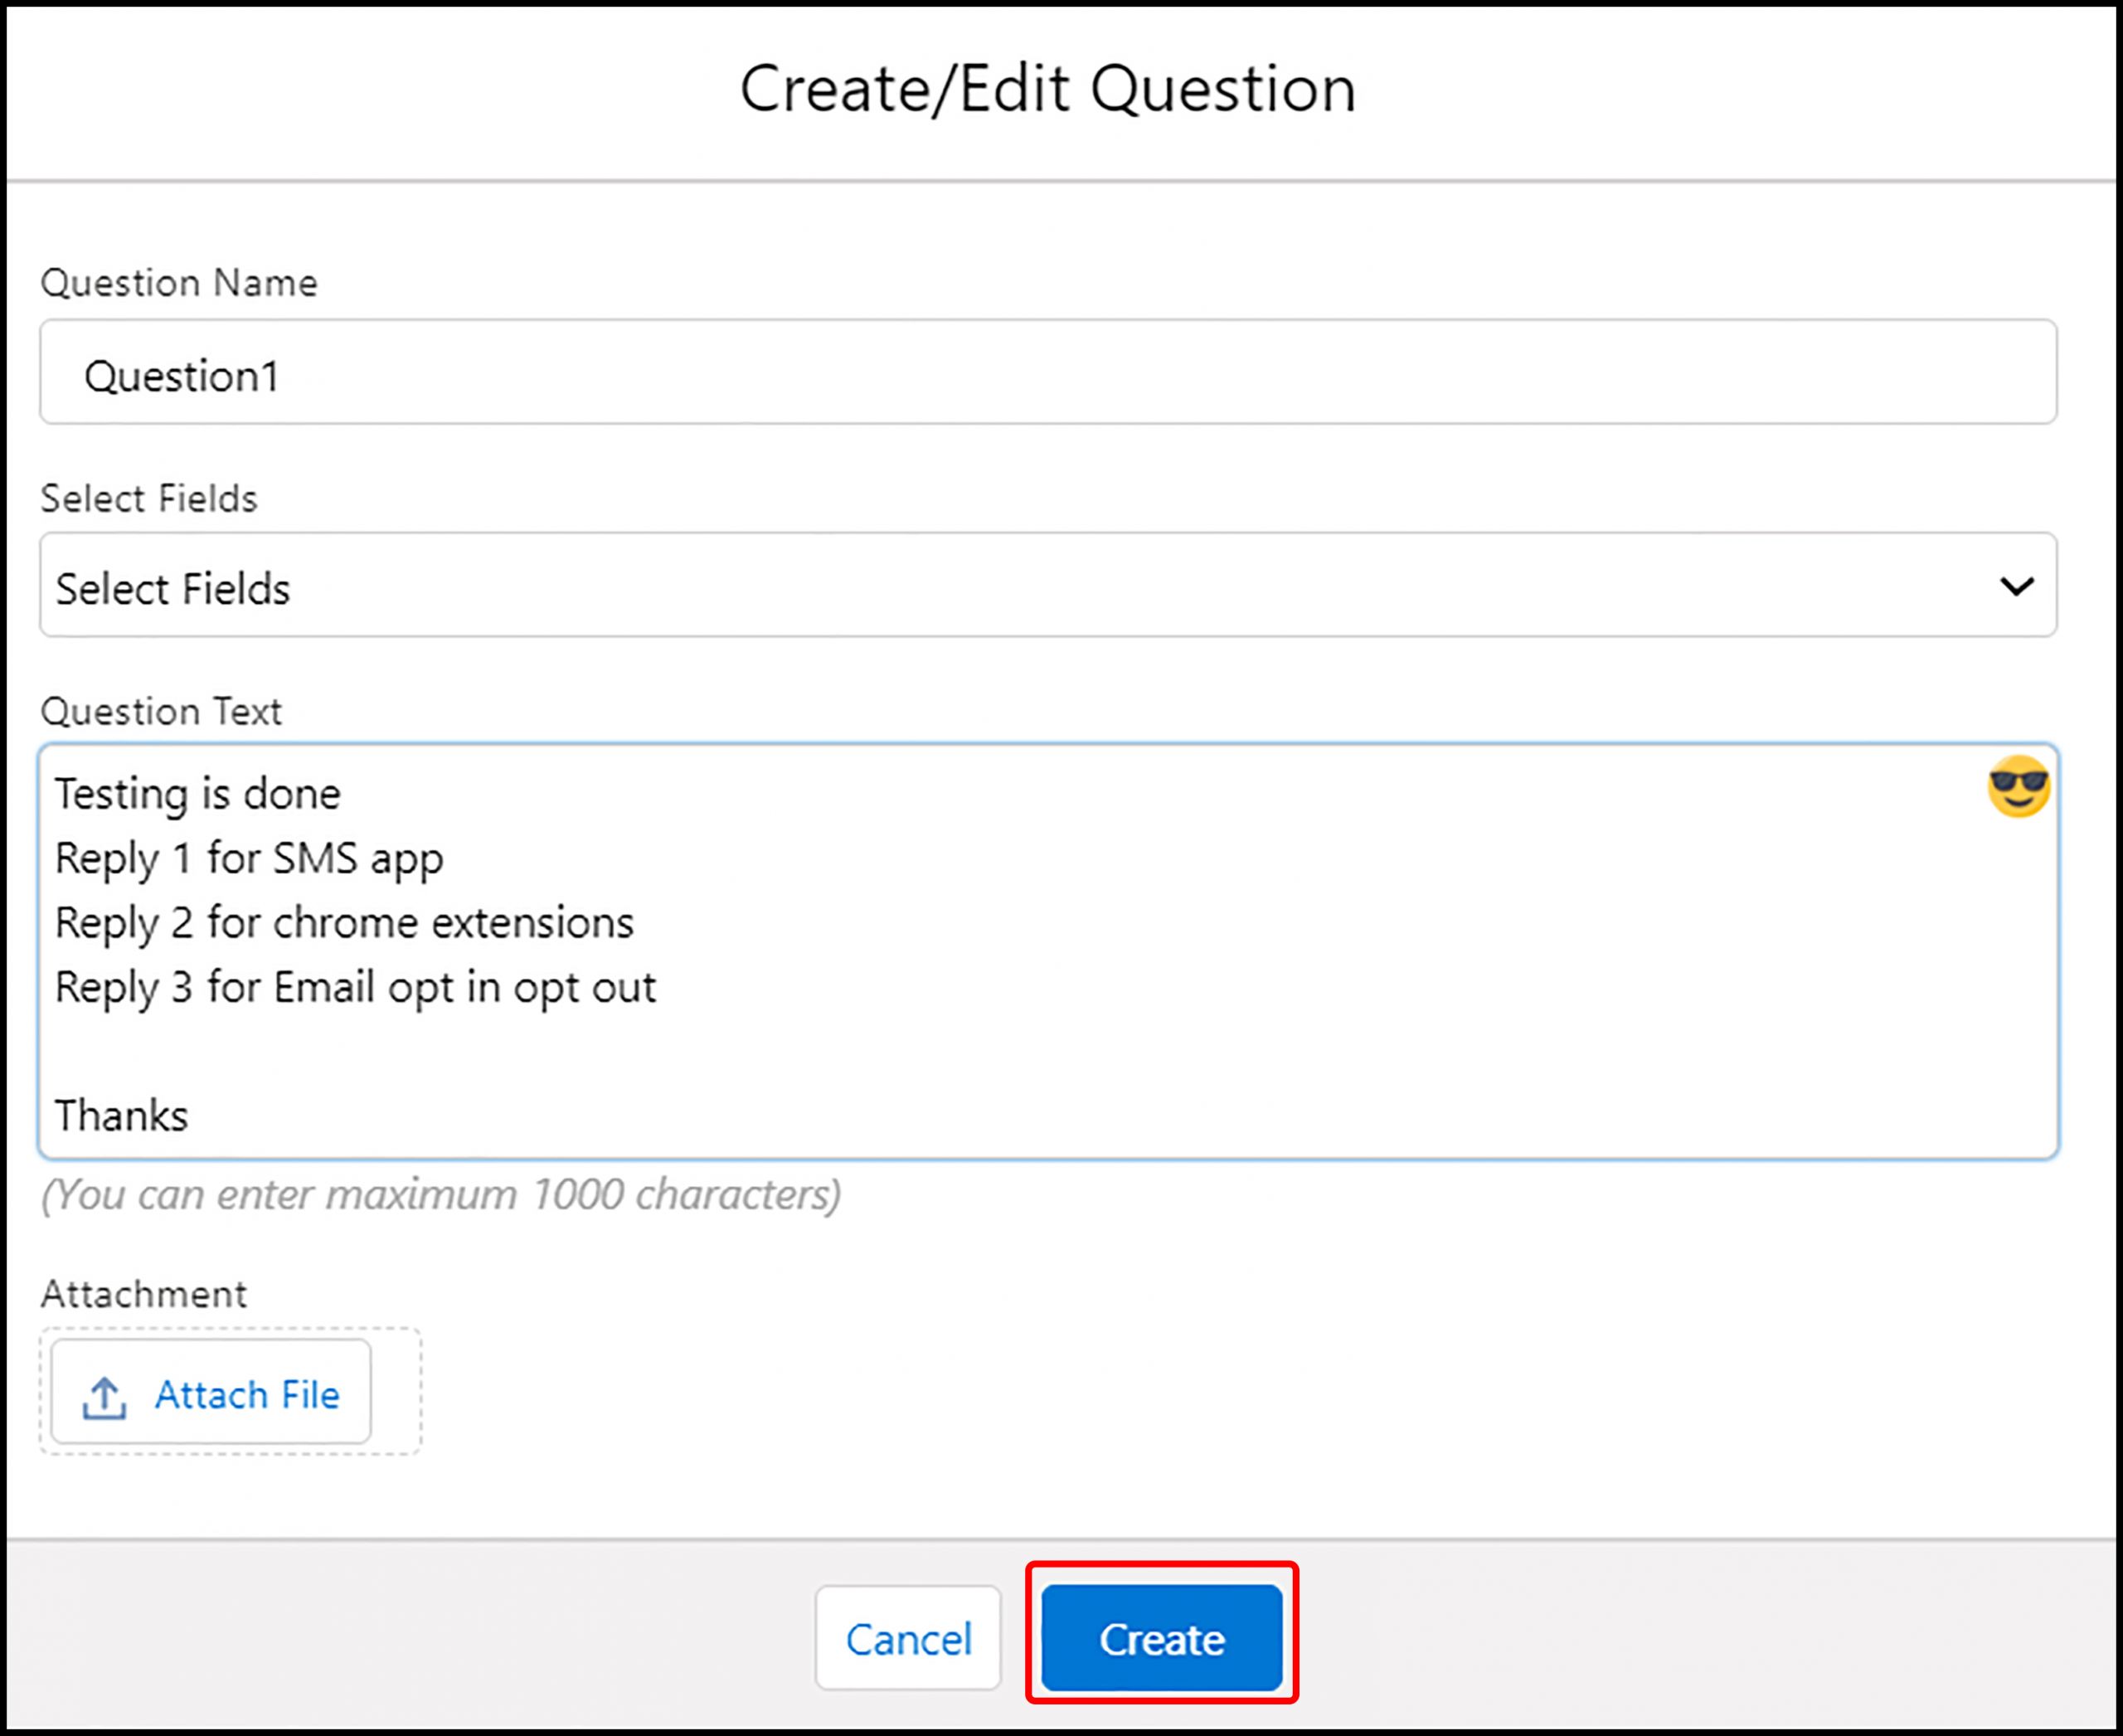
Box to add a question
Here users can add:
Question Name – This is for adding the name or label of the question,
for example – “Question 1.”
Select Fields – This is to select ‘Merge Fields’ if a user wants to add any.
Question Text – Here, users can add the question text to be prompted.
Here, Questions aren’t really questions per se, as much as they are ‘prompts’ for further responses to move the automated interaction forward.
Attachment – This is to add attachments to a message
After filling in all the details, click Create.
After clicking the Create button, the Survey will appear with the added question.
Users can add an expected answer or a choice to the question by clicking Answer, as shown below.
For adding every new answer choice to a question, a user needs to click the Answer button.
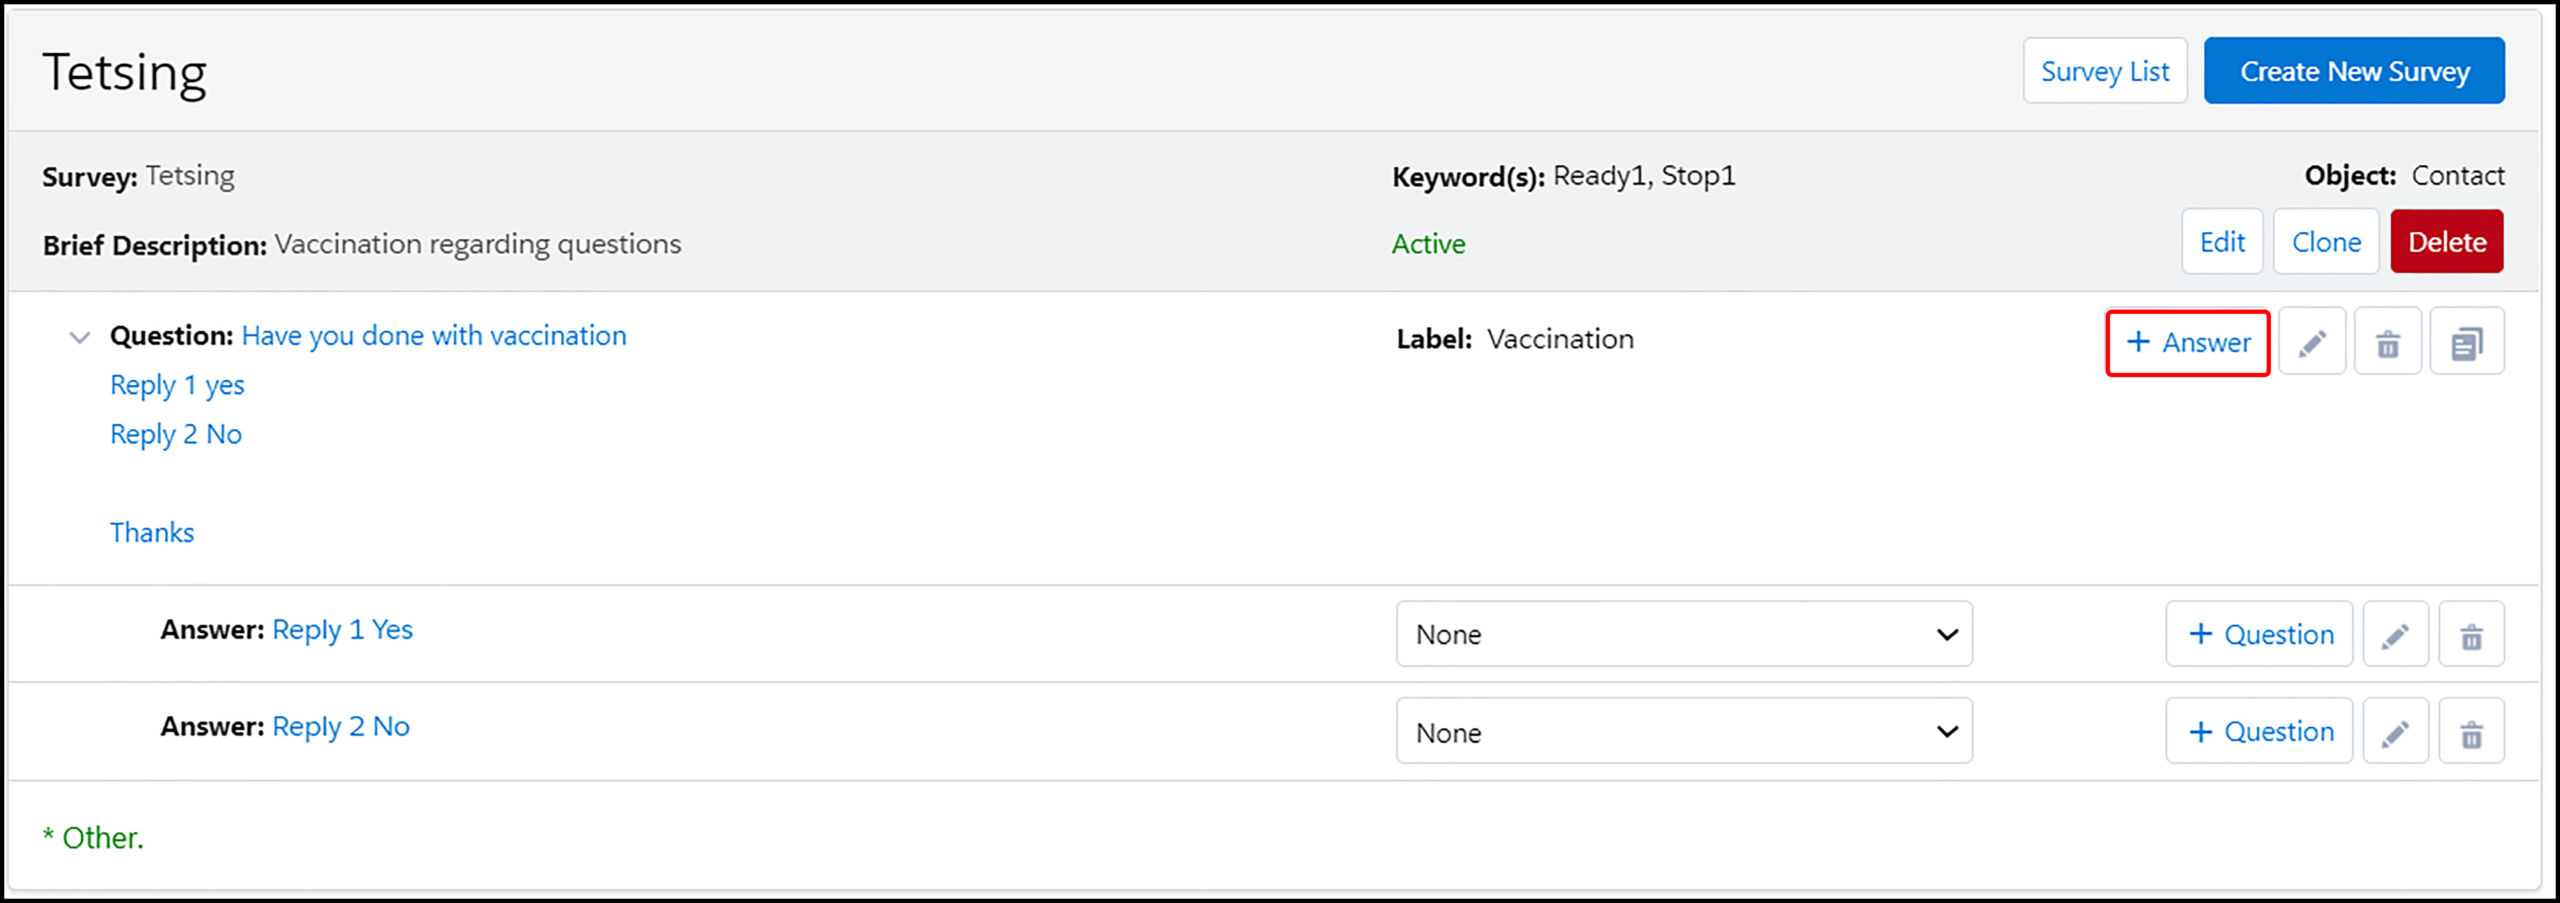
Answer tab for adding the answer choices
As a user clicks on the Answer button, a box will appear for adding an answer choice, as shown below. Each answer choice can also include acceptable synonyms separated by a double pipe (‘||’).
Click Create after entering your answer choices.
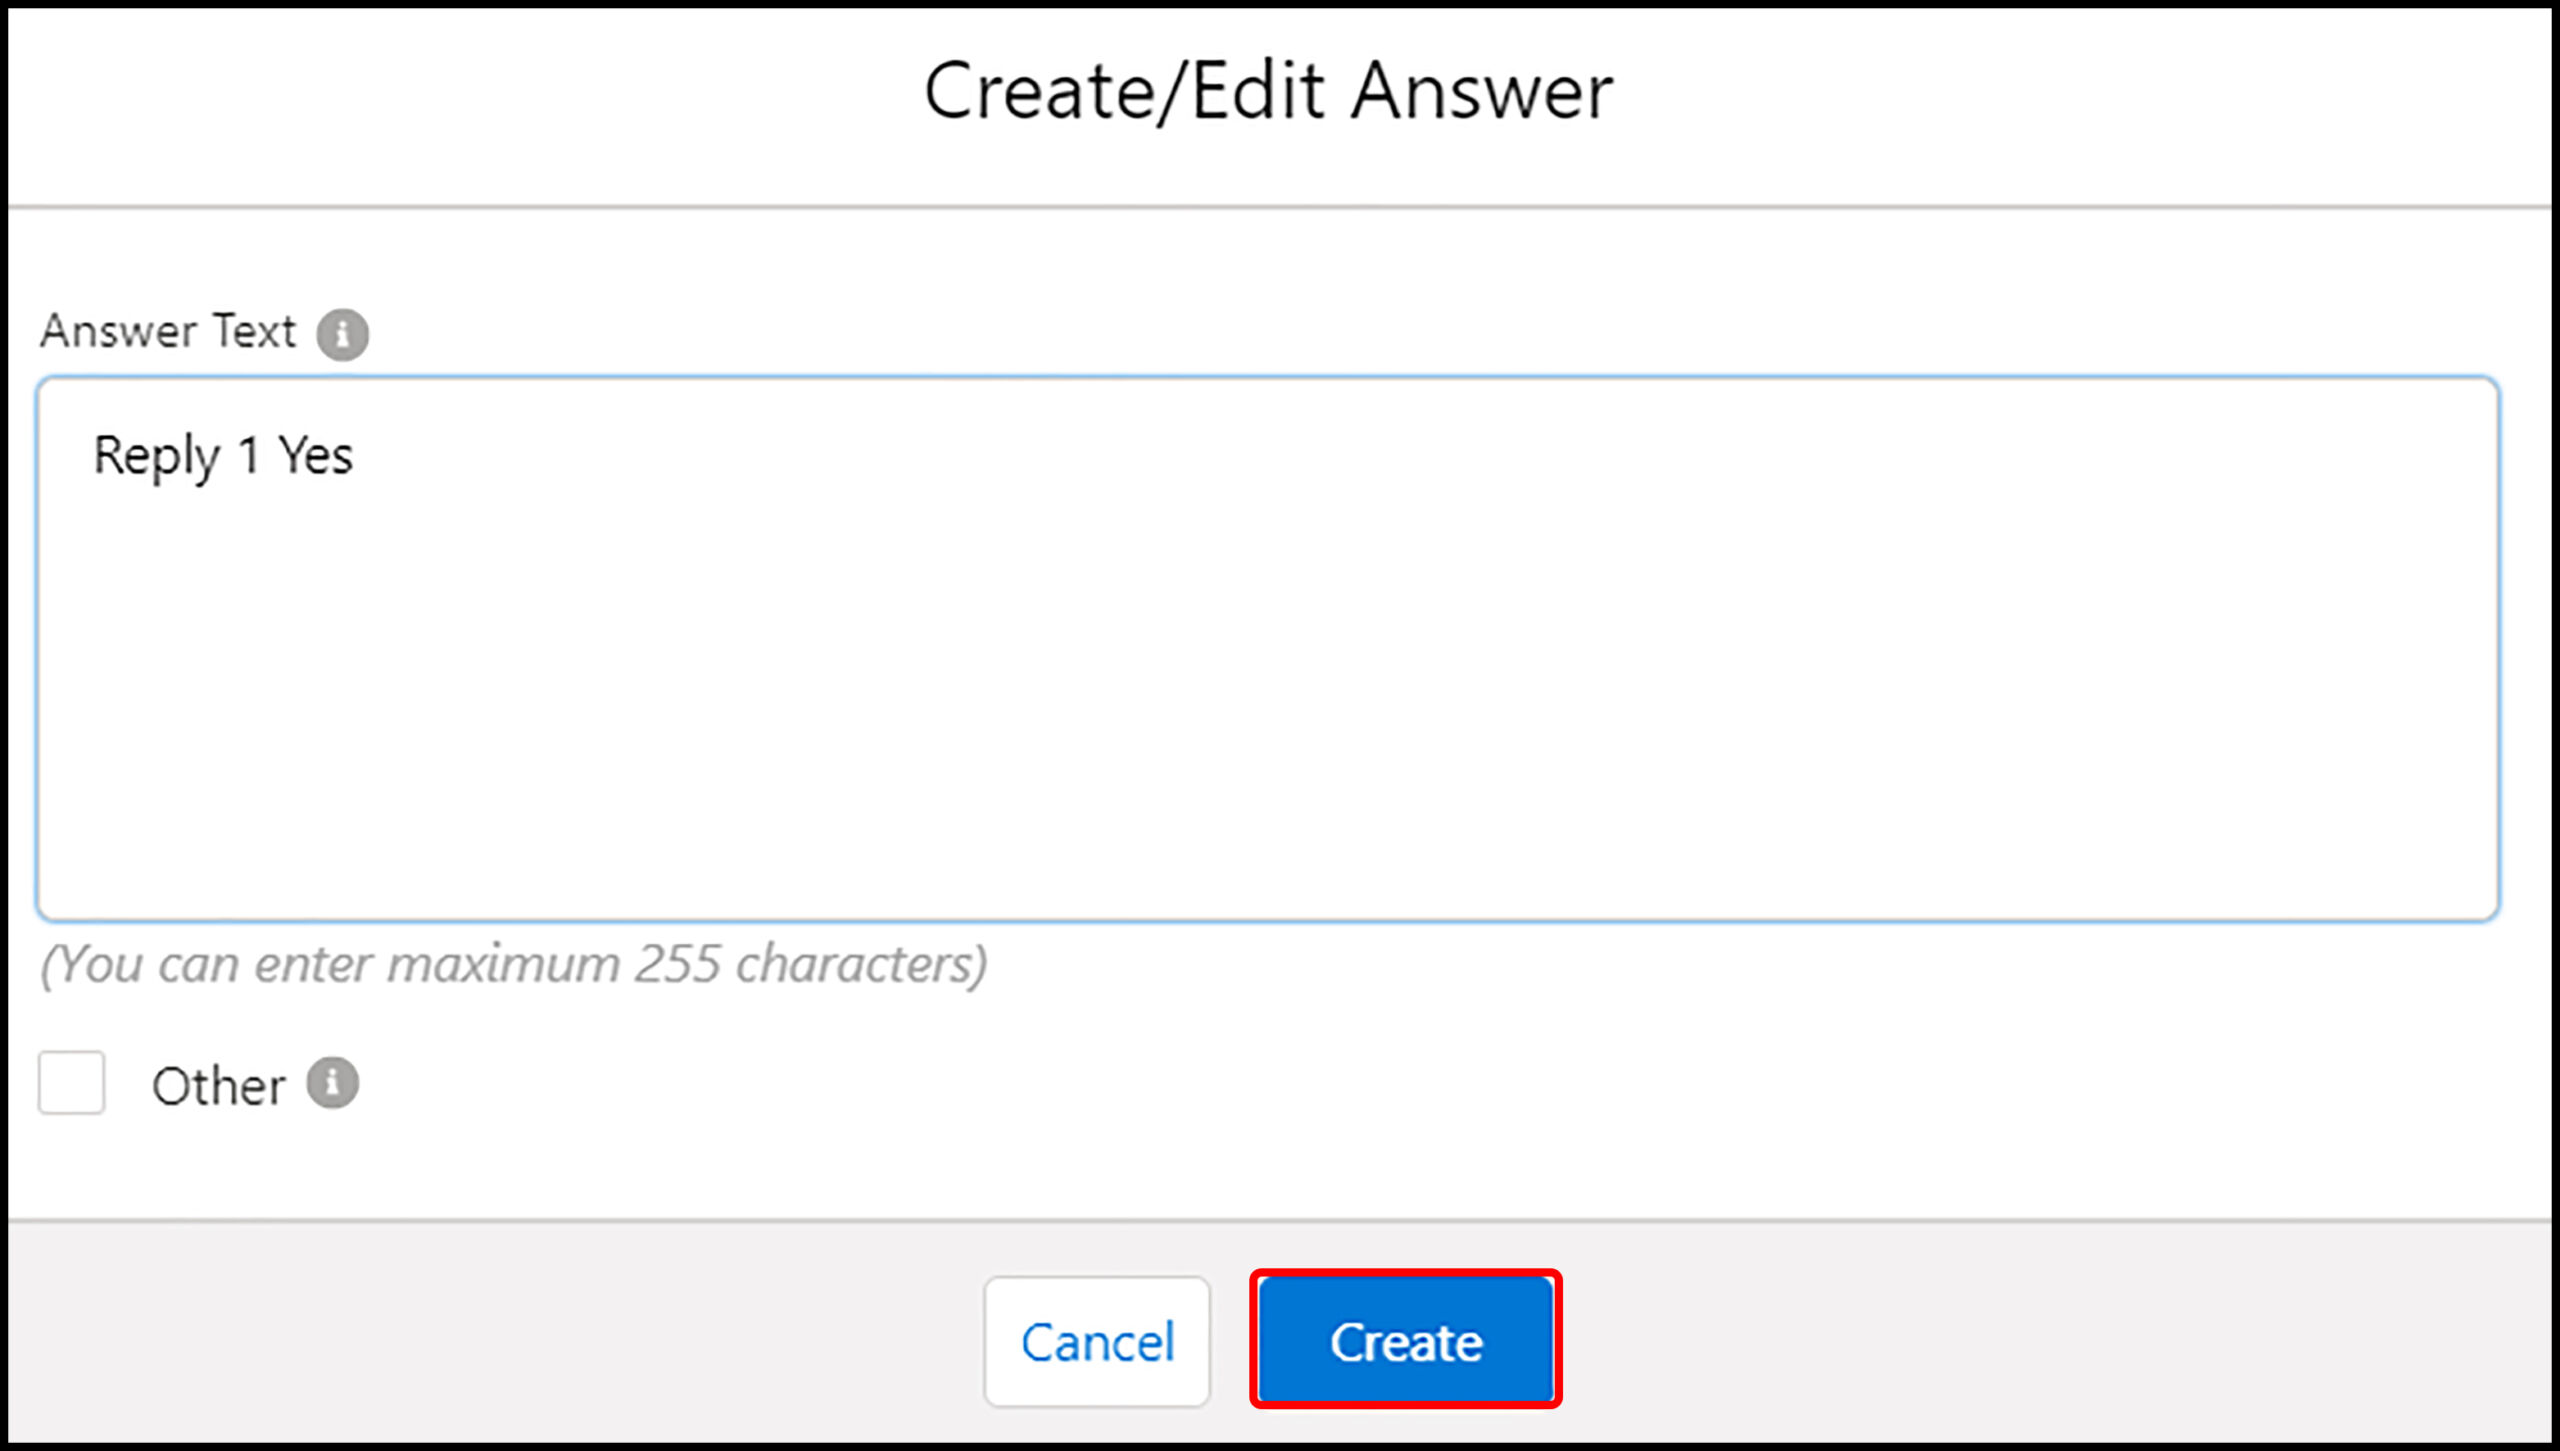
Box to add an answer
After clicking the Create button, the Survey will appear with all answer choices a user has added.
Users can add new questions that they want to trigger dynamically with each incoming response or expected Answer by clicking on the Question button next to an Answer, as shown below.
For assigning a new question to every answer, users need to click on the Question button placed against each answer. Also, users can edit or delete an answer using the ‘pen’ or ‘bin’ icons.
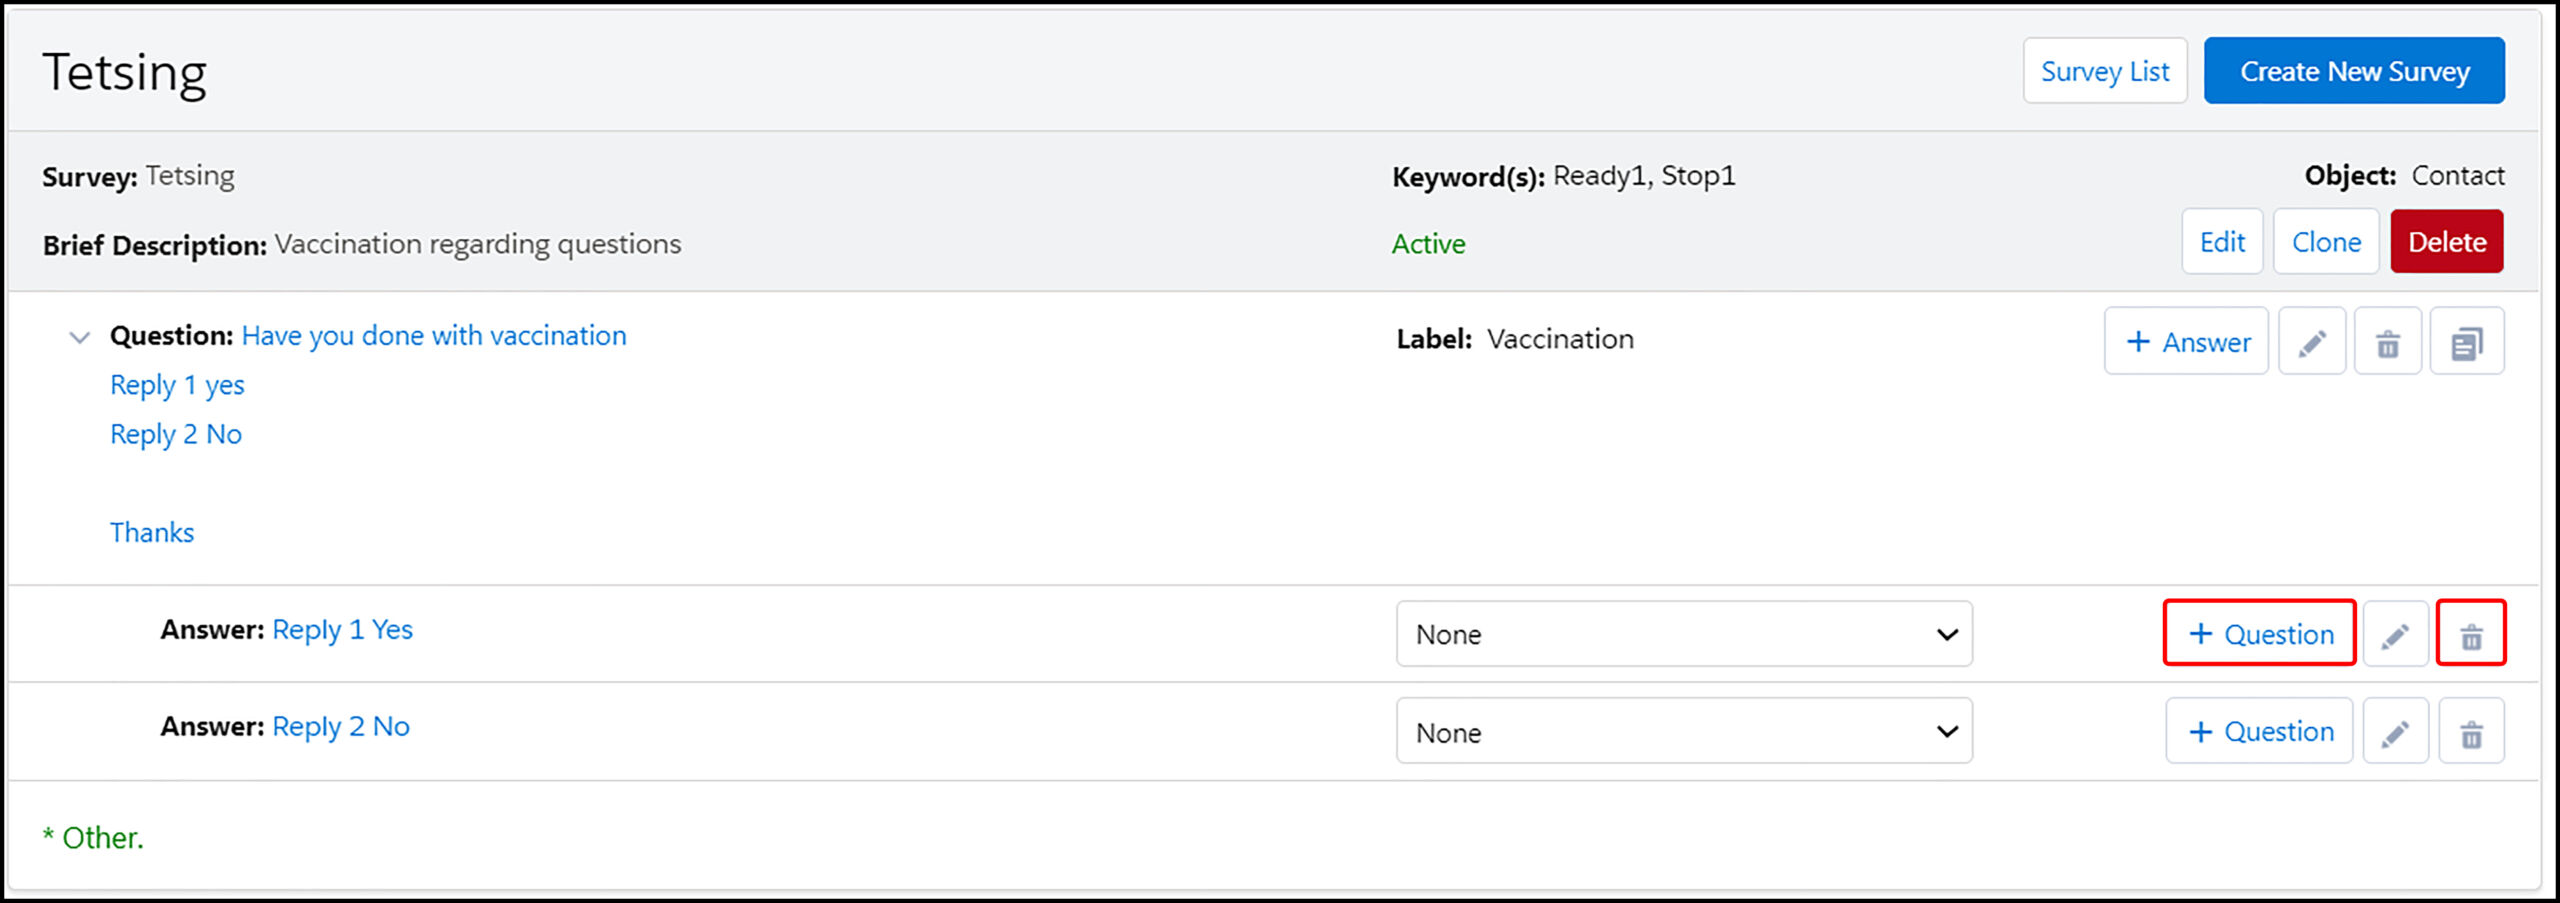
Question tab for assigning a question to an incoming answer
As users add any new question to trigger in the event of an incoming answer, the question will appear right under the specific answer choice, as shown here.
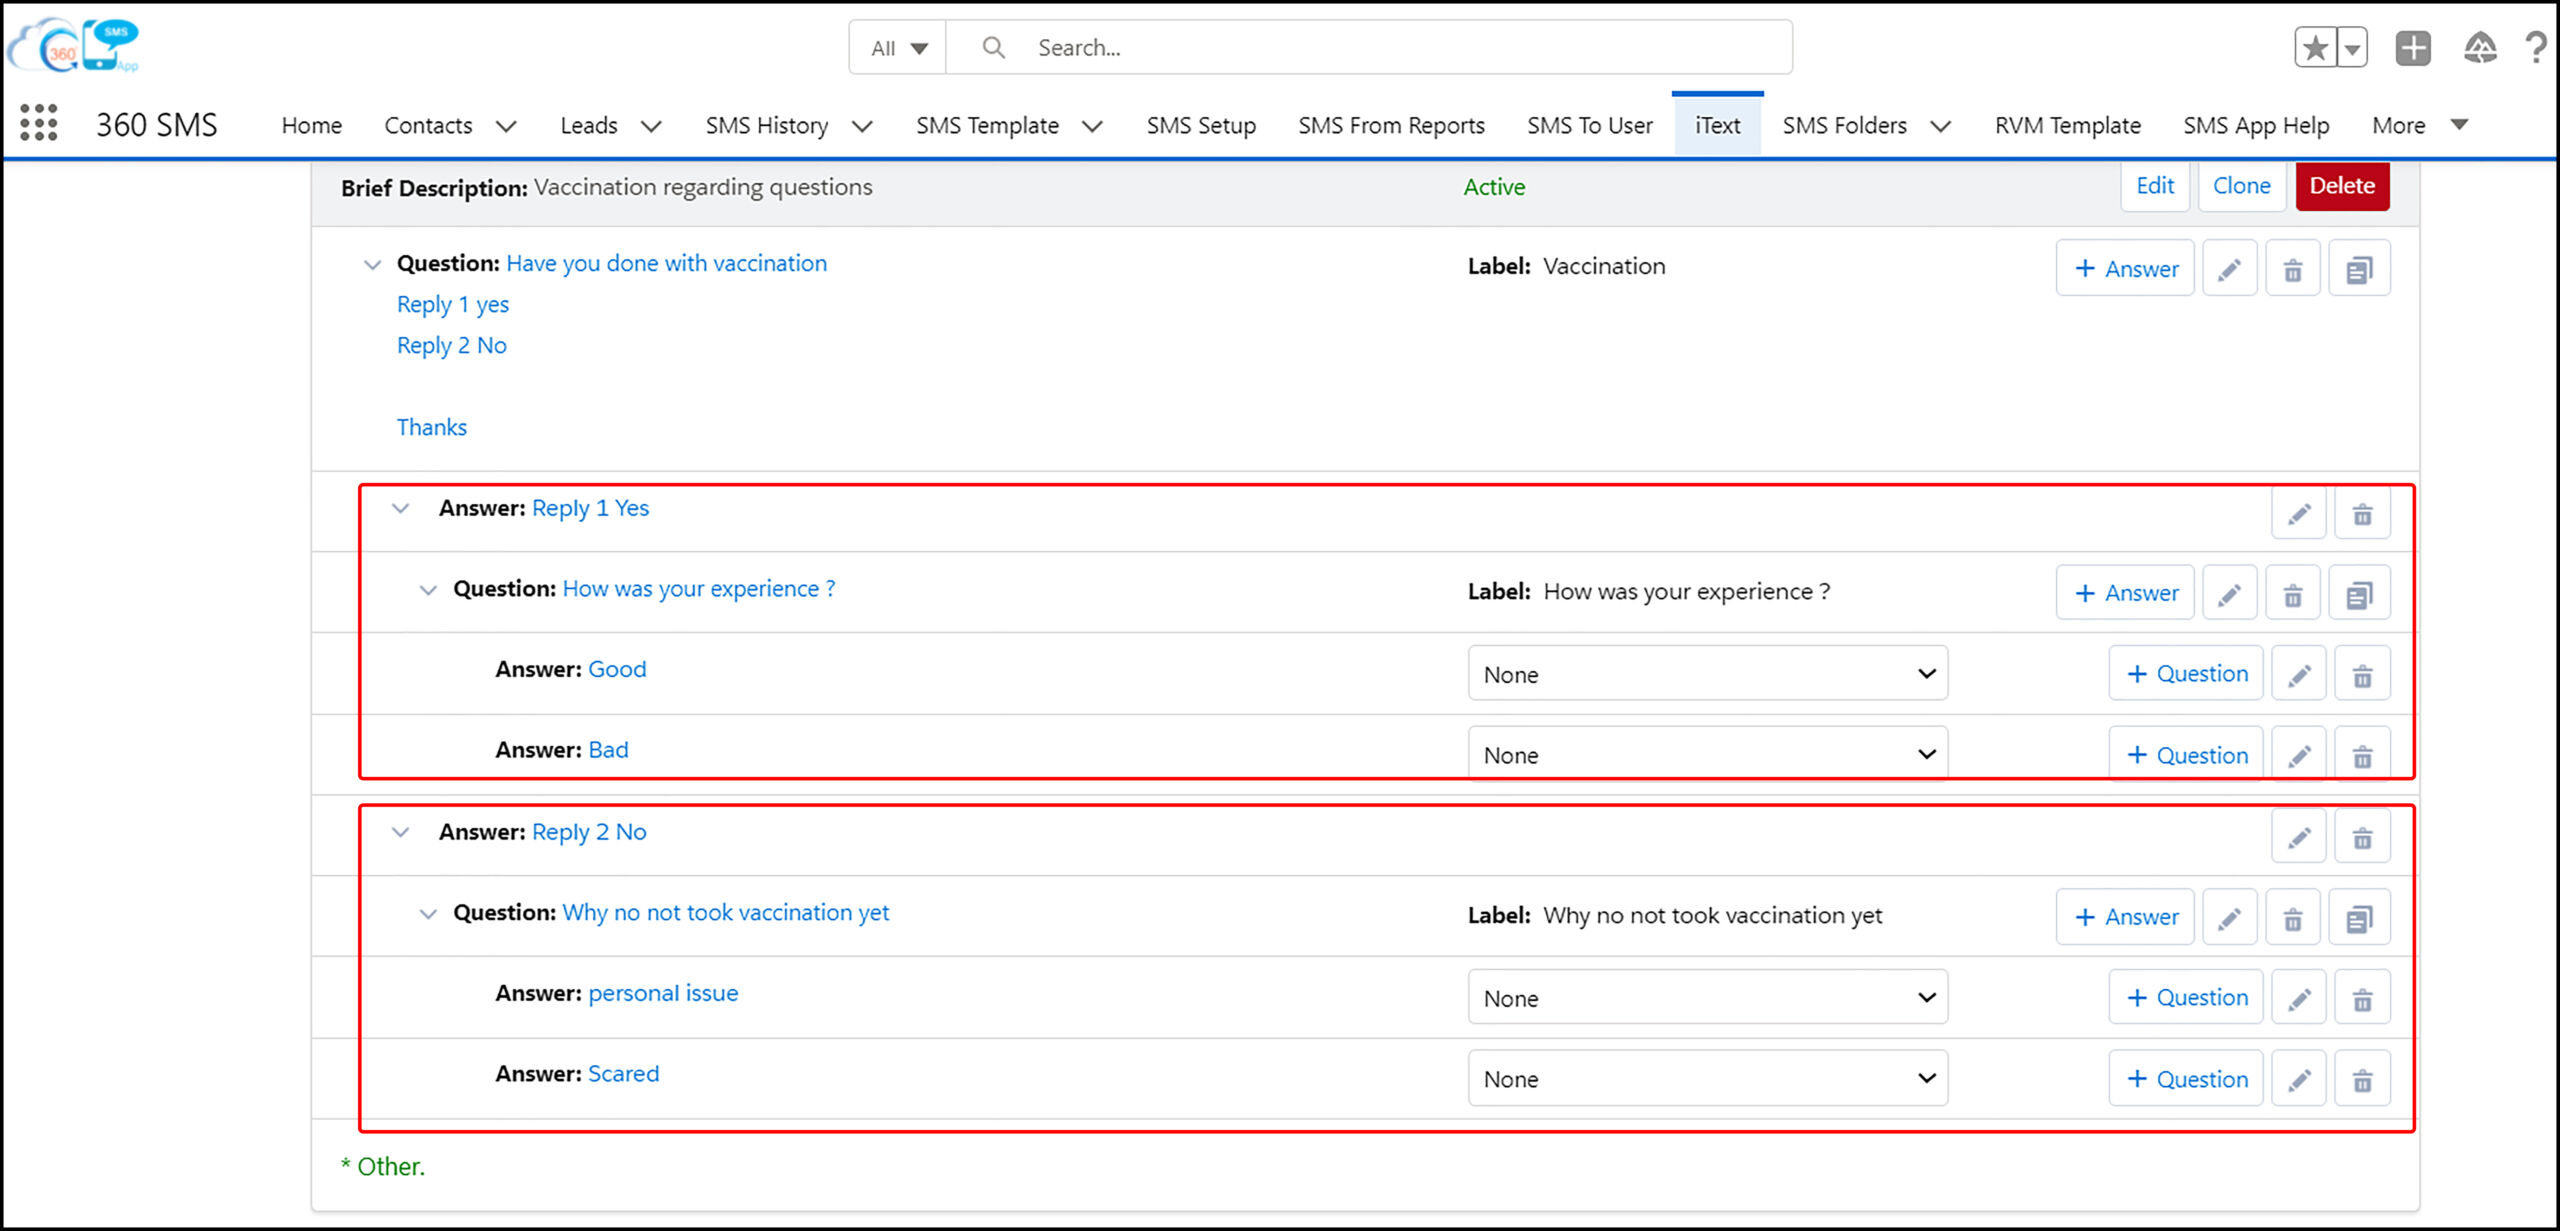
Answers with new assigned questions to trigger
This is how users can keep on assigning questions and answers for each question and answer in a Survey for any number of nested questionnaires.
13.1.2. Jumping between Questions and Surveys
13.1.2.1. Jumping to Specific Questions
iText also allows users to jump to any specific question in a Survey if any question is not assigned to a response using the tab given next to the answer option as shown below.

Tab to jump to another question of a Survey

Question names to jump to a specific question
13.1.2.2. Answer Path (/ Action Handler) for taking action on responses
iText in 360 SMS also lets users automate actions triggered by keyword responses received.
This capability is called Answer Path.
Answer Path is a part of iText that allows users to take action based on incoming responses of Surveys. It could be creating a task, updating fields, triggering emails, alerting a Salesforce user with a notification, jumping to another Survey, or adding recipients to ongoing campaigns.
Users can click on the three dots icon (as shown below) placed against each answer to take any action in the event of an incoming response.

Icon for taking action based on incoming response
13.1.2.2.1. Triggering Actions through Answer Path / Action Handler
Action in the itext allows users to decide the next step based on the iText or Survey response. So user can perform the following action in the event of an incoming response.
13.1.2.2.1.1. SMS Alert
Users can send an SMS alert to the incoming owner or primary record owner based on the incoming response. Also, if required, users can ask for a custom field to add a custom number on which they want to send an SMS alert
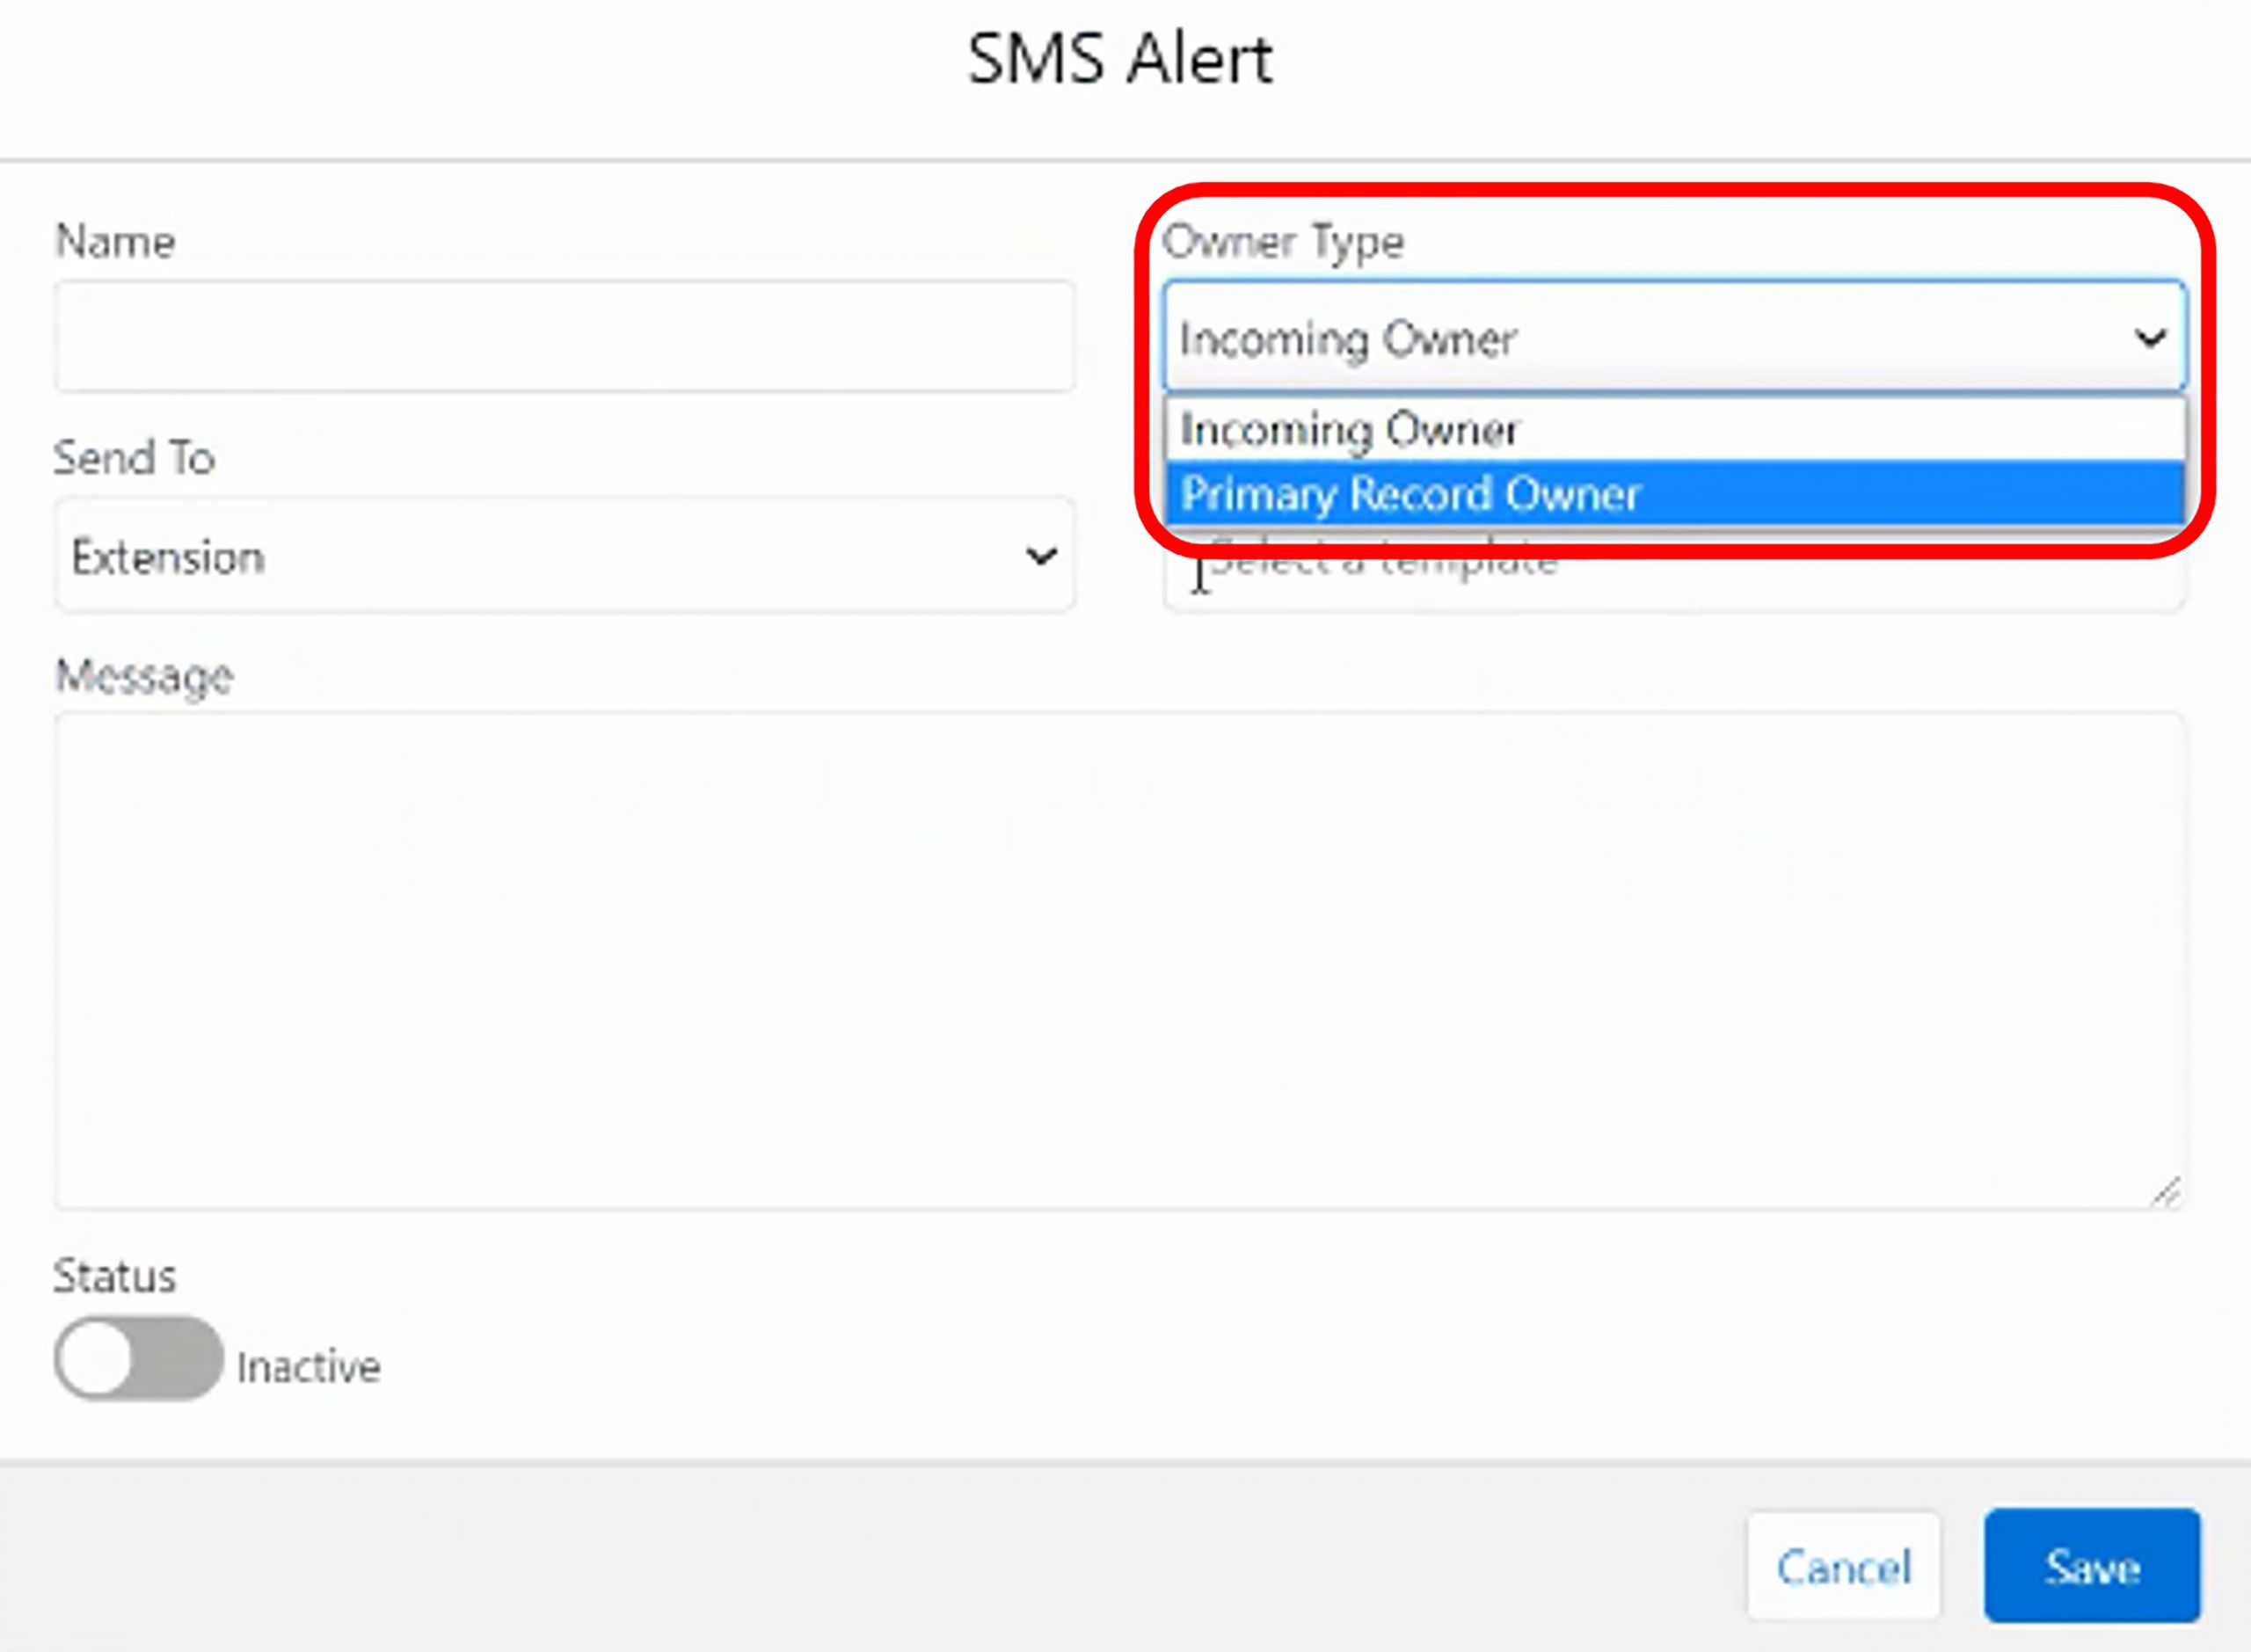
SMS alert page
13.1.2.2.1.2. Email Alert
Users can send an email to the record, record owner, or enter a recipient manually based on the incoming response
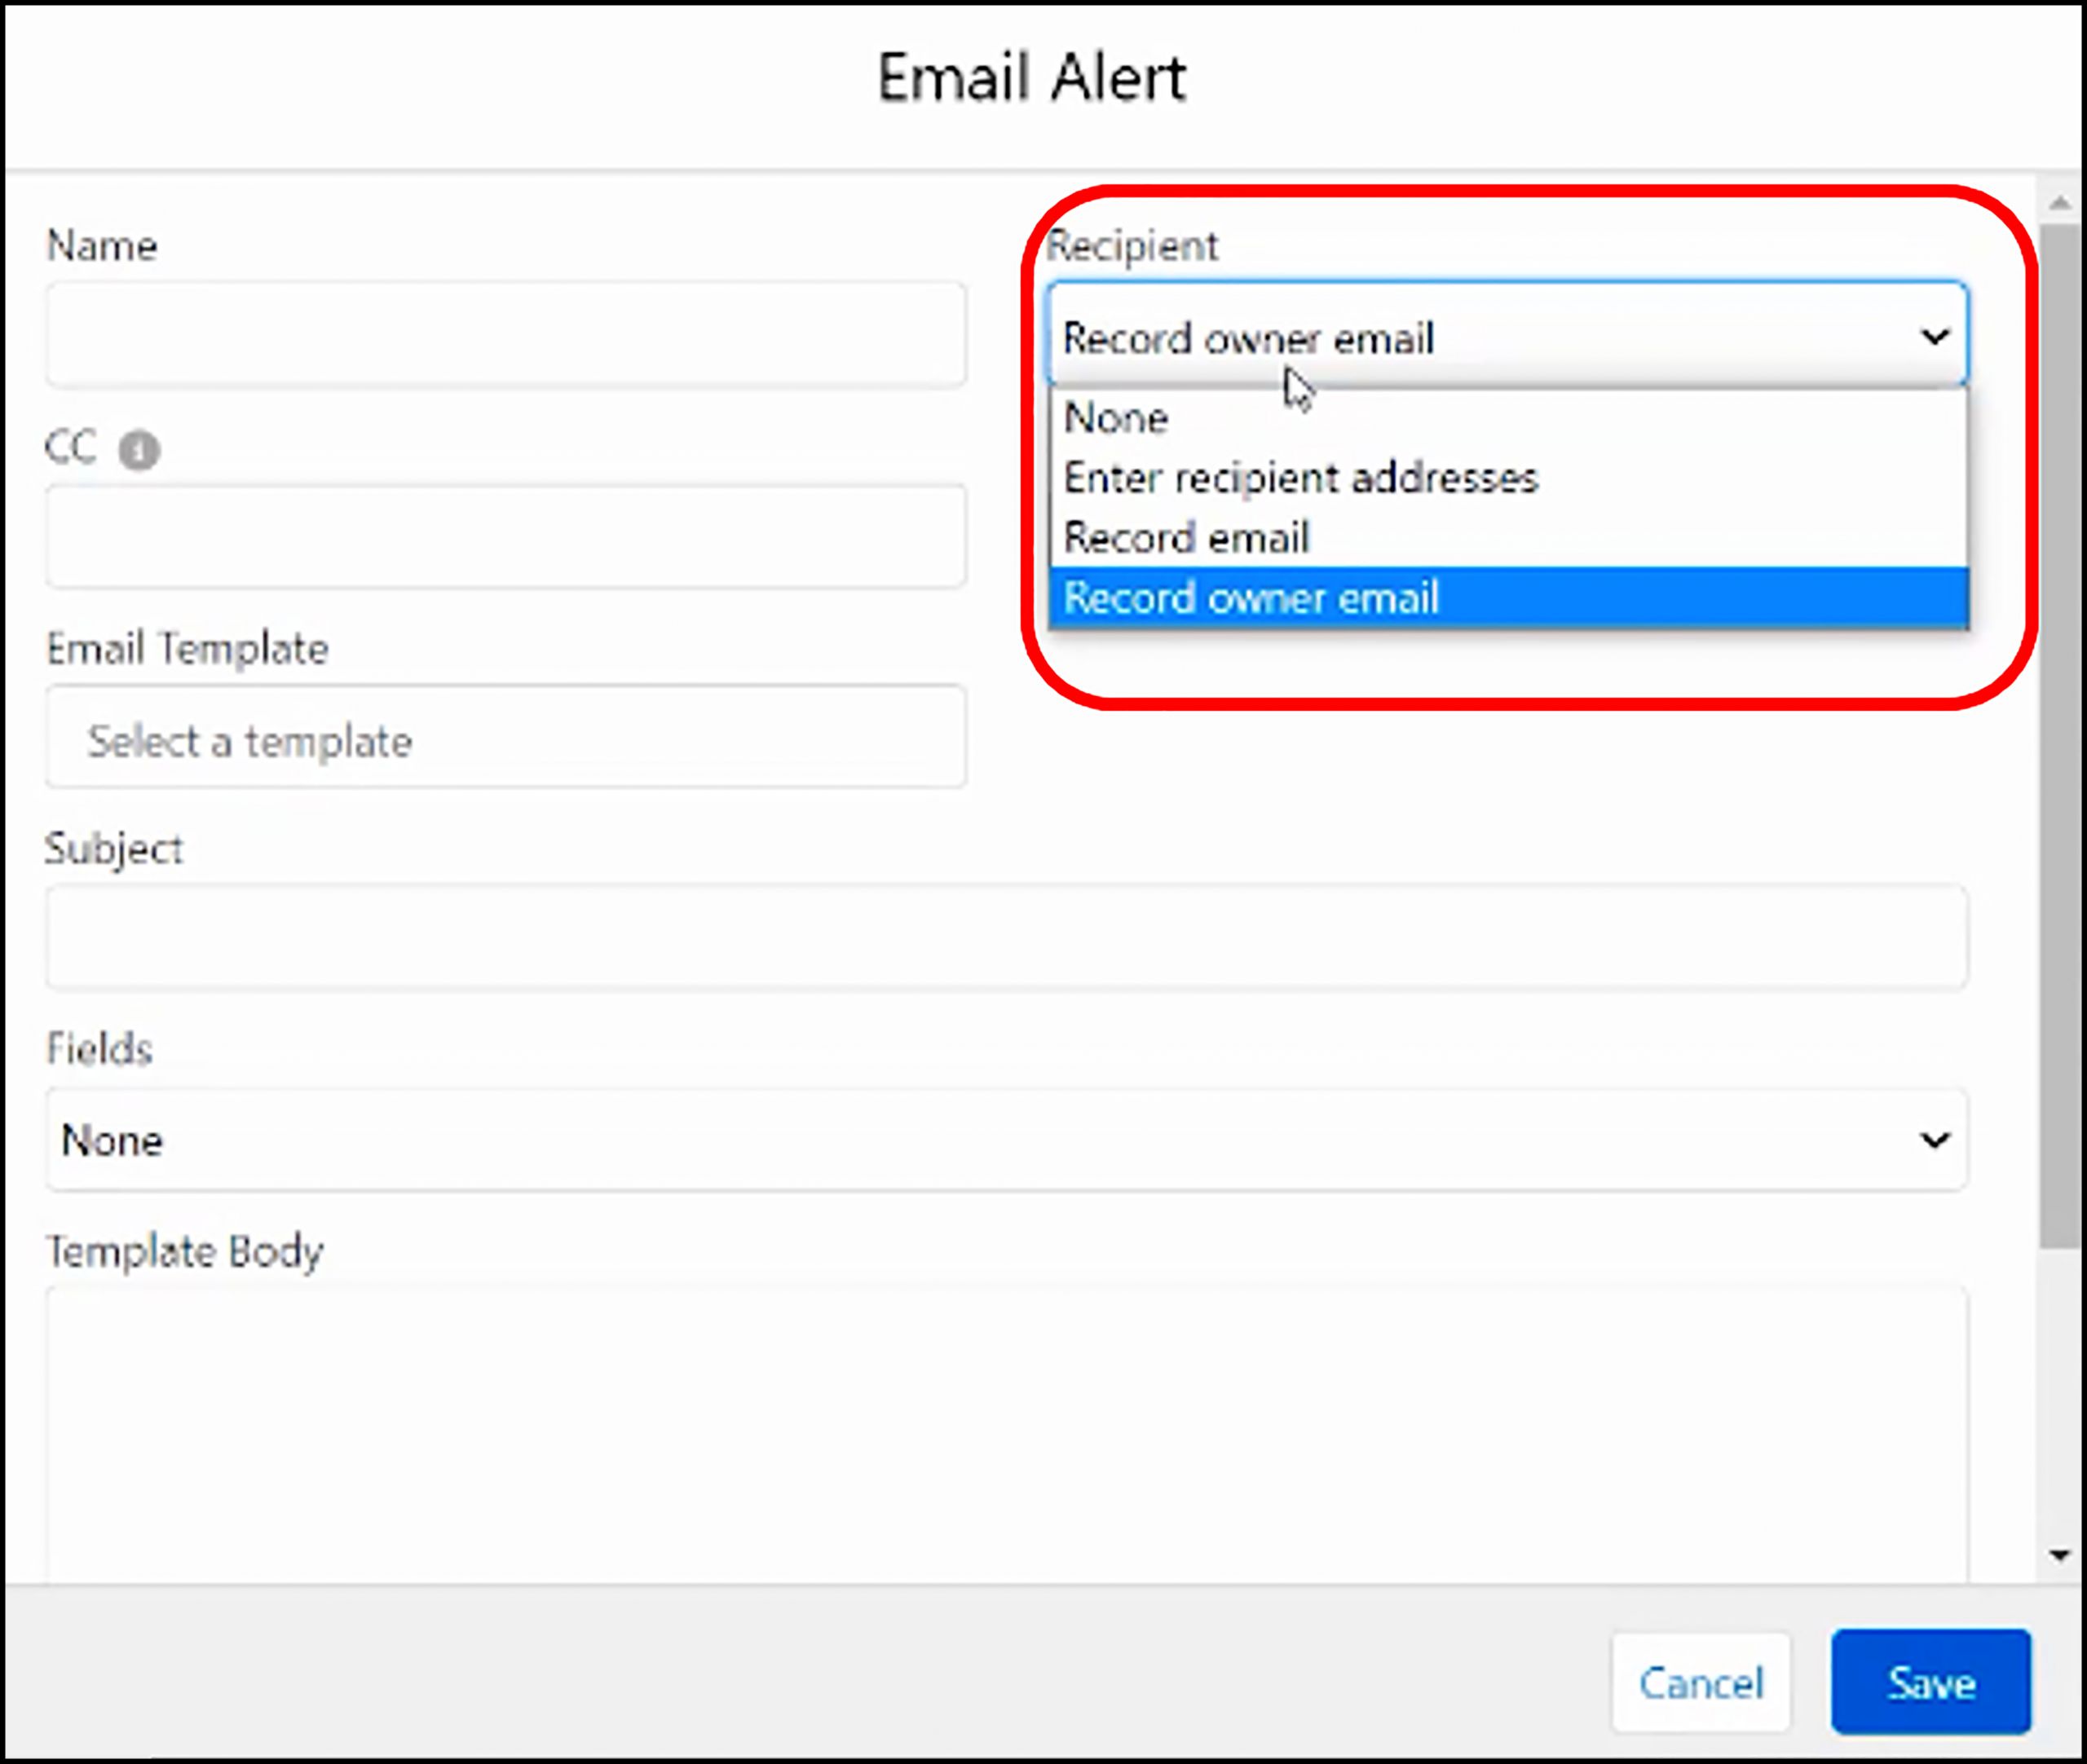
Email Alert page
13.1.2.2.1.3. Create Task
Using Create Task option, users can add the next task they want to perform based on the incoming response. It could be making a call, sending a letter, quote, or any other. Also, users can add a due date to receive a reminder and perform the defined task before or on the due date.
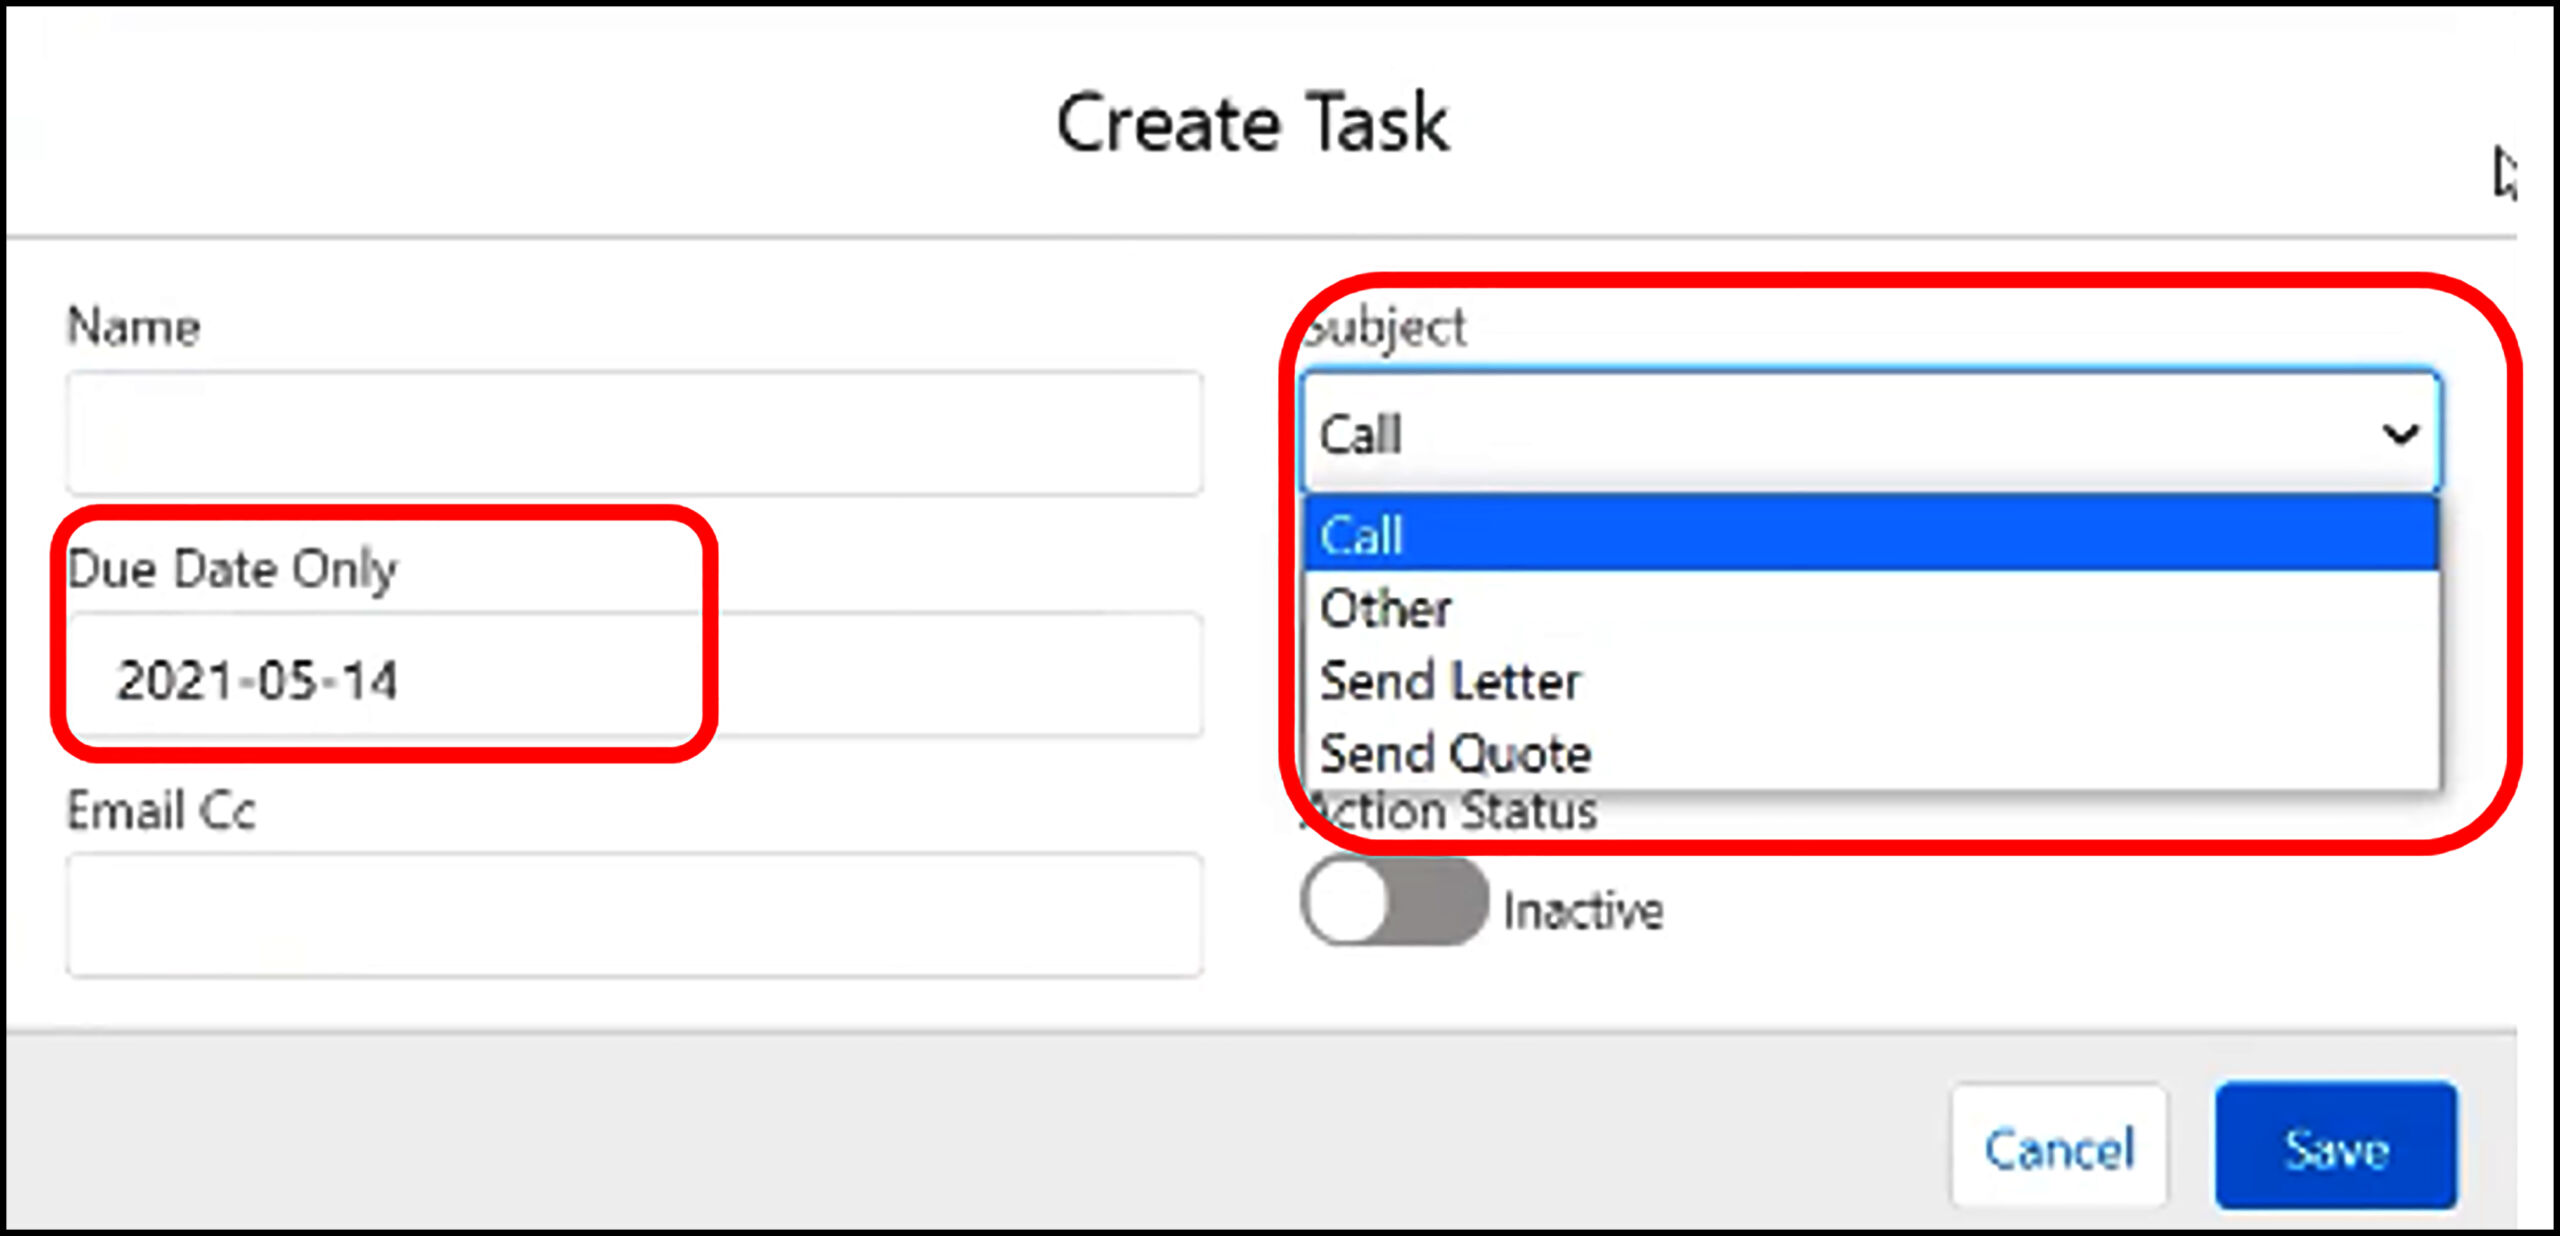
Create Task page
13.1.2.2.1.4. Add to Campaign
Using Add to Campaign action, a user can only add a contact or lead record in the ongoing campaign.
13.1.2.2.1.5. Update Field Value
Update Field Value action allows users to update any field value of the Salesforce object on which a Survey has been created.
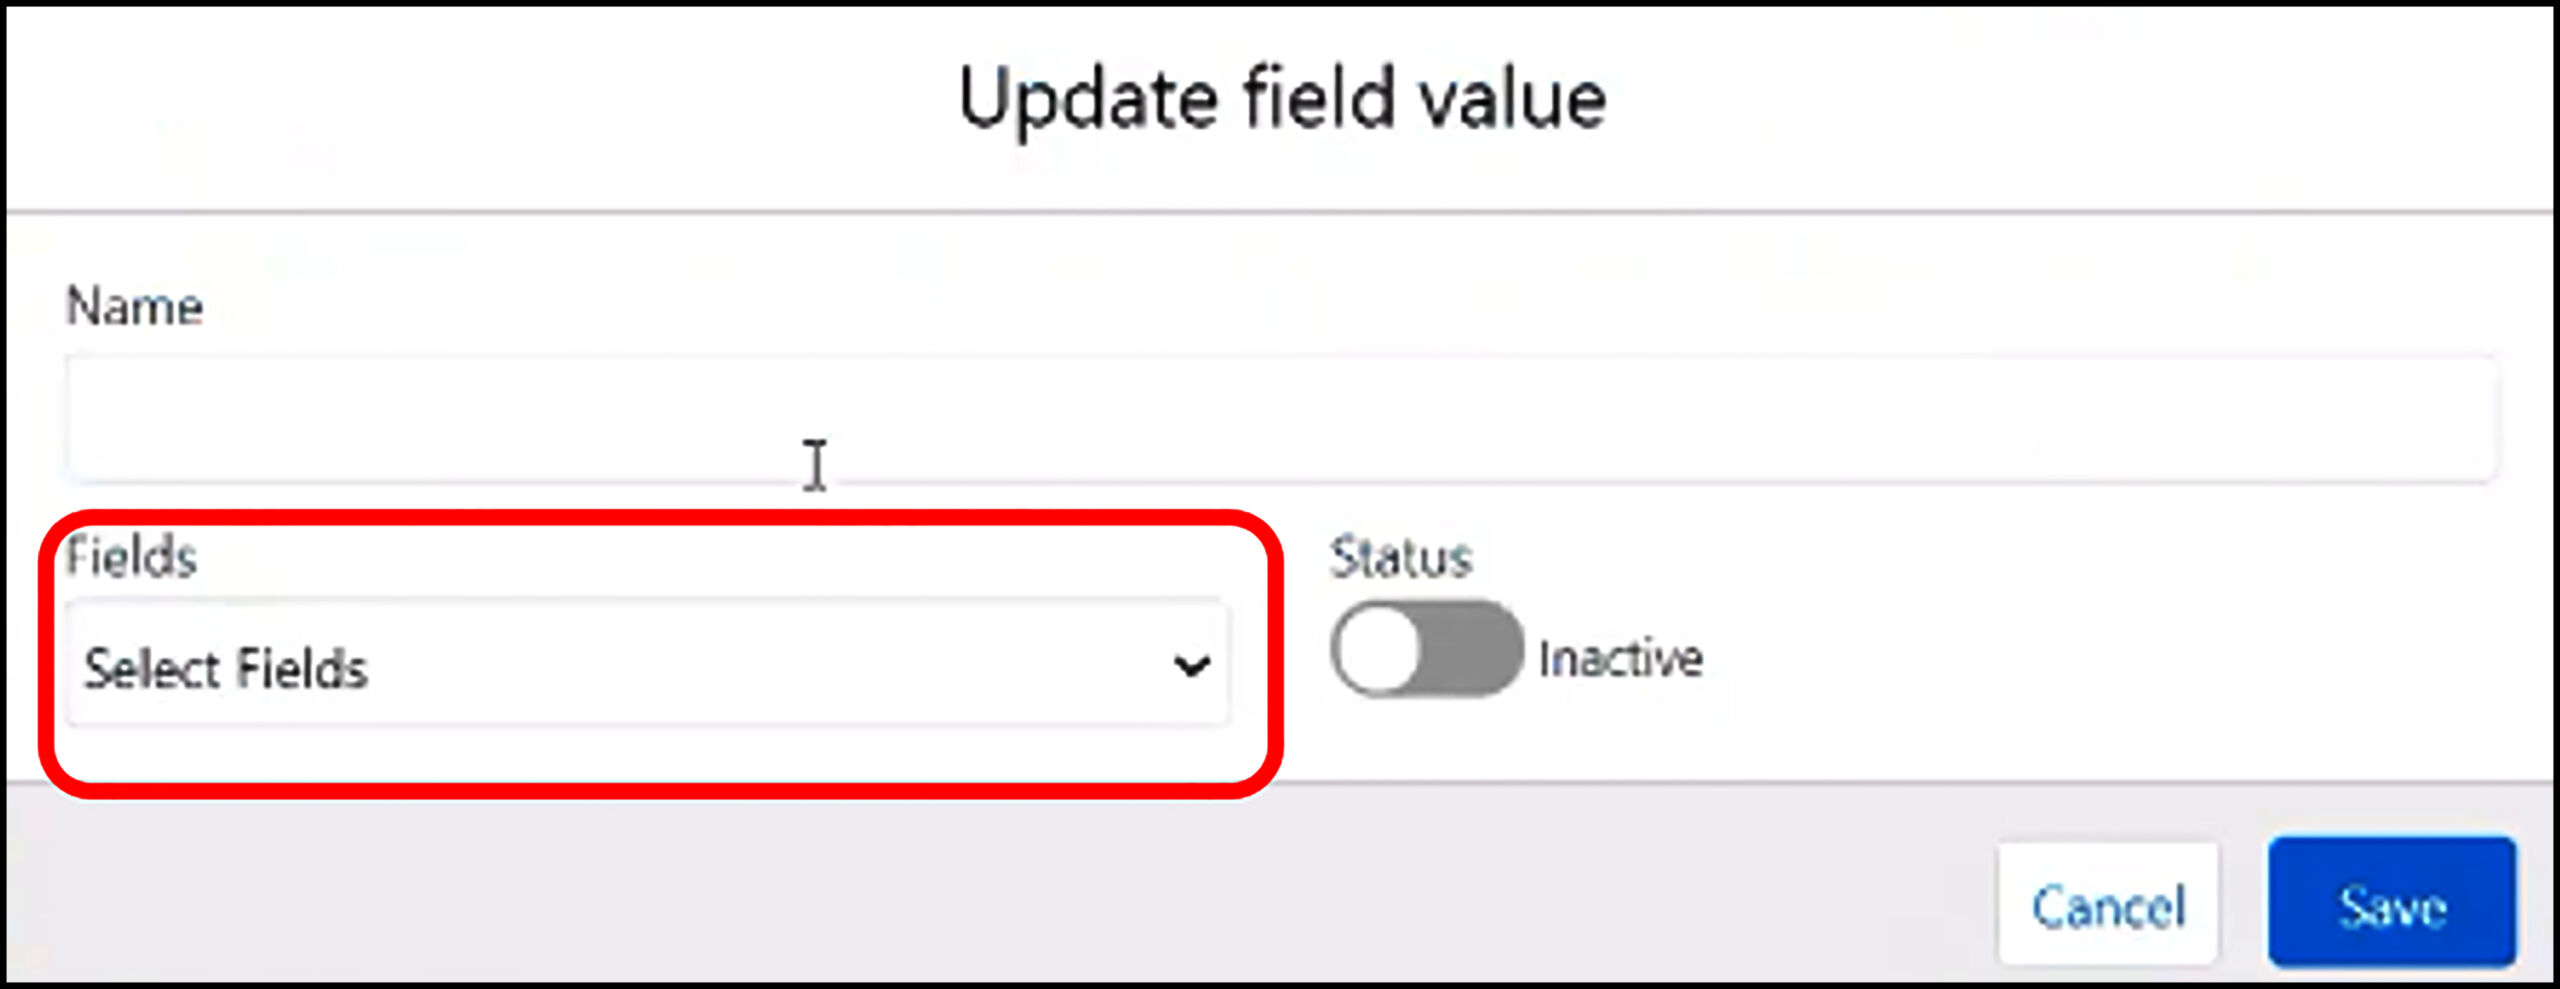
Select Fields dropdown
In the Select Field dropdown, users can view all the available fields of the Salesforce object on which a Survey has been made (as shown below) and select a specific field to update it.
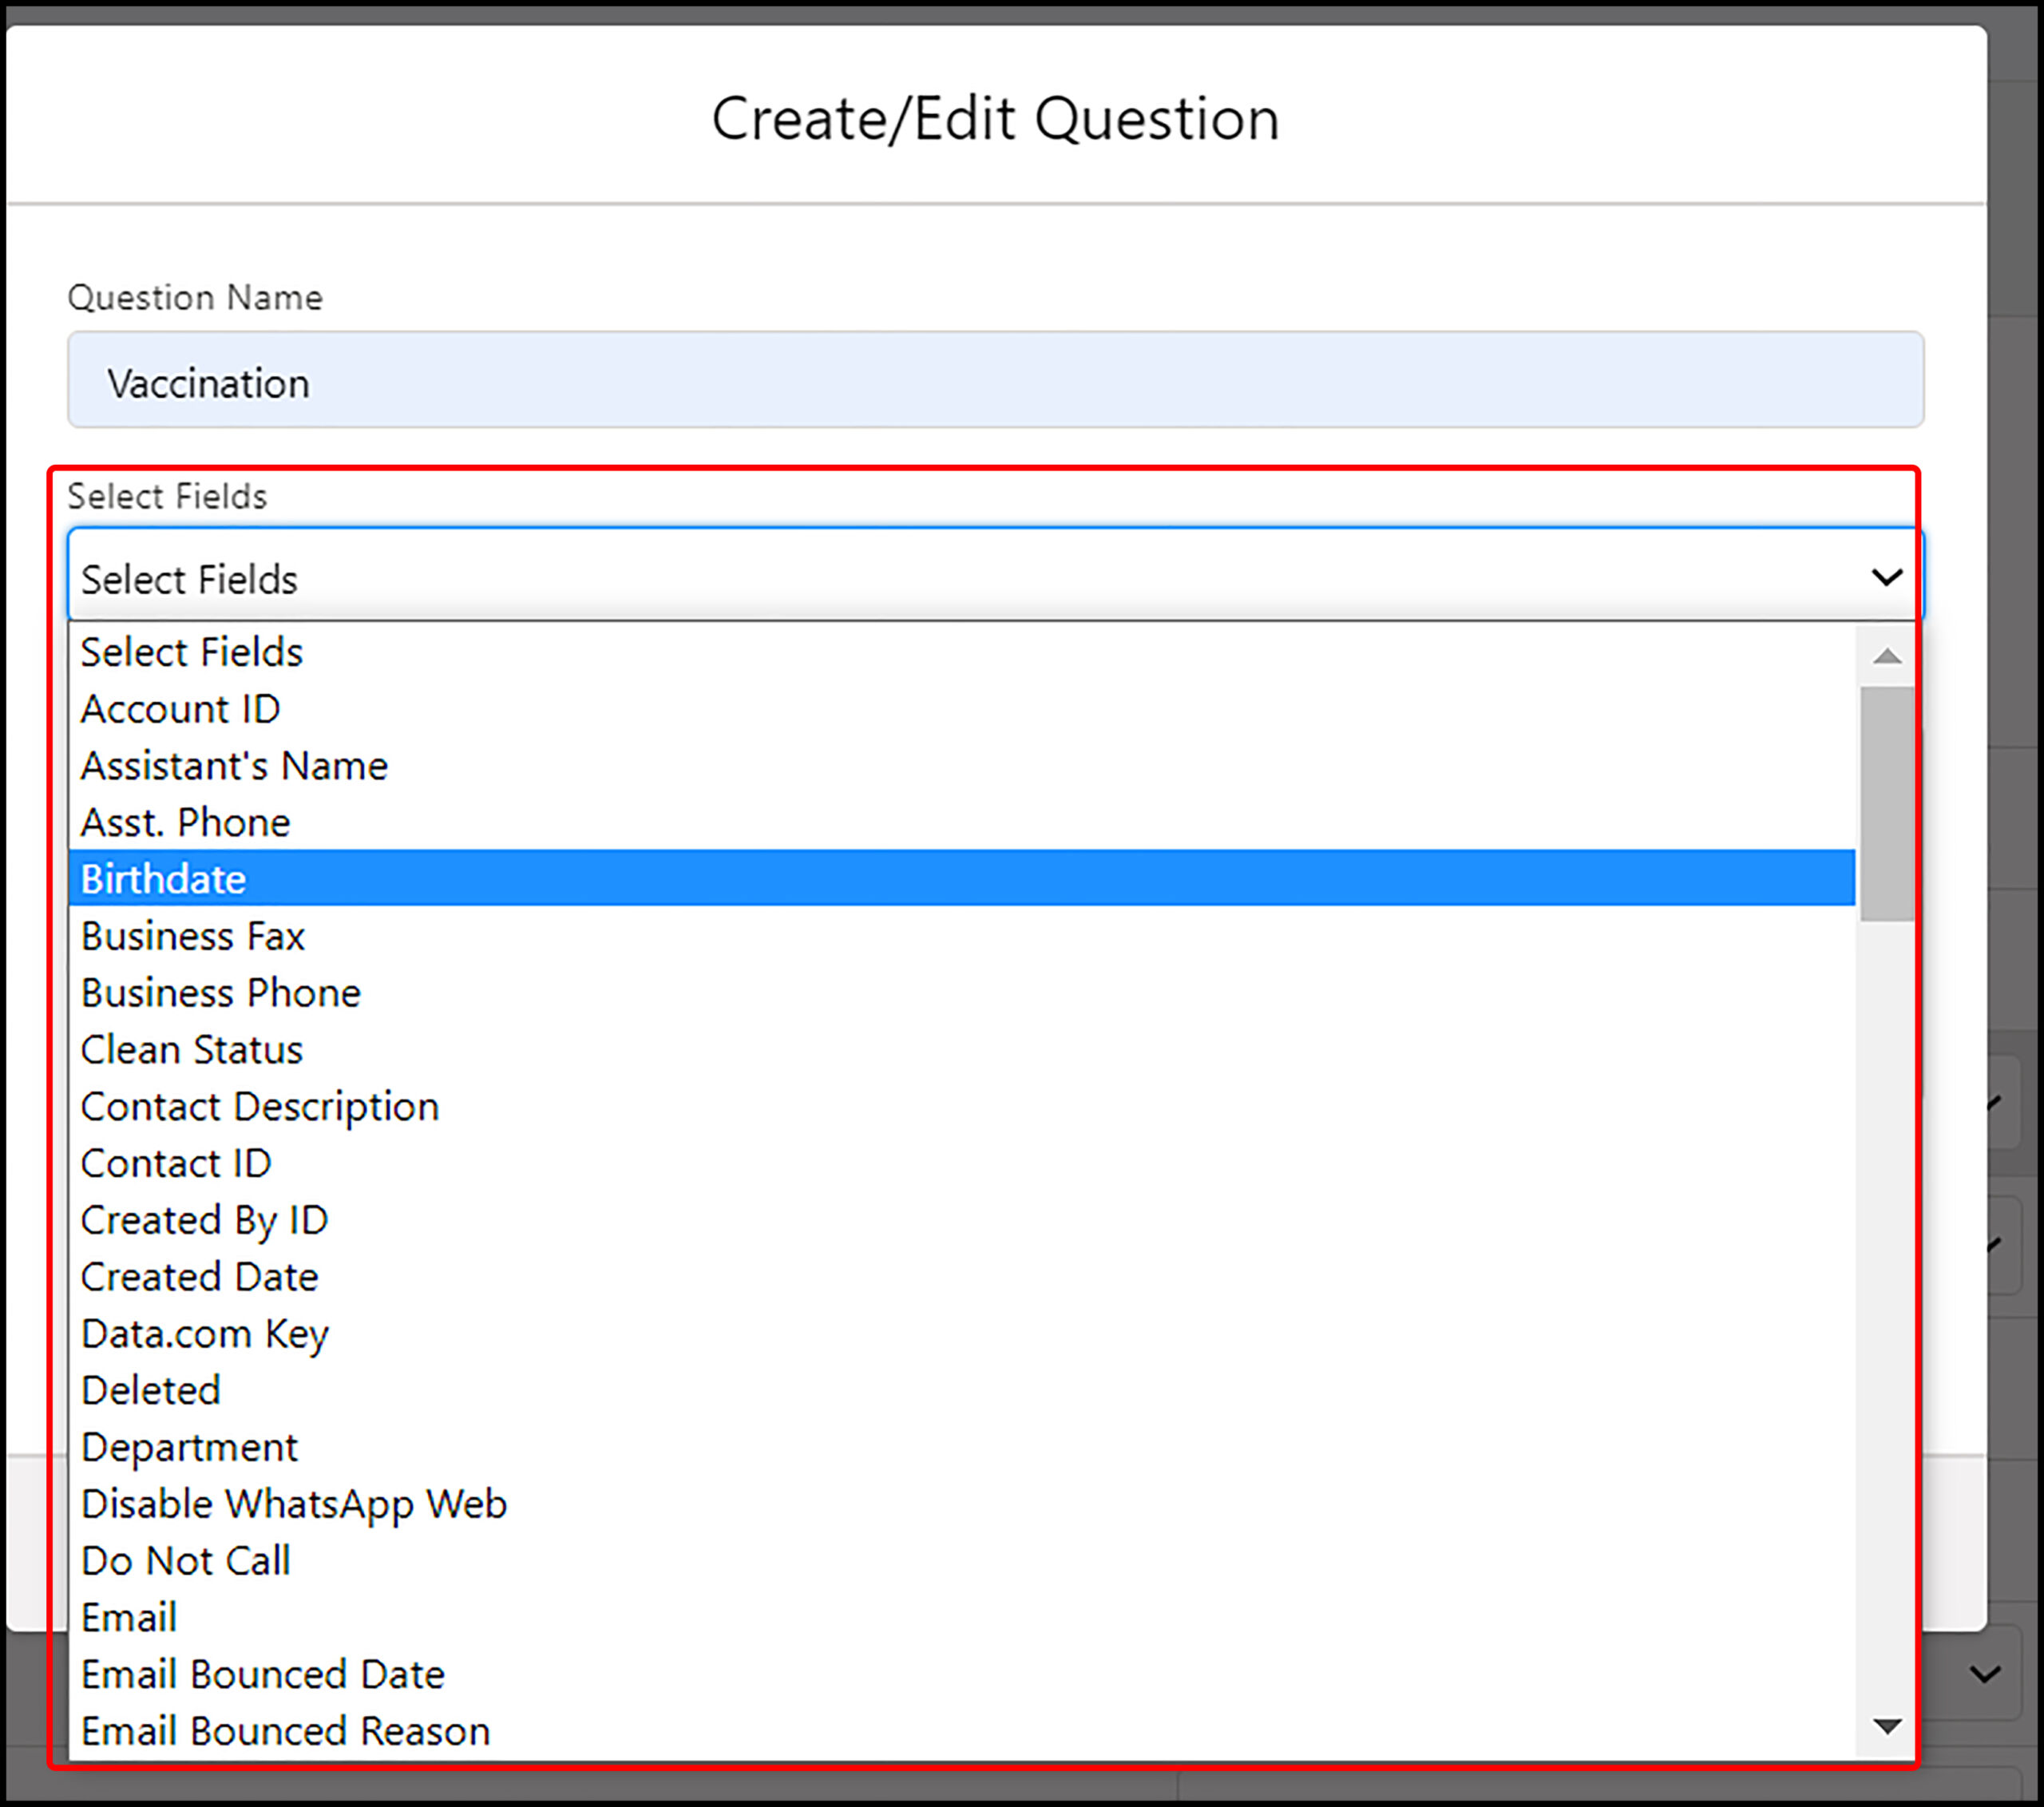
Available Fields to update
13.1.2.2.1.6. Survey to Survey
iText also allows users to jump from one Survey to another Survey or Questionnaire by adding the Survey name from the Survey List (as shown below).
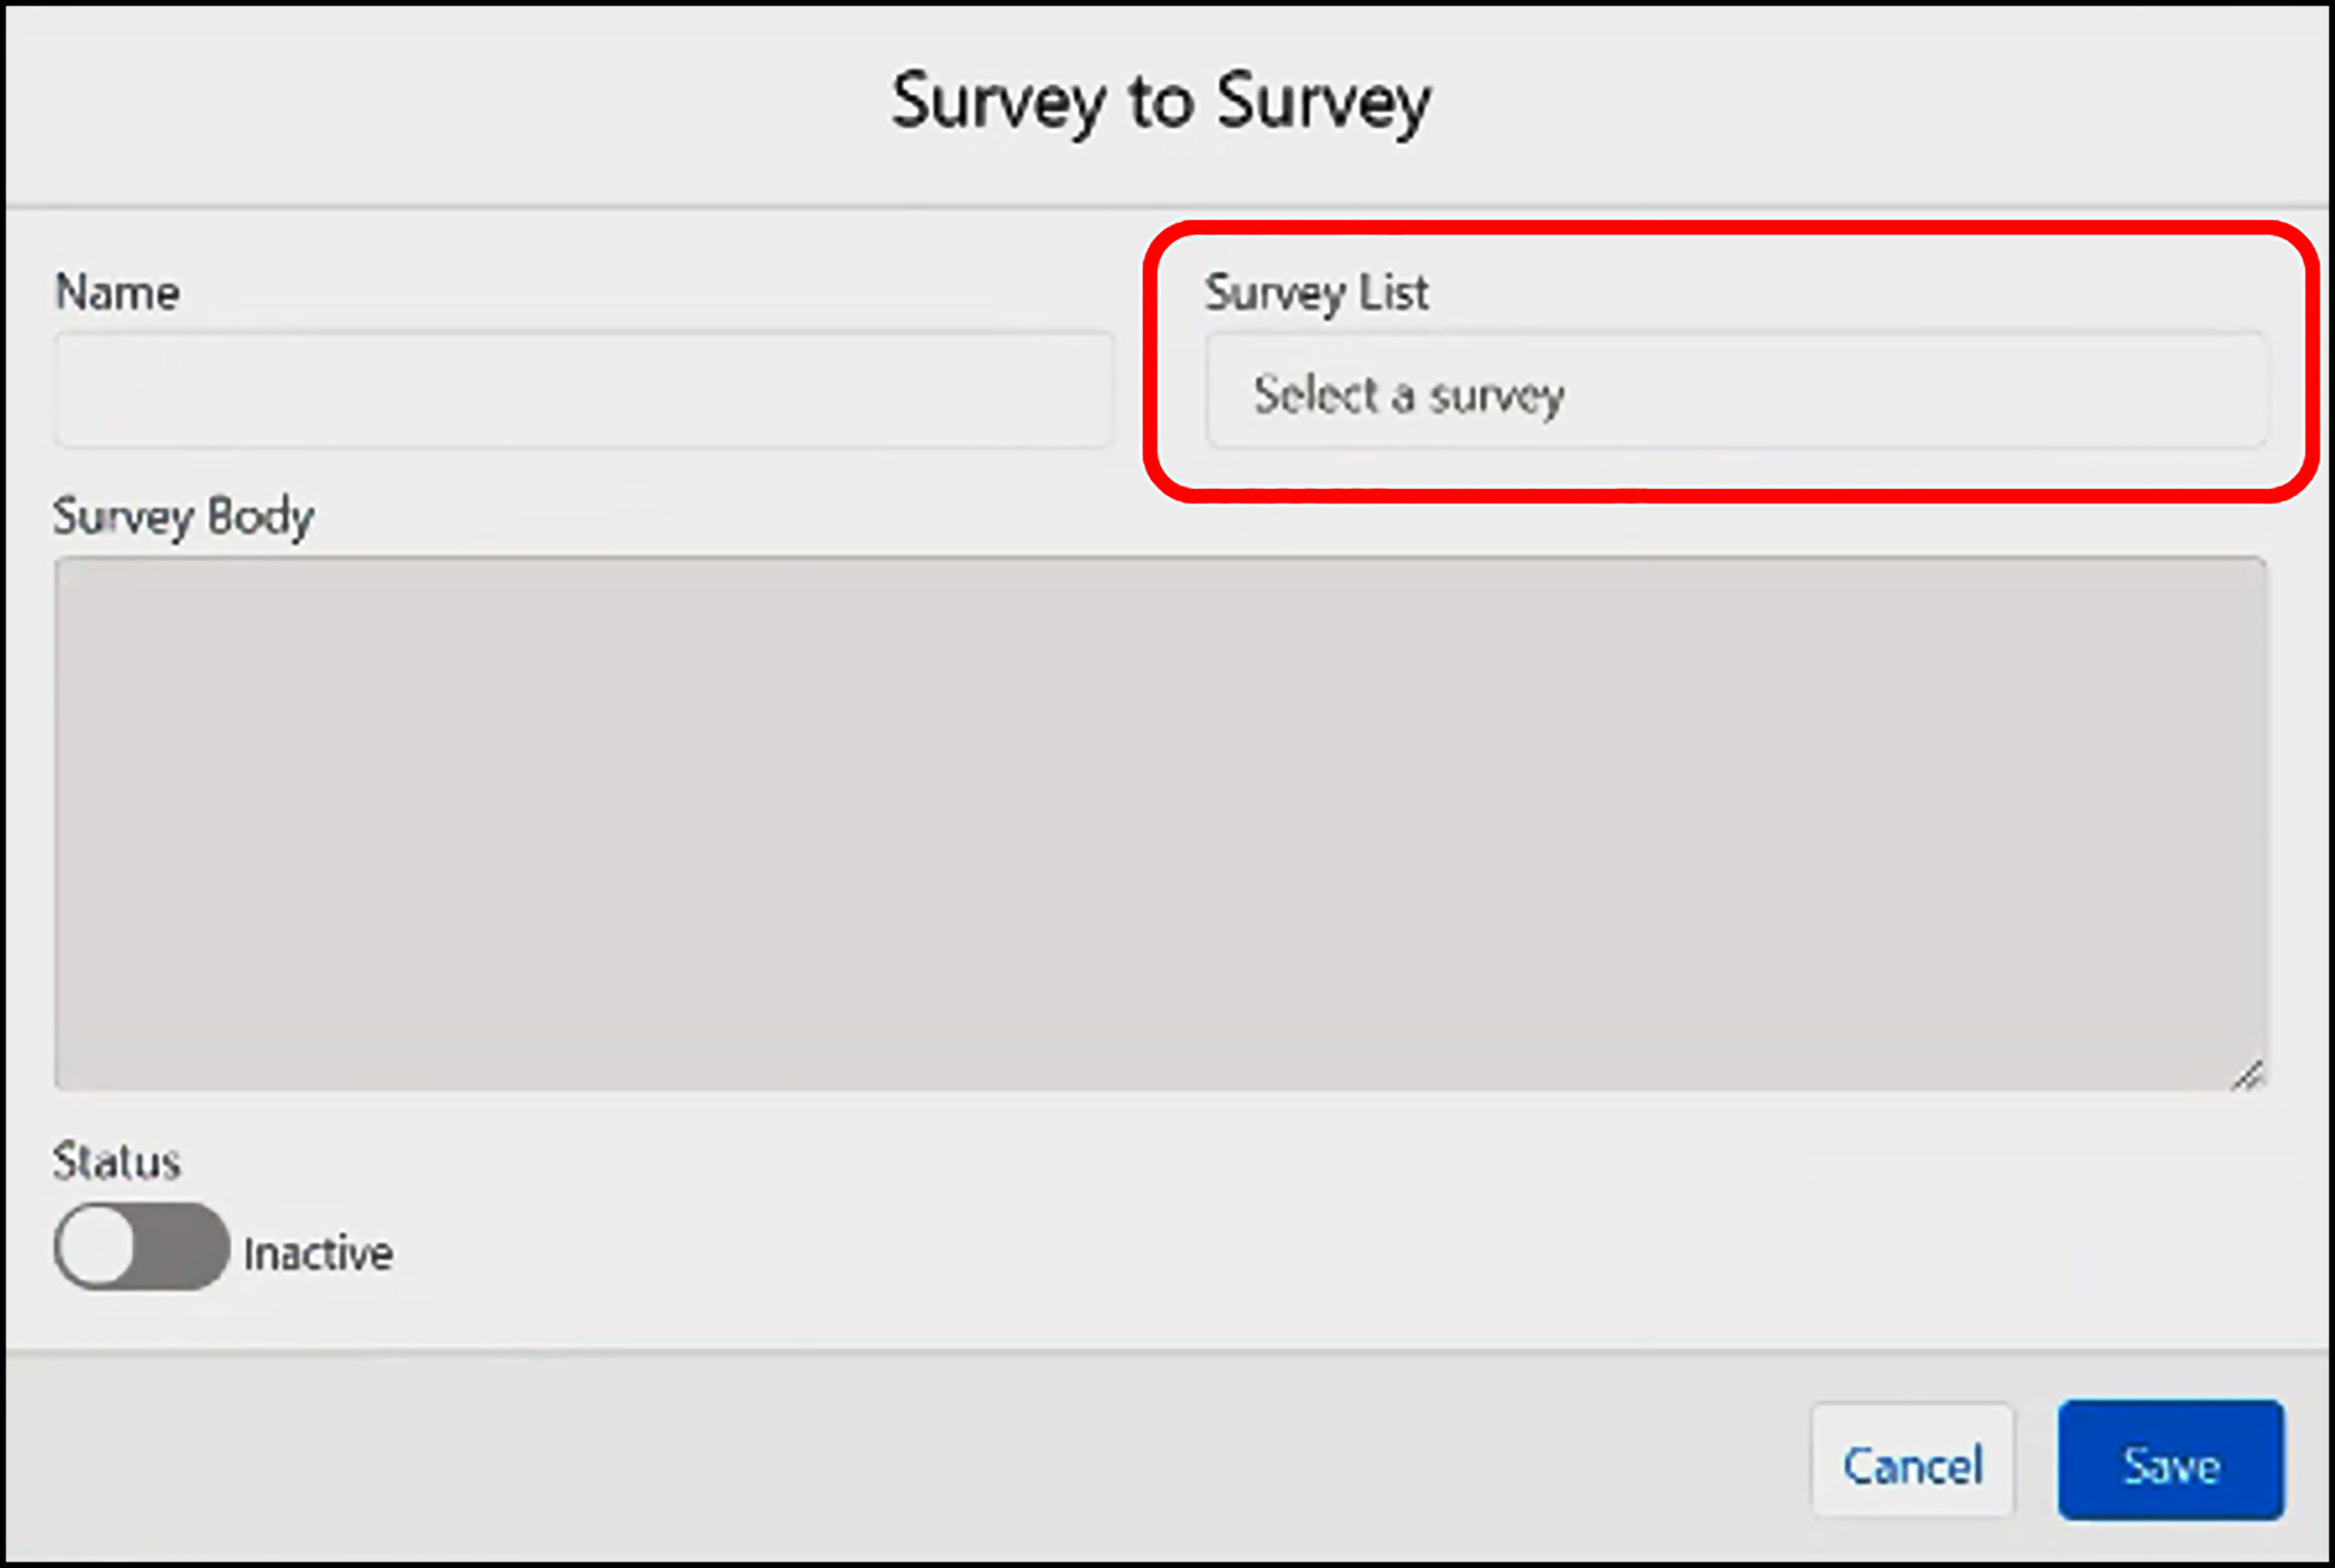
Survey List tab
13.1.3. Jumping to iText while texting
No matter whether users are sending a single message or messages in bulk, they can add the name of the Survey or iText they want to trigger while creating a text message.
Users can click an iText checkbox and select the iText name from the list.
Users would notice an iText checkbox (as shown below) and iText input bar the moment users click the iText Checkbox (also shown below) on every Create Message page except while sending bulk SMS from Campaign to trigger iText while running or sending:
- Bulk SMS from List Views
- Bulk SMS from Reports
- Bulk SMS from Conversation Manager
- Drip Campaigns
(Users can trigger iText while running an SMS drip Campaign too by clicking the iText checkbox and adding iText name they want to trigger)
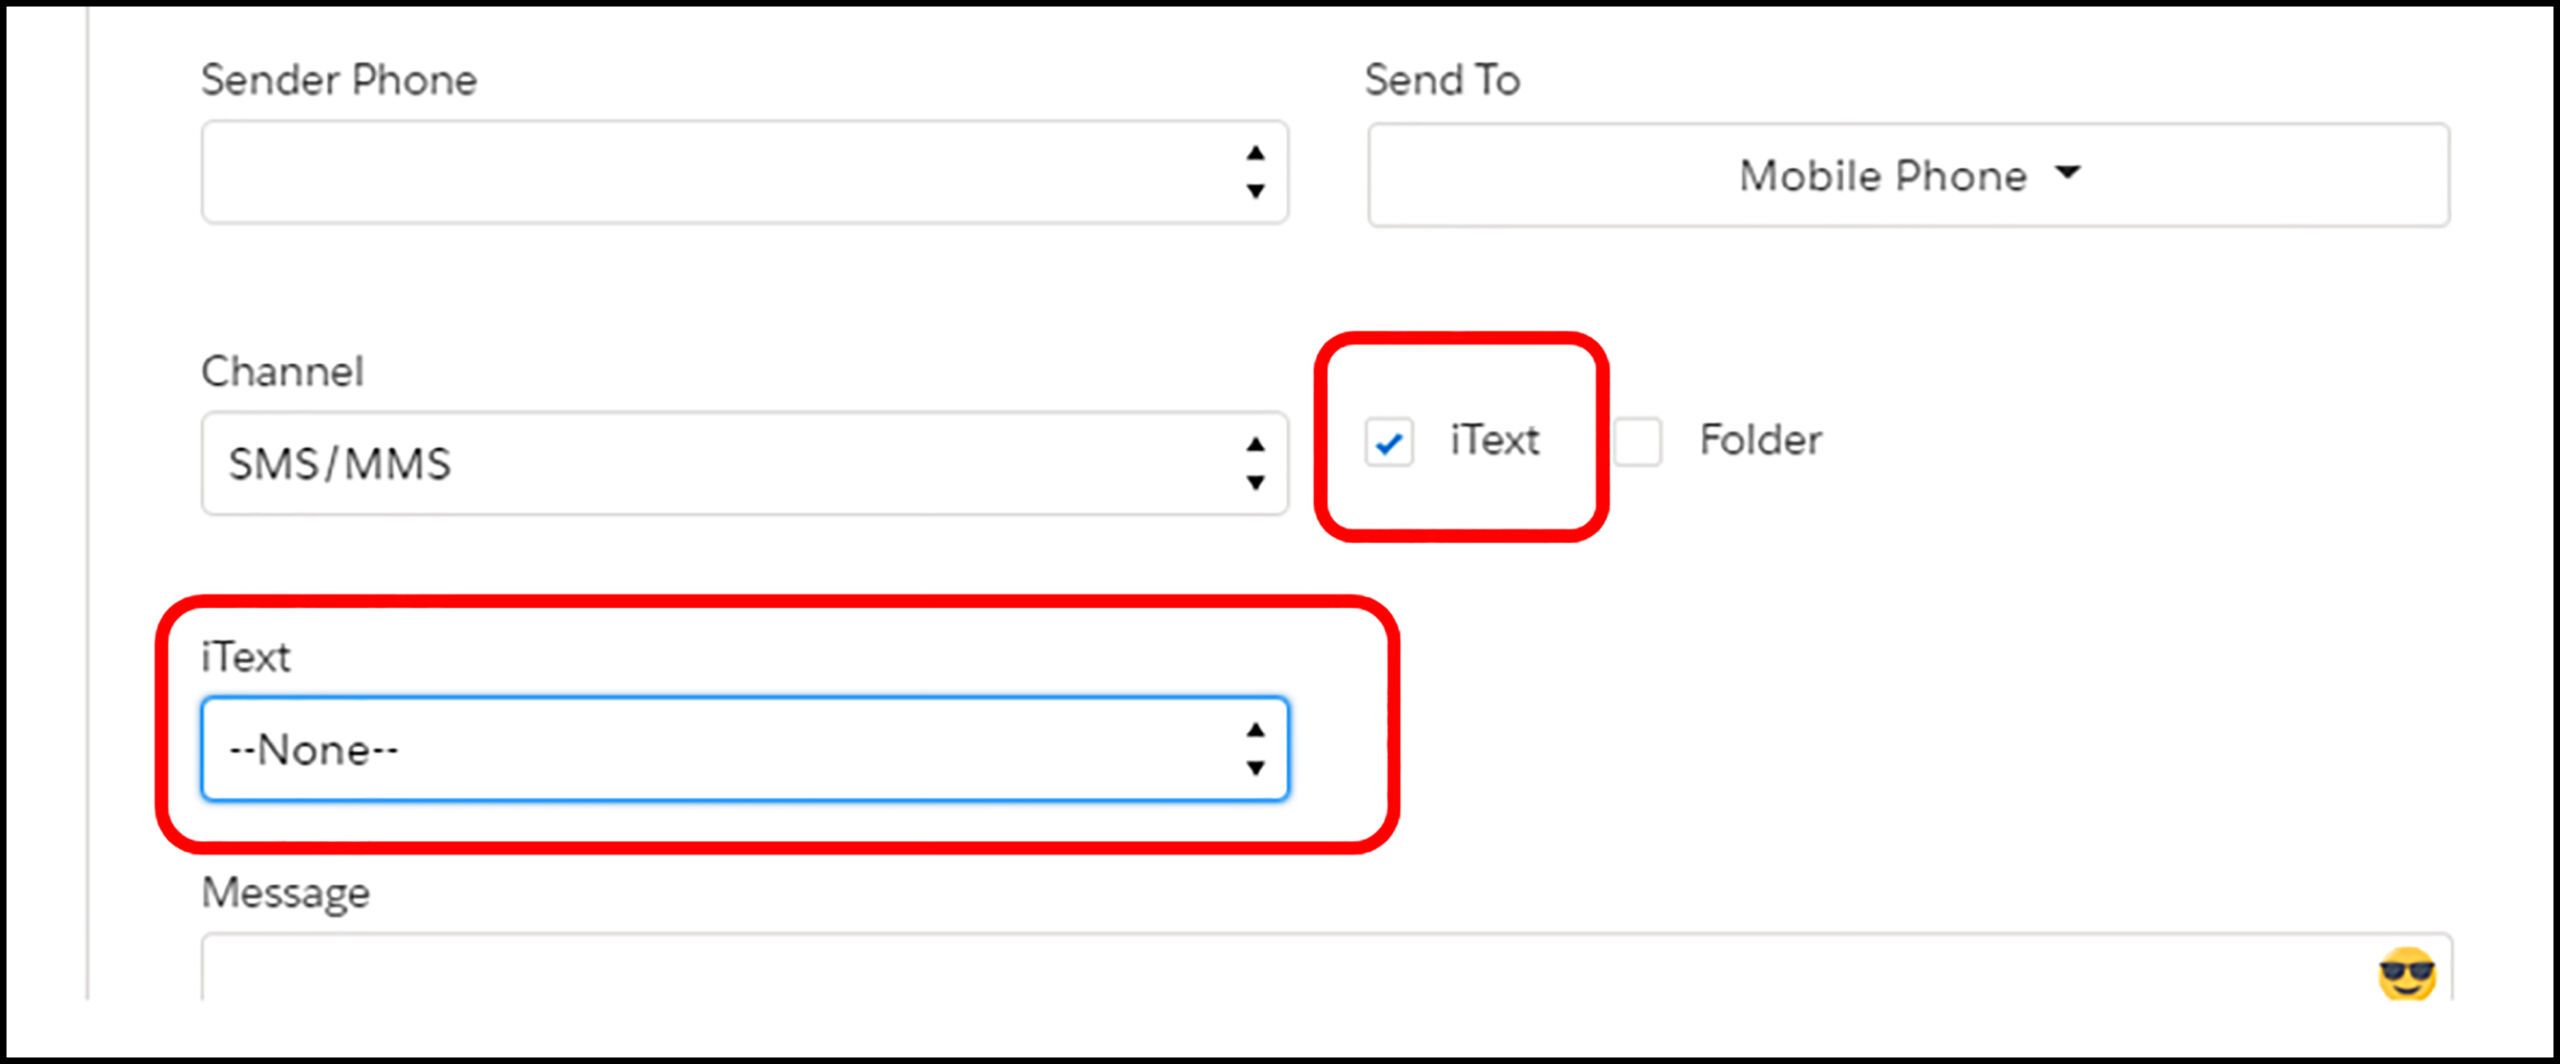
iText checkbox and input bar to add iText name

List of iTexts or Surveys
Capture Data, Qualify Leads, and Render Support with No-code Automation and Dynamic Conversation Trees
iText in 360 SMS allows users to design Surveys on their own and capture any type of data to make informed decisions, automate the lead qualification process, So, users can easily cut back on their dependency on expert and business investments to run each Survey. In addition, users can configure dynamic chatbots to redefine their support services and provide 24*7 support without an additional workforce.


